Tiny beads are basically glitter with an attitude—so if you don’t give them a system, they’ll take over every surface. In my small apartments, I’ve learned that the best DIY bead storage keeps everything visible, sorted, and easy to grab without turning your home into a craft avalanche.
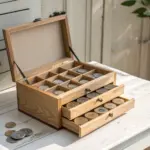
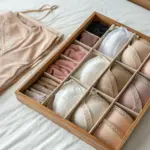
Compartment Box With Color Zones
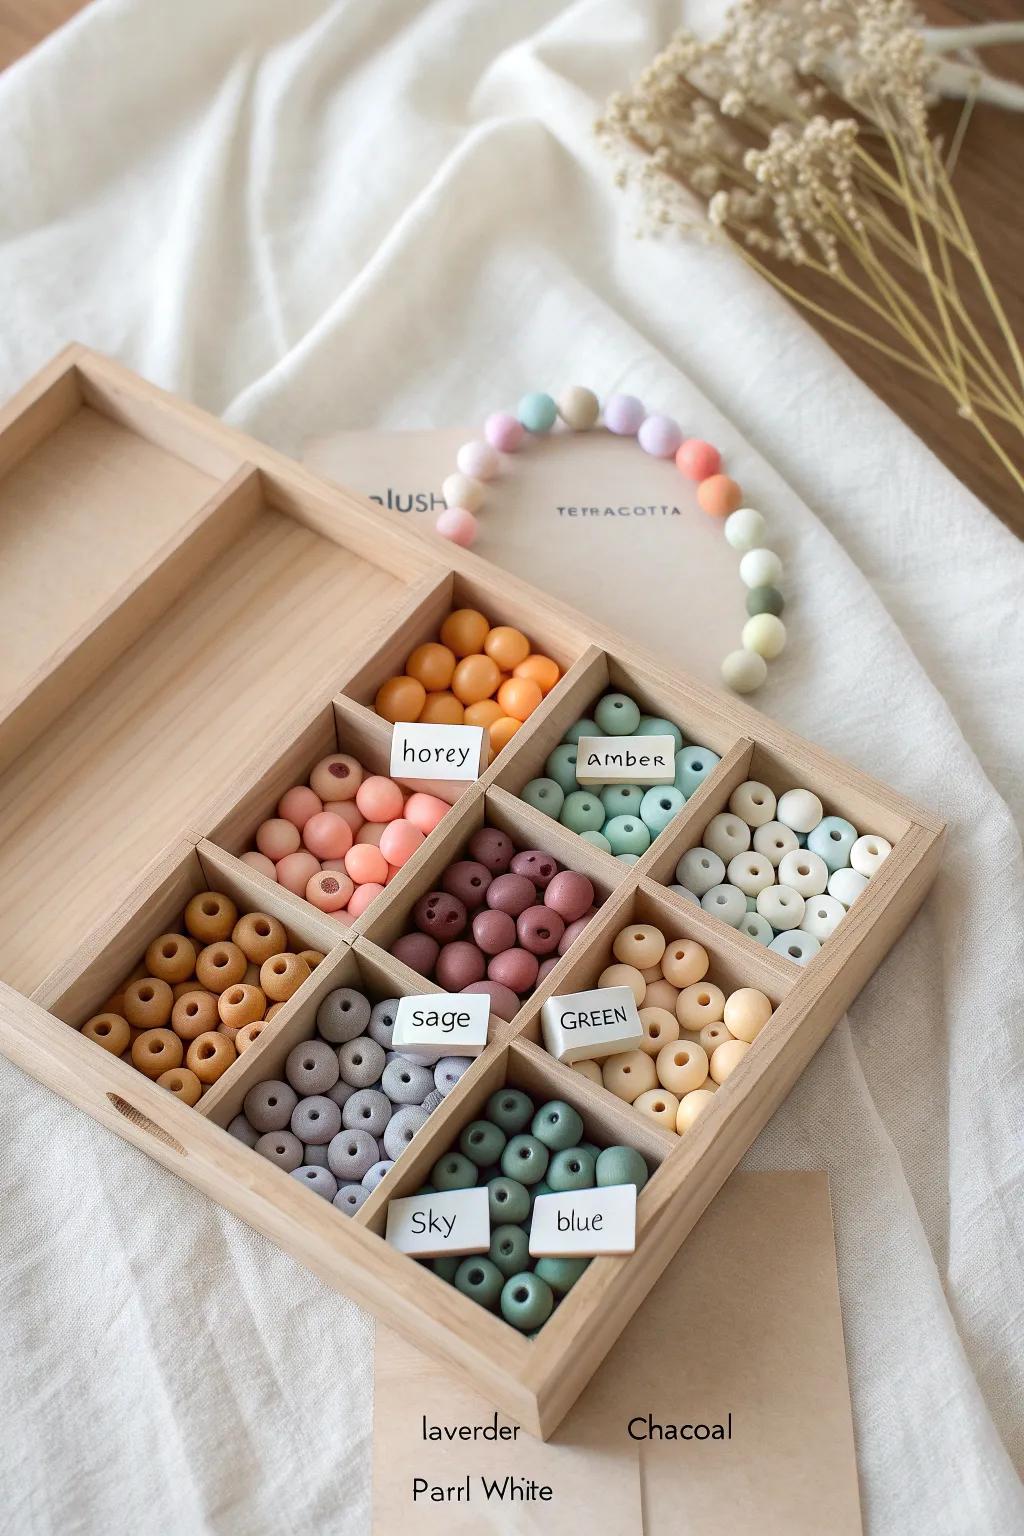
I started with a simple compartment box and grouped beads into “color families,” and it instantly made projects faster. I stick tiny paper labels inside each section so my color coding stays consistent even when I reorganize.
Give these a look:
- Wooden Bead Organizer Box: Keep your different bead colors neatly separated and visible with these sturdy, natural wood compartment organizers.
- Small Cardstock Tags or Labels: Label your color zones easily using these small, durable paper cards that fit perfectly inside compartments.
- Silicone Teething Beads Set: Restock your collection with a variety of soft, colorful silicone beads perfect for baby-safe crafting projects.
Labeled Mini Tubes in a Shoebox Tray
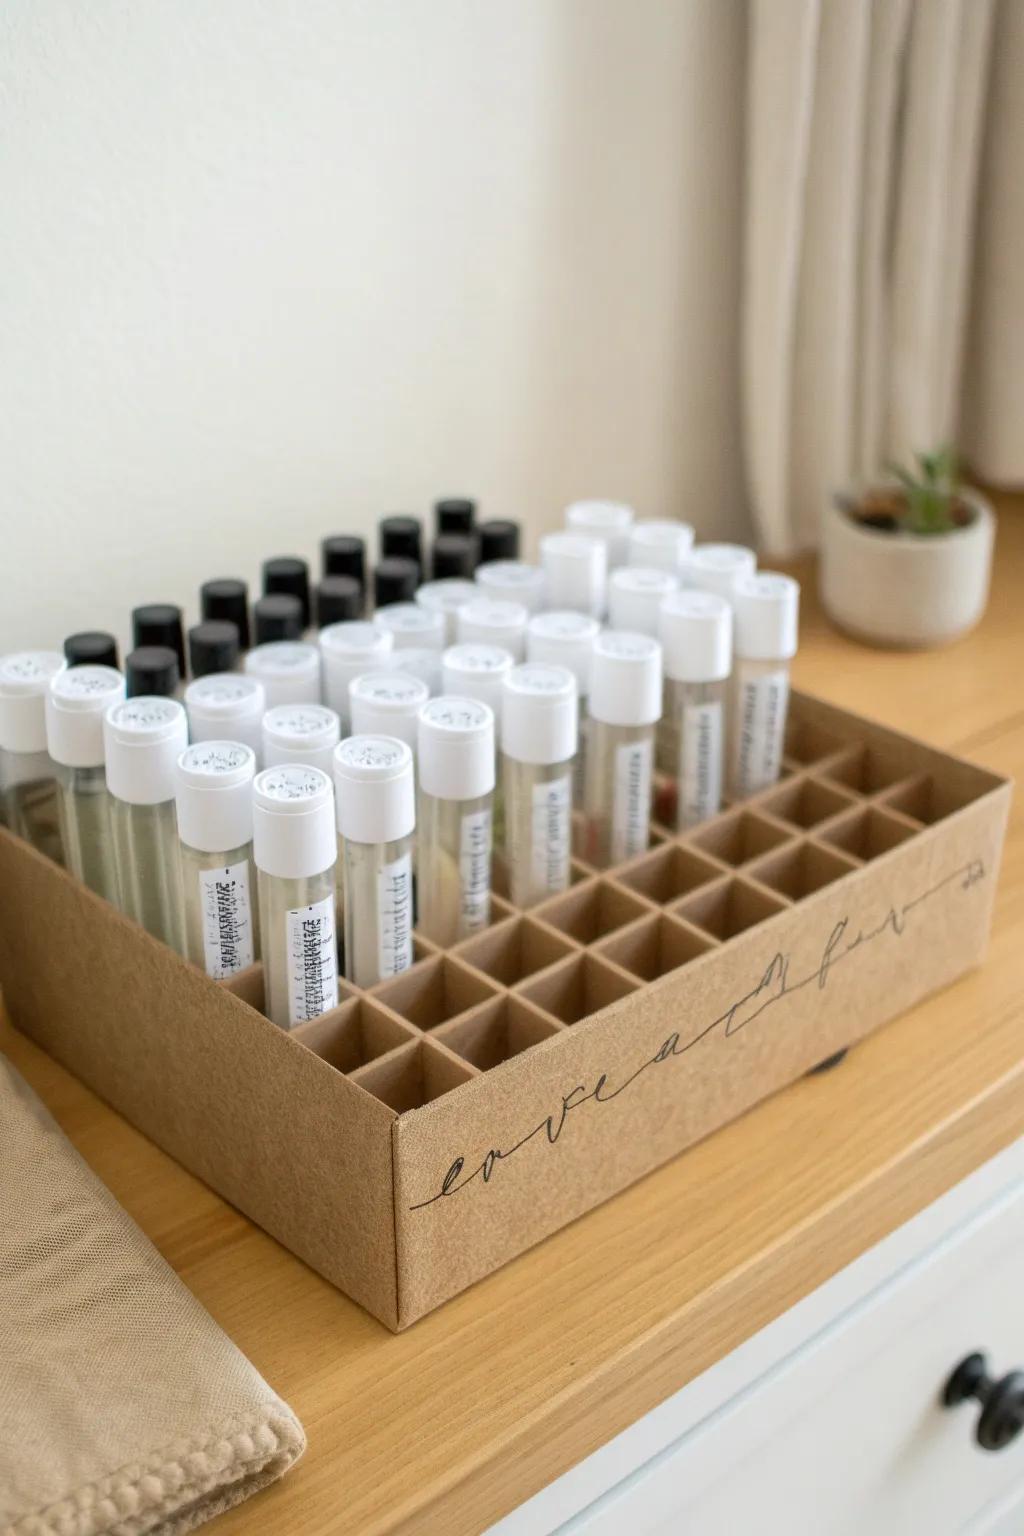
When I was drowning in seed beads, I switched to bead tubes and stood them upright in a DIY cardboard divider tray. I label the caps and the sides so I can spot what I need even when the tray is tucked on a high shelf.
Check if these fit your needs:
- Clear Plastic Test Tubes: Store your tiny seed beads in clear tubes to easily see colors at a glance while crafting.
- Cardboard Grid Organizer Box: Keep those tubes standing upright and organized with a sturdy cardboard storage box featuring grid dividers.
- Small Round Label Stickers: Label the caps of your tubes quickly to identify bead sizes or codes without lifting them out.
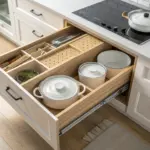
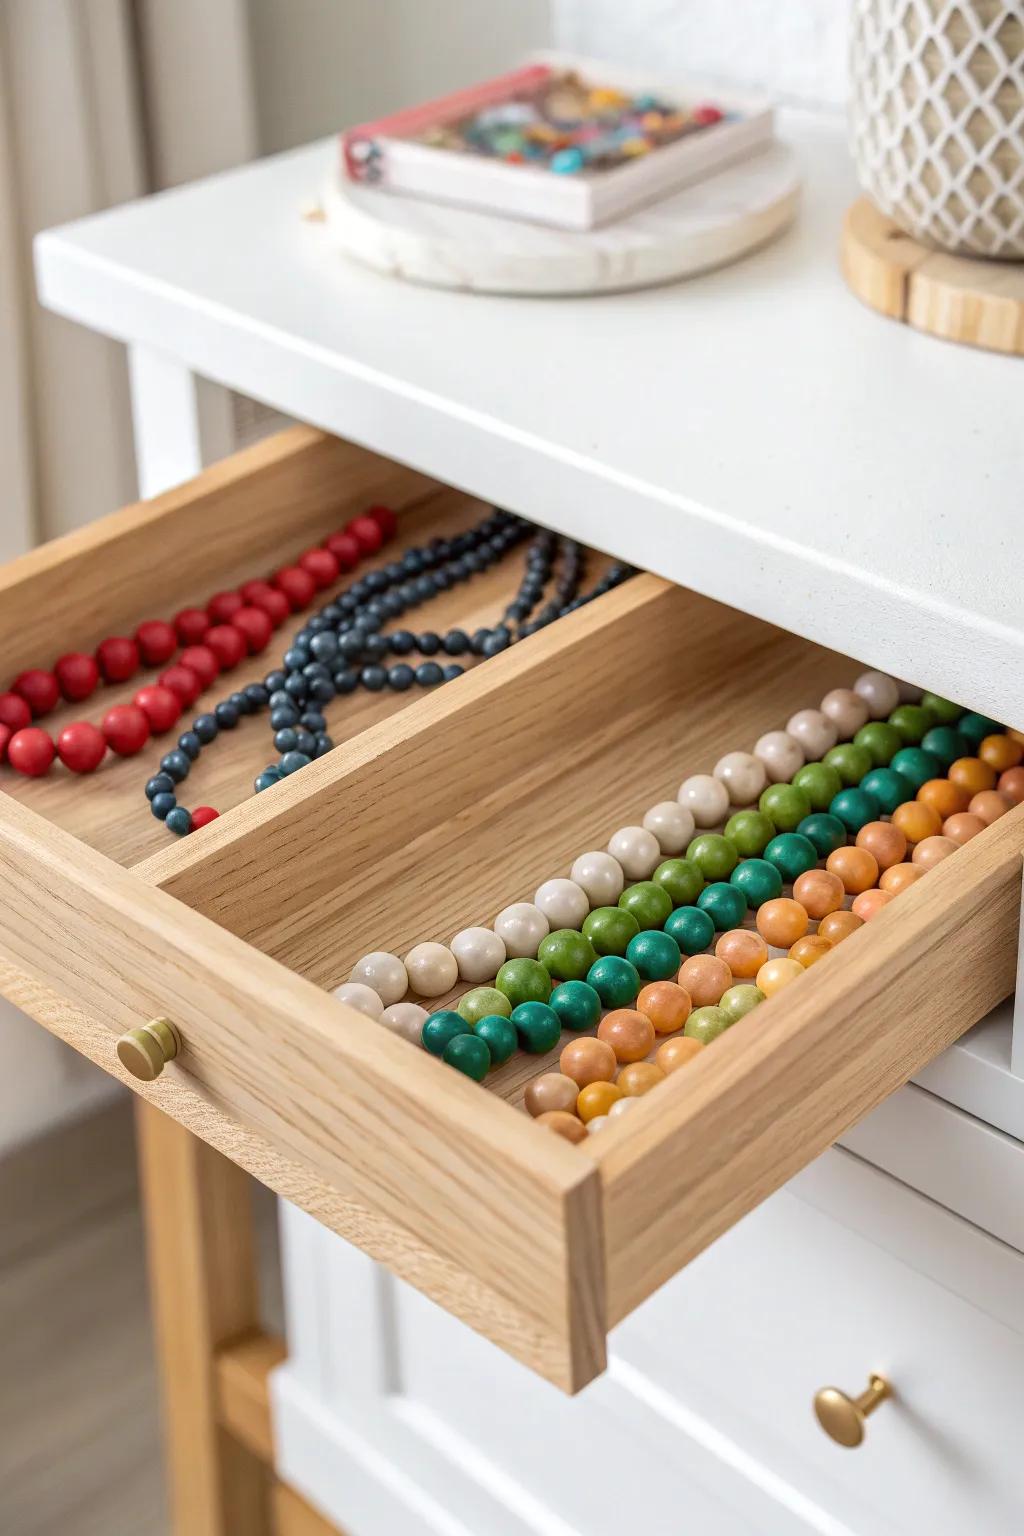
Drawer Inserts Made From Foam Board
In my desk drawer, I built drawer inserts with foam board strips so every bead type gets its own lane. It’s super renter-friendly, and I love how the low-profile storage keeps my tabletop clear.
May just do the trick:
- White Foam Core Board: Create custom dividers easily with sturdy foam board sheets that you can cut to fit any drawer size perfectly.
- Self-Adhesive Velvet Fabric: Line your new compartments with soft velvet fabric to protect delicate beads and give your drawer a luxurious finish.
- Precision Craft Knife Set: Ensure clean, professional cuts on your foam board dividers with a sharp, reliable craft knife for precise assembly.

Small Parts Drawer Tower With DIY Labels

I repurposed a mini parts drawer unit and added my own clean labeling system for sizes and finishes. It makes my collection feel like a little bead shop, and I can find a specific shade in seconds.
Some handy options:
- Clear Plastic Hardware Cabinet: Organize your beads visibility with a multi-drawer storage unit perfect for sorting small craft supplies.
- Desktop Label Maker: Create clear, custom adhesive labels for drawer fronts to instantly identify bead sizes and colors.
- Small Glass Storage Jars: Keep loose beads or tools tidy on your workspace using small, clear containers for easy access.
Zip Pouches Sorted Inside One Clear Bin
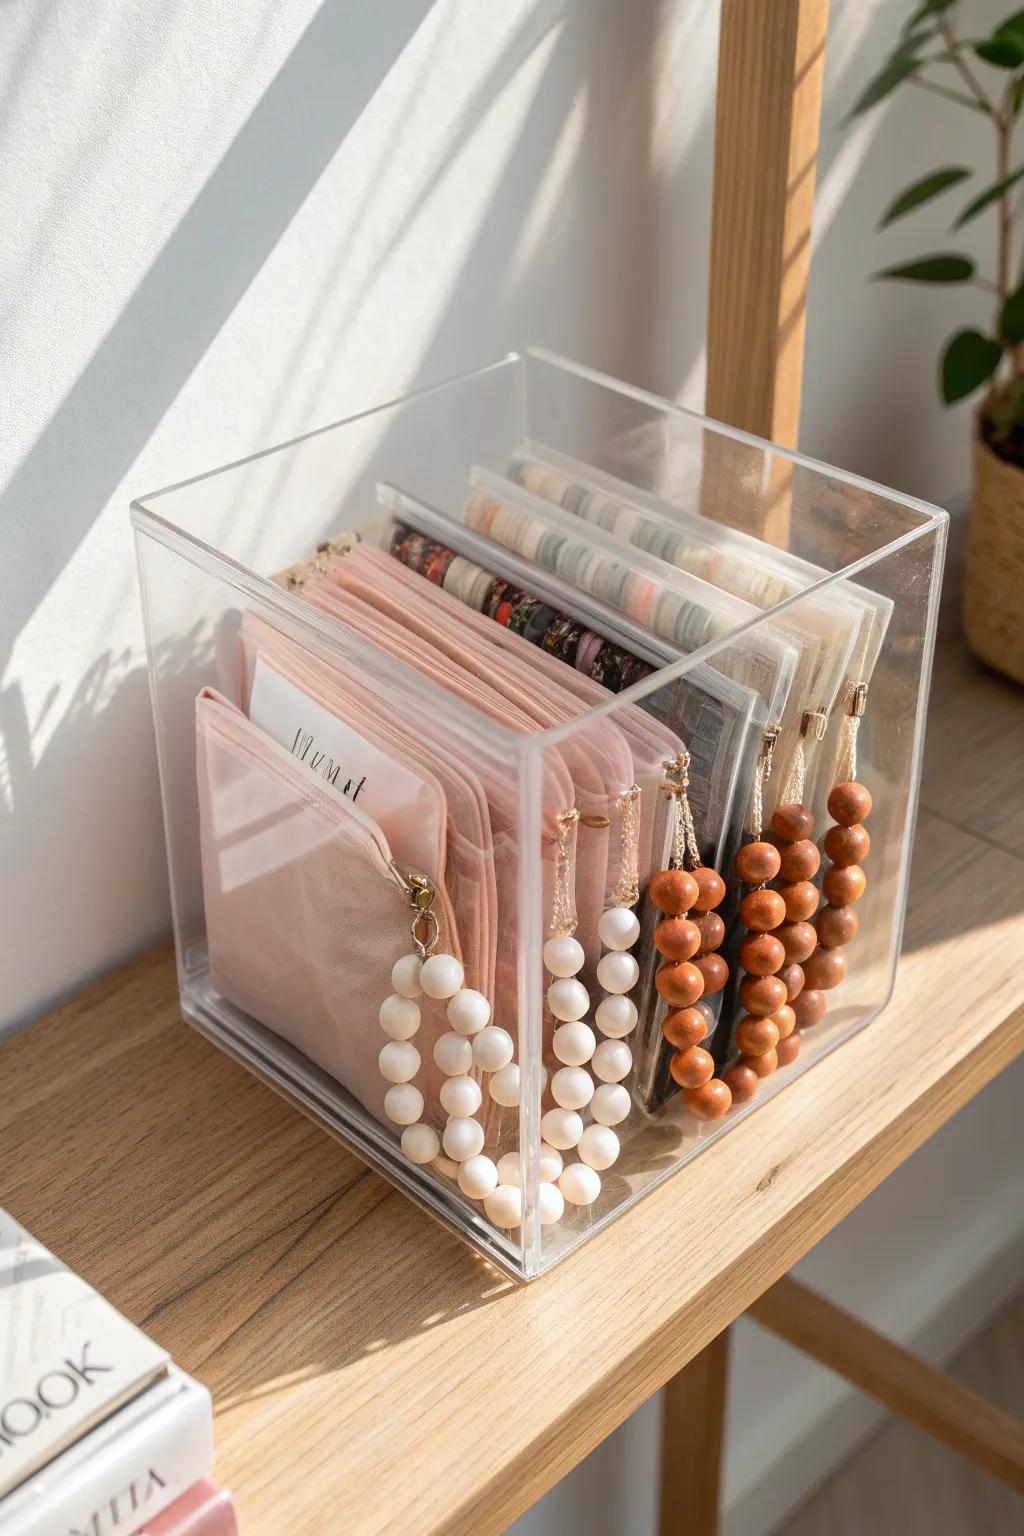
For overflow beads, I use small resealable pouches and file them upright in one clear bin like a tiny folder system. I learned the hard way that this beats loose bag chaos, especially in a closet shelf that’s hard to reach.
Possibly helpful picks:
- Clear Acrylic Storage Bin (Cube): Keep pouches upright and visible with a sturdy clear bin, making organization simple and accessible.
- Zippered Vinyl Pouches: Protect your bead collections in durable, see-through or colored pouches perfect for vertical filing systems.
- Resealable Poly Bags (Small): Sort loose beads securely inside larger pouches using these essential small bags to prevent mixing.
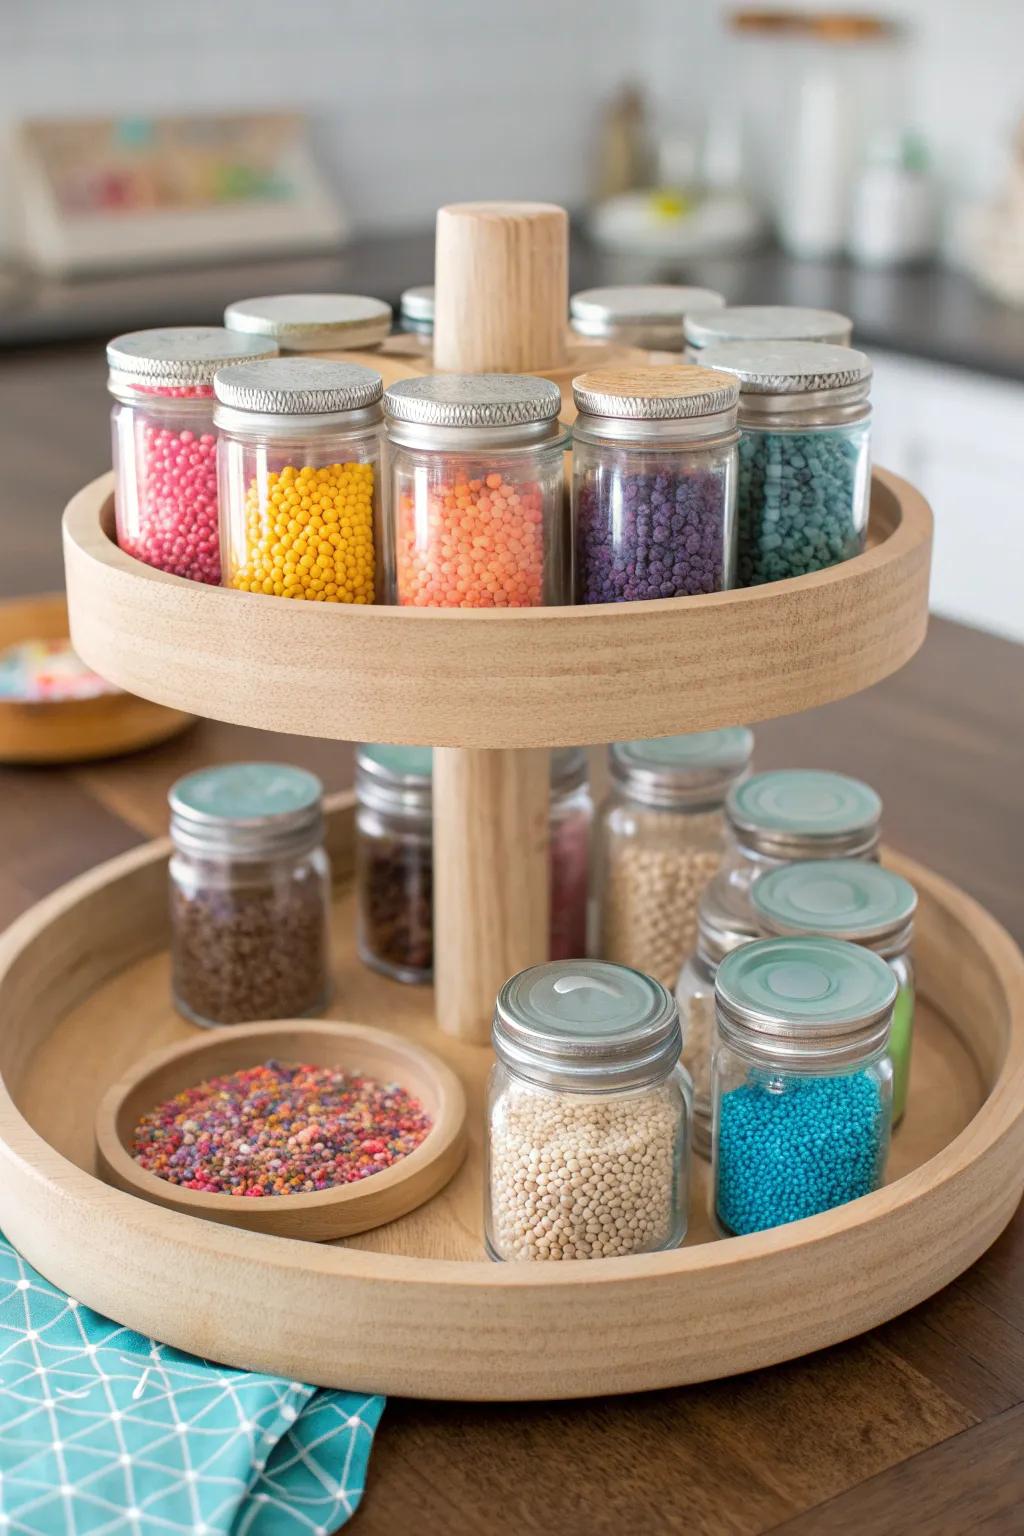
Tiered Riser Display for Grab-and-Go
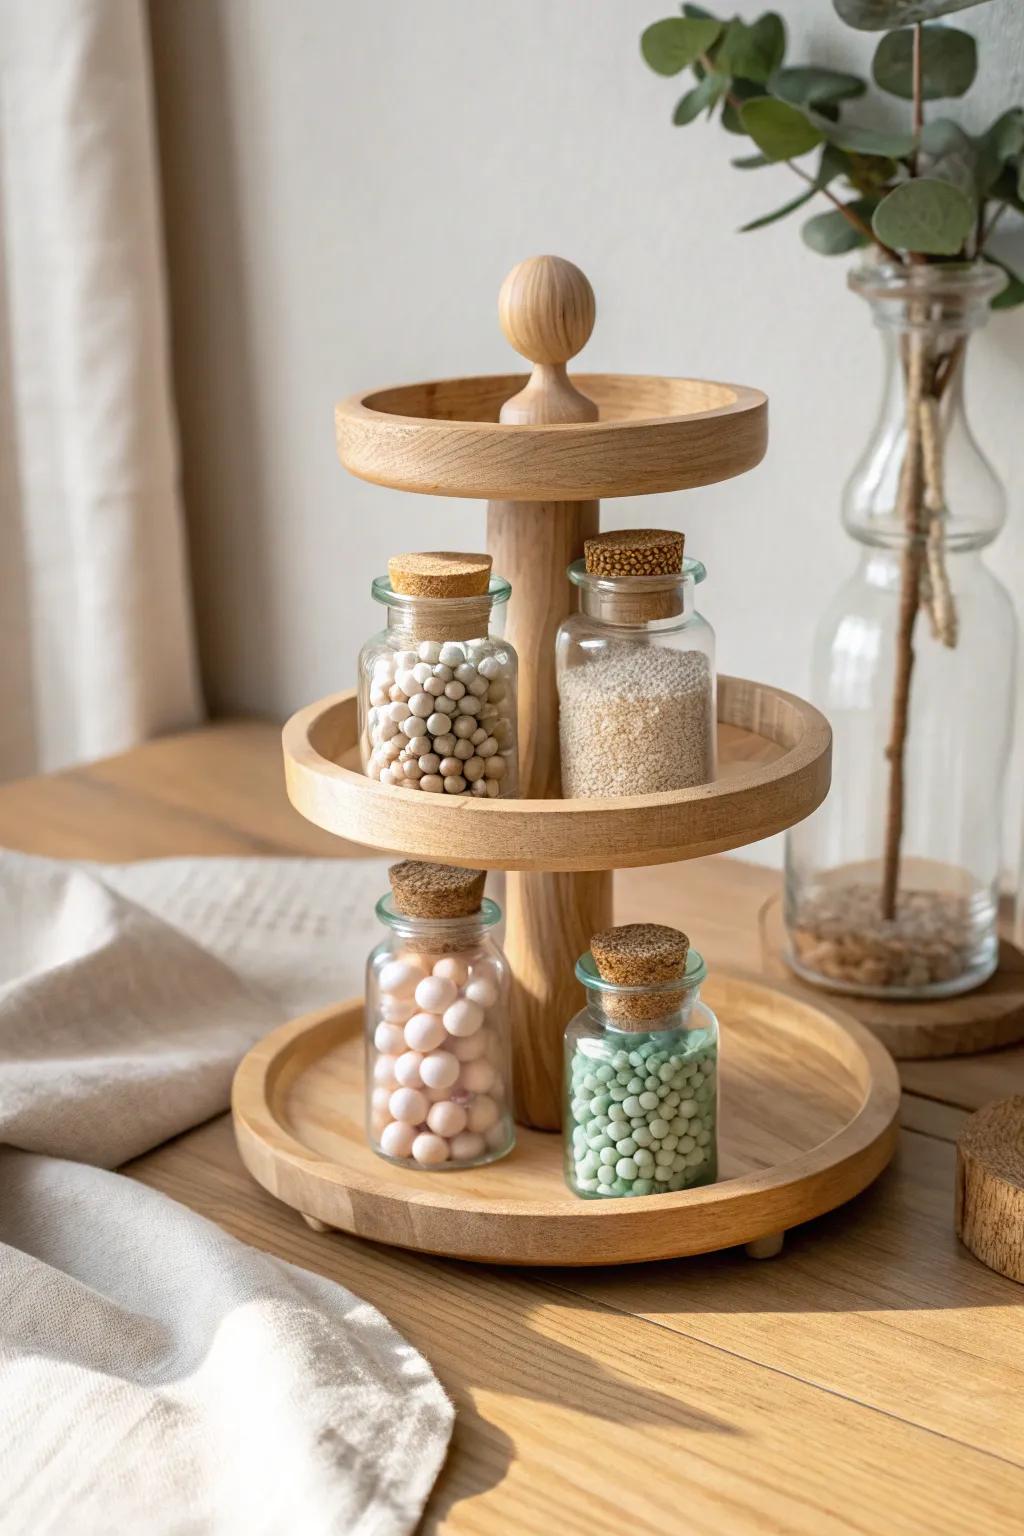
On my workstation, I use a DIY tiered riser so the back rows of bead containers aren’t hidden. It’s the easiest way I’ve found to keep high-use beads visible without adding more footprint.
Might be a good match:
- Round 3-Tier Wooden Display Stand: Showcase your favorite bead jars vertically with this stylish riser to save precious desk space while crafting.
- Small Glass Jars with Cork Stoppers: Store colorful beads in these clear, charming bottles to easily identify your supplies at a quick glance.
- Lazy Susan Tiered Organizer: Access all your bead containers effortlessly by spinning this rotating organizer to reach every hidden supply quickly.
Spinning Carousel Made From Two Trays
I hacked together a little spinning carousel by stacking two round trays with a turning base, and it’s ridiculously satisfying. I keep my most-used bead colors around the edge so I can spin and pick without standing up.
Useful items to consider:
- Round Wooden Lazy Susan: Use a simple rotating base as the foundation for your DIY carousel to let your beads spin freely.
- Small Glass Mason Jars: Organize your beads clearly in clear glass jars that fit perfectly on your new spinning trays.
- Unfinished Wood Round Trays: Select plain wooden serving trays to stack and customize for your own tiered bead storage tower.
Bead Mat Station With a Built-In “Parking” Tray
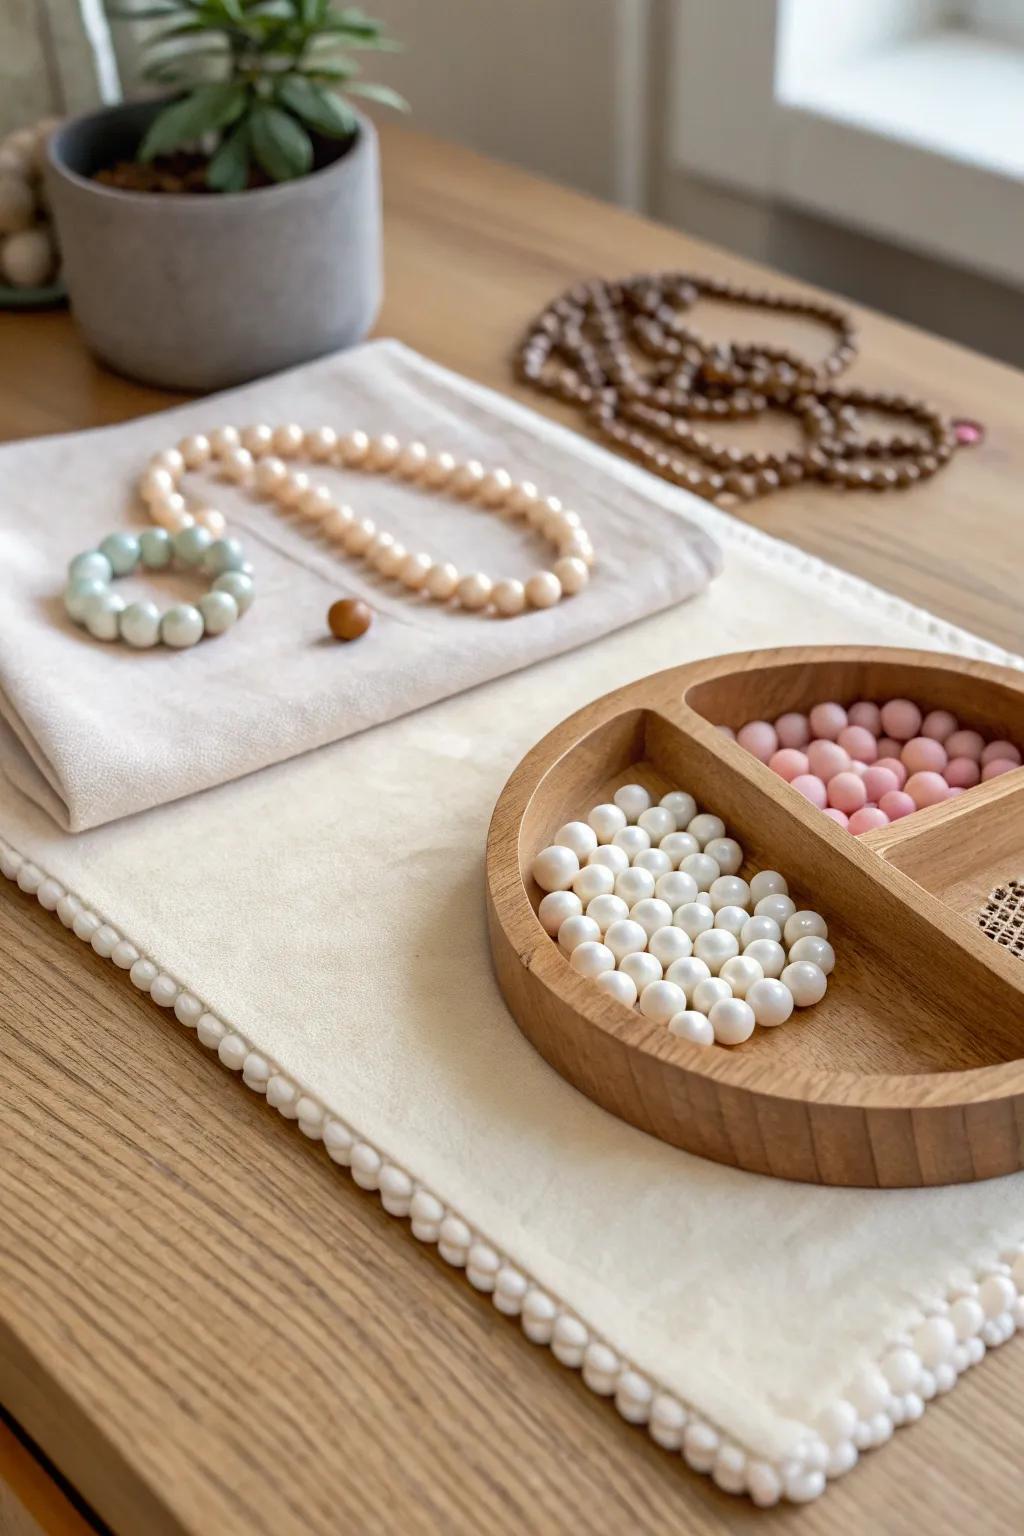
I glued a shallow “parking tray” next to my bead mat so mid-project beads have a safe landing zone. This saved me from the classic sleeve-swipe disaster more times than I want to admit.
Explore these options:
- Divided Wooden Serving Tray: Organize your loose beads effectively by securing a divided wooden tray directly onto your crafting workspace.
- Velvet Beading Mat: Provide a soft, non-slip surface for your jewelry projects to prevent beads from rolling away while working.
- Pom Pom Trim Ribbon: Add a decorative touch to your custom bead station by gluing this trim around the mat’s edges.
Pill Organizer for Daily Color Palettes
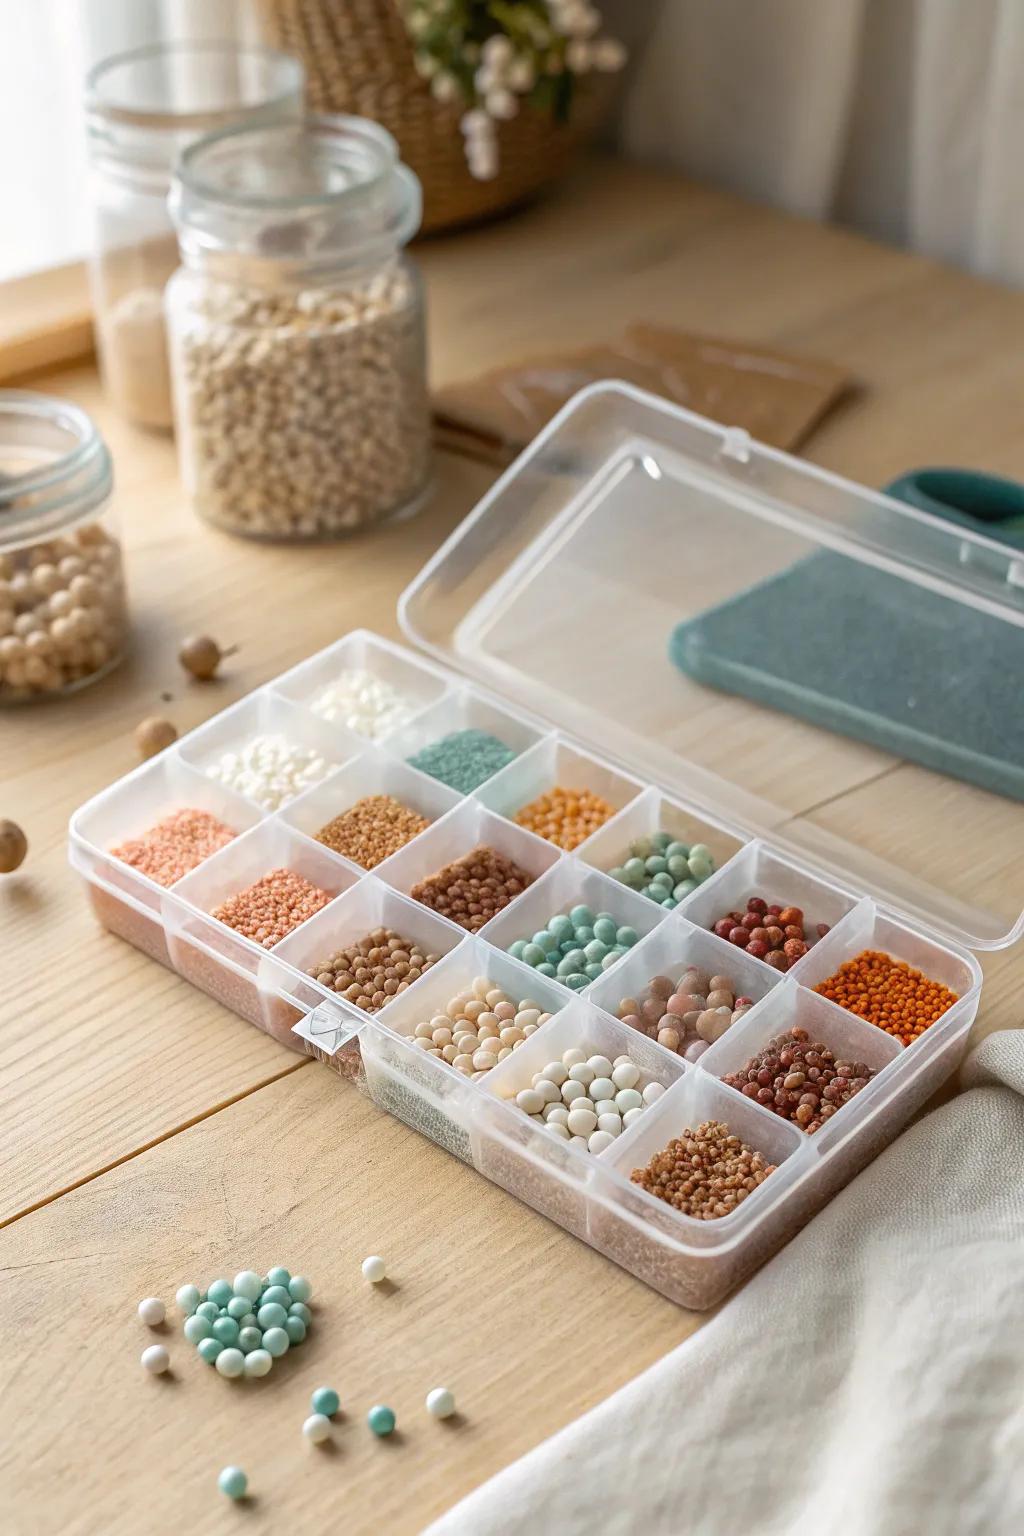
When I’m planning a project, I pre-sort a week’s worth of color palettes into a simple daily organizer. I started doing this in a studio apartment, and it keeps my “in-progress” beads from taking over the whole table.
You might give these a try:
- Grid Storage Box with Adjustable Dividers: Customize your own daily color palettes by adjusting these dividers to fit different bead sizes perfectly.
- Small Empty Bead Jars: Use these extra jars for safely storing leftover mix from your daily palette without spilling tiny beads.
- Weekly Pill Organizer Case: Streamline your workflow by pre-sorting your exact bead colors for each day of the week effortlessly.
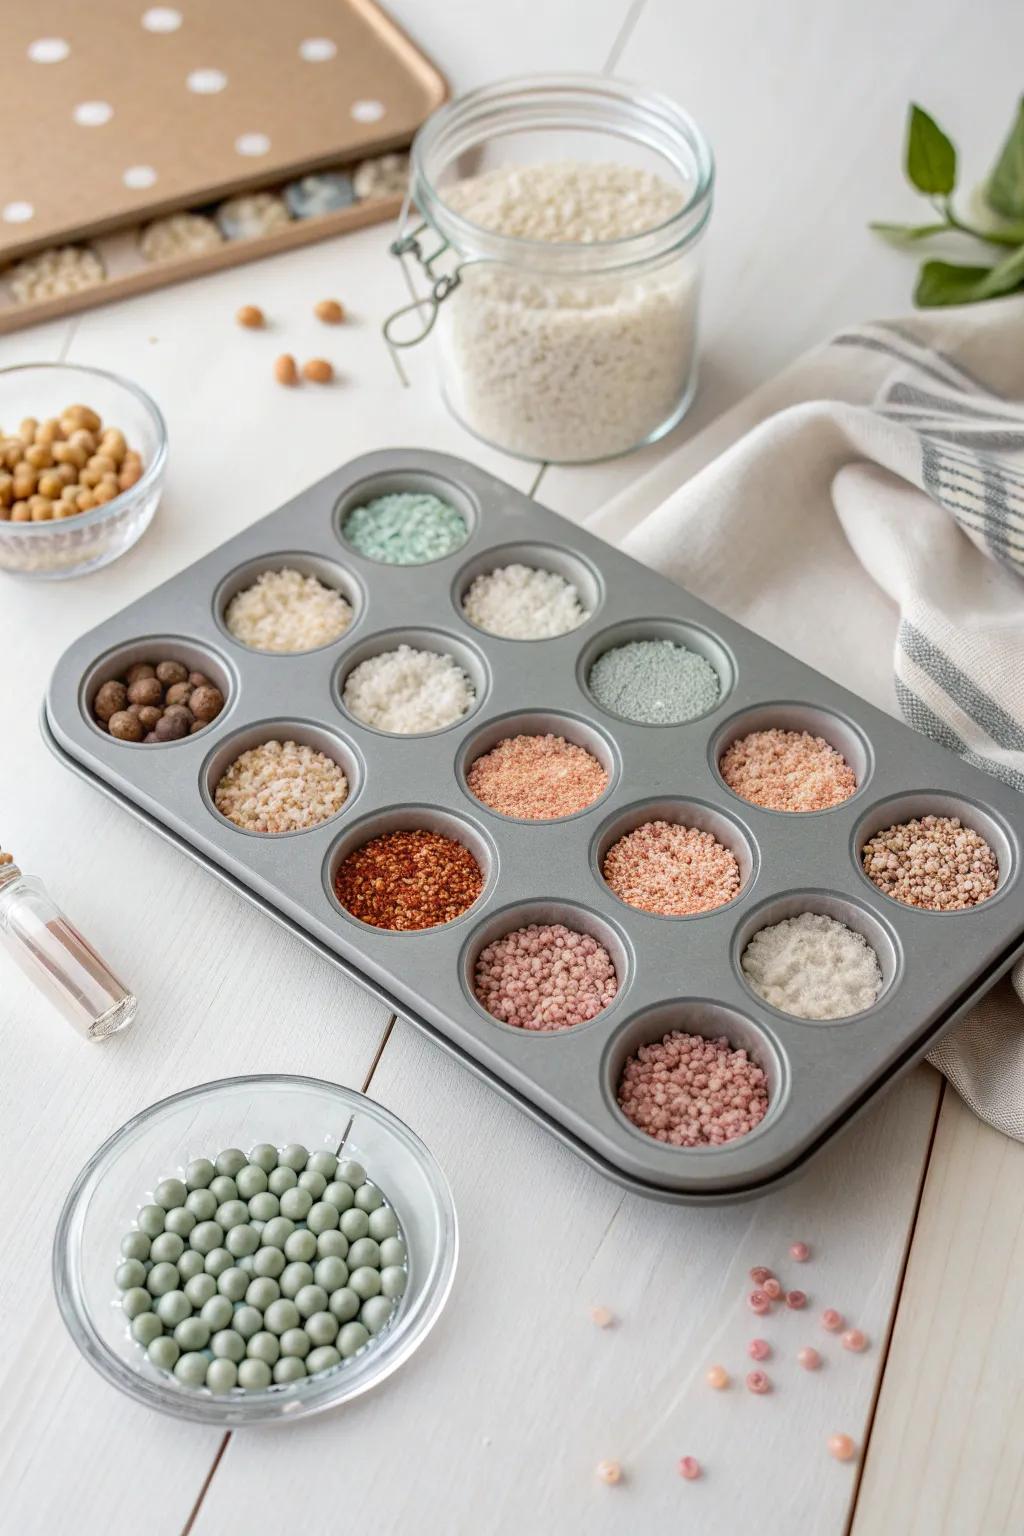
Ice Cube Tray With a Clear Lid
I turned a lidded ice cube tray into instant bead storage for chunky beads and spacer mixes. I like it because every compartment is visible, and the lid keeps everything contained when I slide it into a drawer.
Products that could assist:
- Silicon Ice Cube Tray with Lid: Store your larger, chunky beads securely and keep them visible with these easy-release lidded trays.
- Plastic Divided Organizer Box: Mimic the ice cube tray look with these dedicated hard plastic organizers perfect for sorting separate bead colors.
- Natural Wooden Craft Beads: Fill your new storage solution immediately with a variety of unfinished or earth-toned wooden beads.
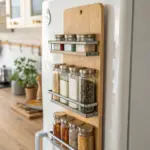
Magnetic Strip for Metal Beads and Findings
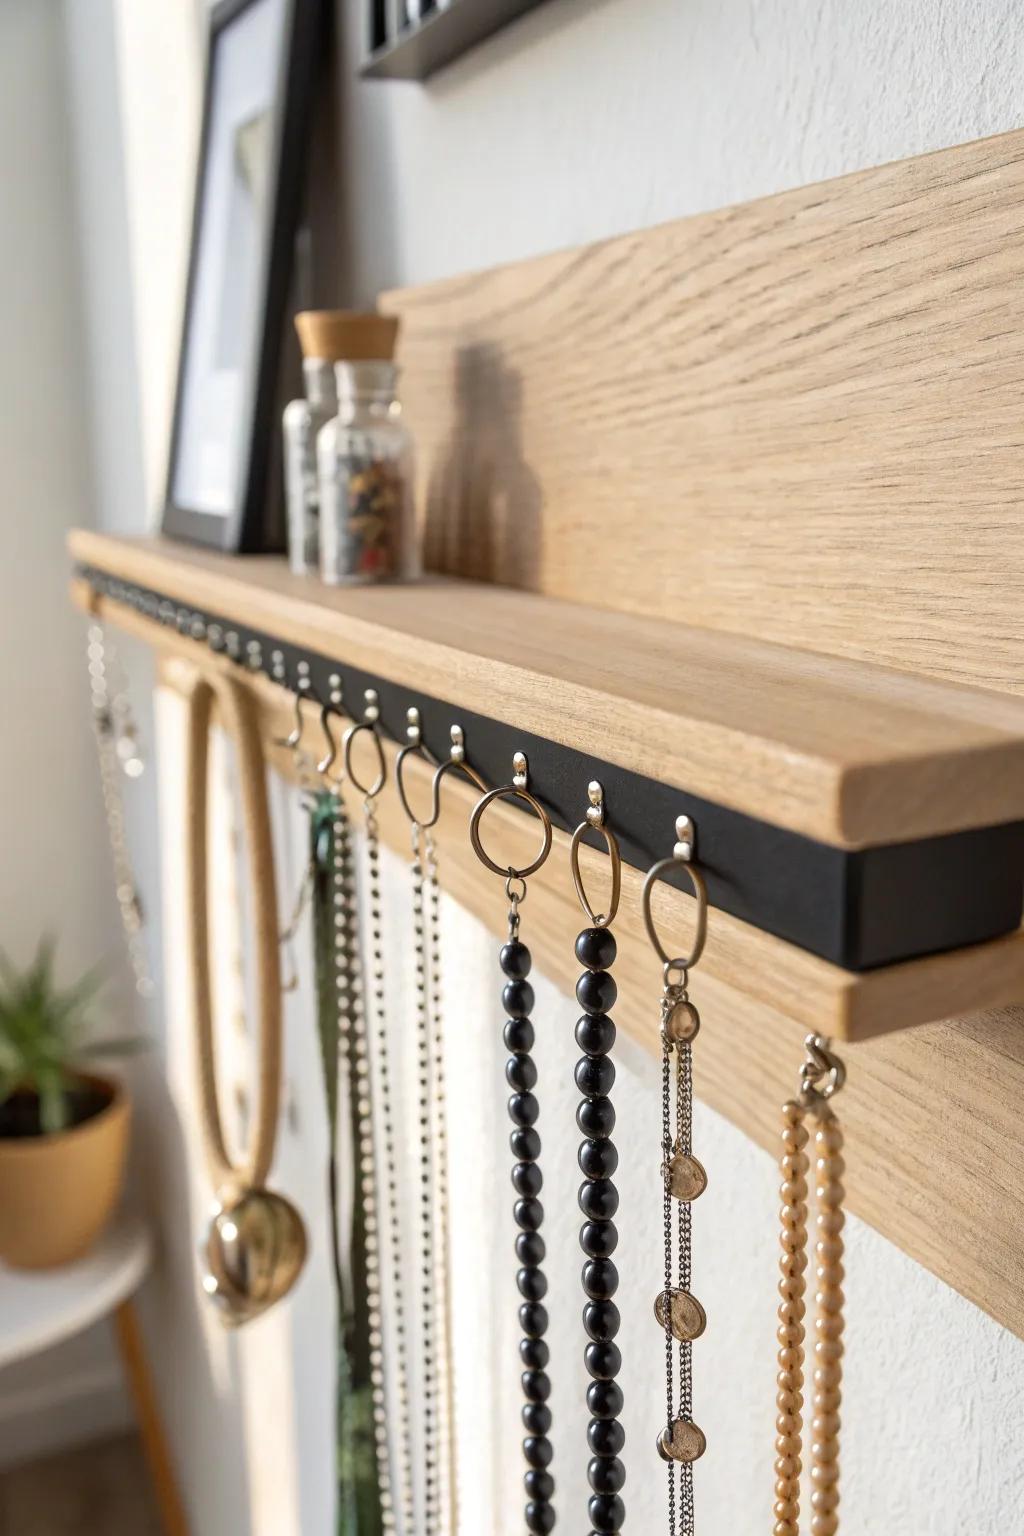
For anything that’s magnetic, I mounted a magnetic strip under a shelf so metal beads and findings stay put. I love how this frees up container space and keeps tiny pieces from disappearing into the void.
You might like:
- Adhesive Magnetic Tape Strip: Easily attach this flexible magnetic tape under any shelf to keep metal findings organized and accessible.
- Small Metal S-Hooks: Hang non-magnetic jewelry from your magnetic strip with these simple hooks for instant, tangle-free storage.
- Magnetic Tool Holder Bar: Mount this sturdy bar to your wall or shelf for a stronger hold on heavier metallic supplies.
Hanging Pocket Organizer for Bead Refills
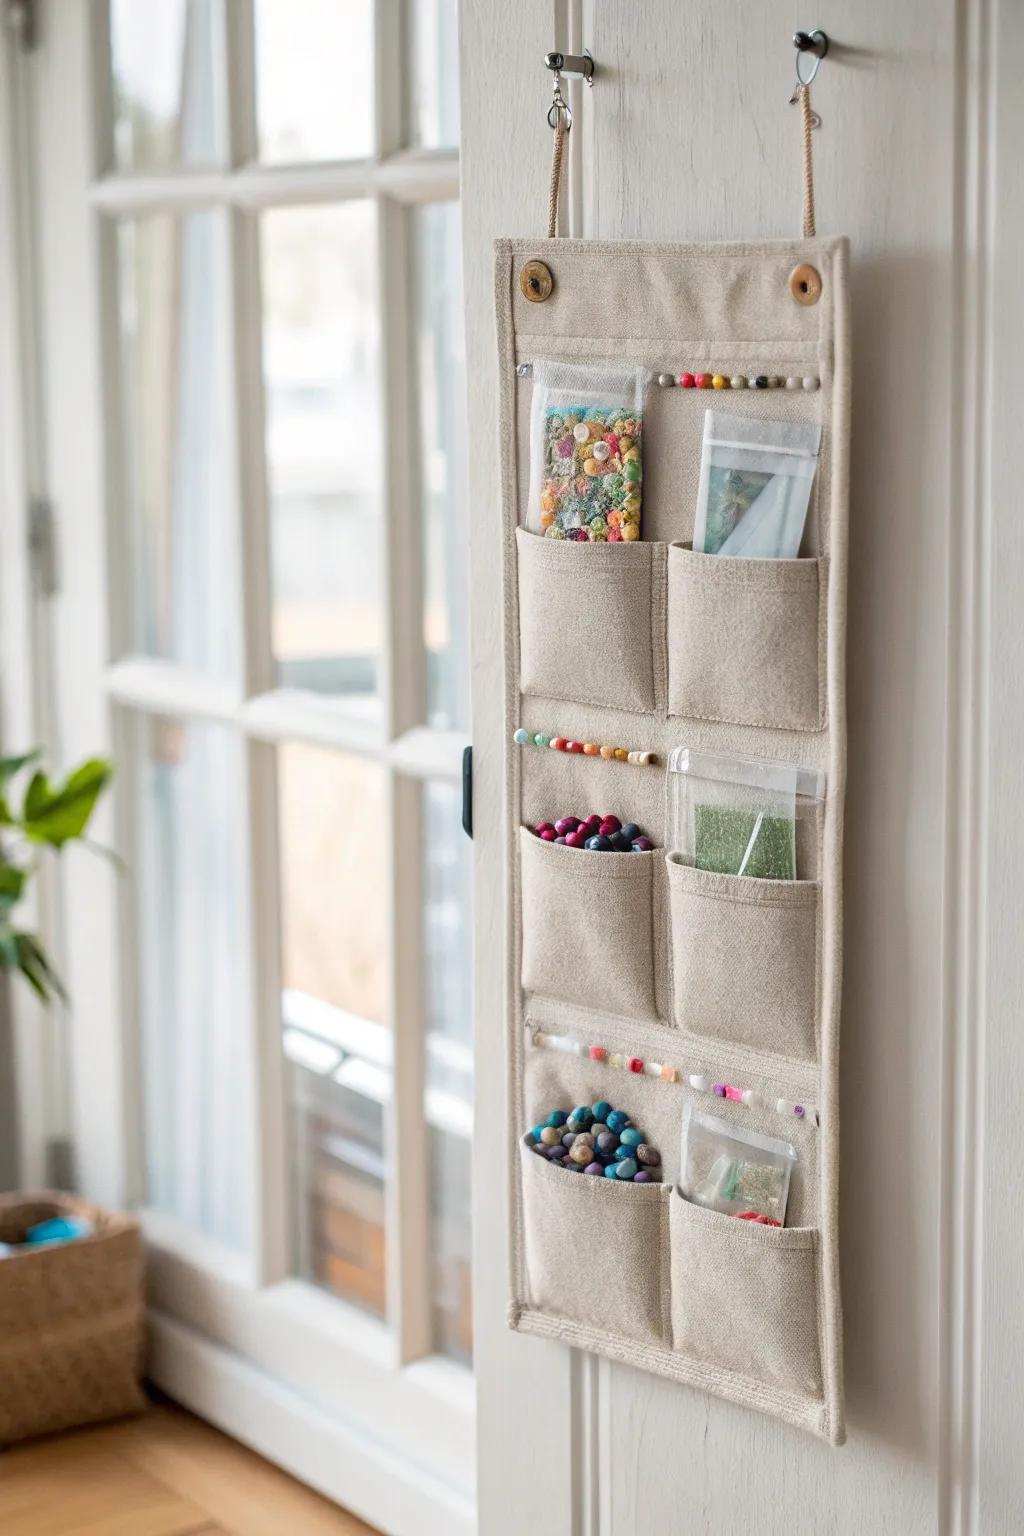
I hung a slim hanging pocket organizer inside my closet door for refill bags and backup strands. In small spaces, using vertical storage like this has been a total game changer for keeping bead supplies off the floor.
Items that may come in handy:
- Linen Hanging Wall Organizer: Utilize vertical space efficiently by hanging this natural fabric organizer on any door to sort your bead packets.
- Clear Resealable Storage Bags: Keep loose beads secure and visible within your pocket organizer using these durable, transparent small zipper bags.
- Over-the-Door Hooks: Ensure your organizer stays put with these simple, sturdy hooks designed to fit over standard interior doors.
Binder Pages for Flat Packs of Beads
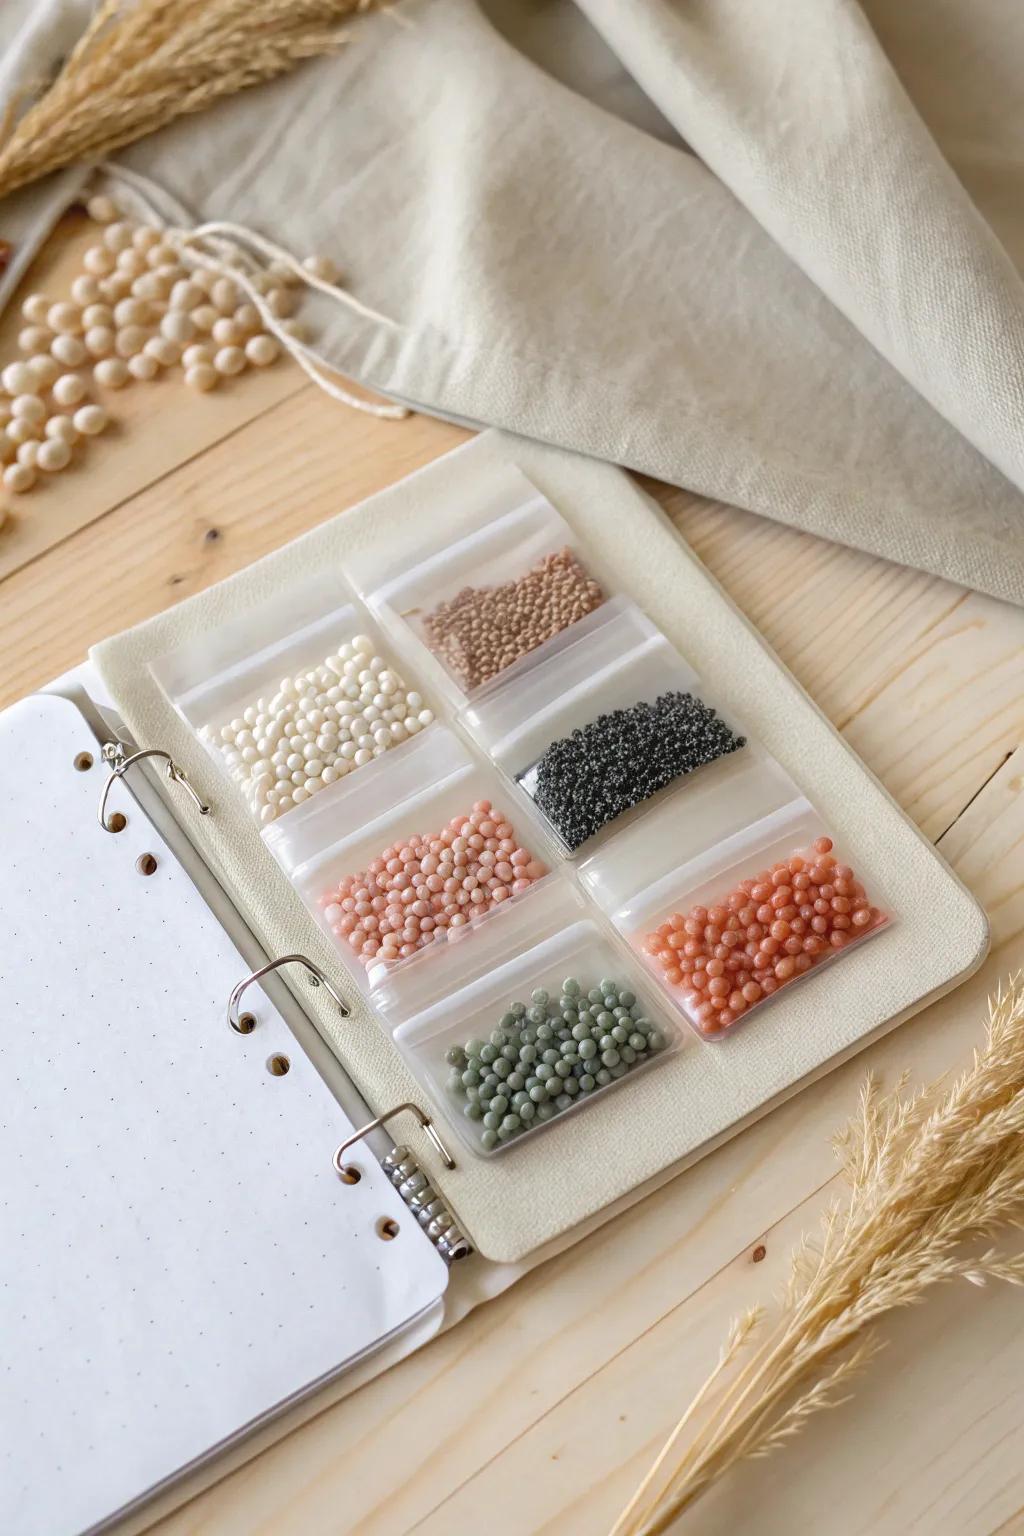
I store small bead bags in binder pocket pages so I can flip through colors like a catalog. I started this when my shelves got crowded, and now I actually know what I own.
Consider these options:
- Photo Binder Pocket Pages: Store flat bead packs securely in clear pockets, allowing for easy browsing through your color collection.
- Resealable Small Plastic Bags: Keep beads organized in uniform, secure baggies that fit perfectly into standard binder pocket slots.
- Refillable Ring Binder: Create your own bead catalog using a sturdy binder that protects your supplies and sits flat.
Matchbox-Style Mini Drawers From Scrap Cardboard
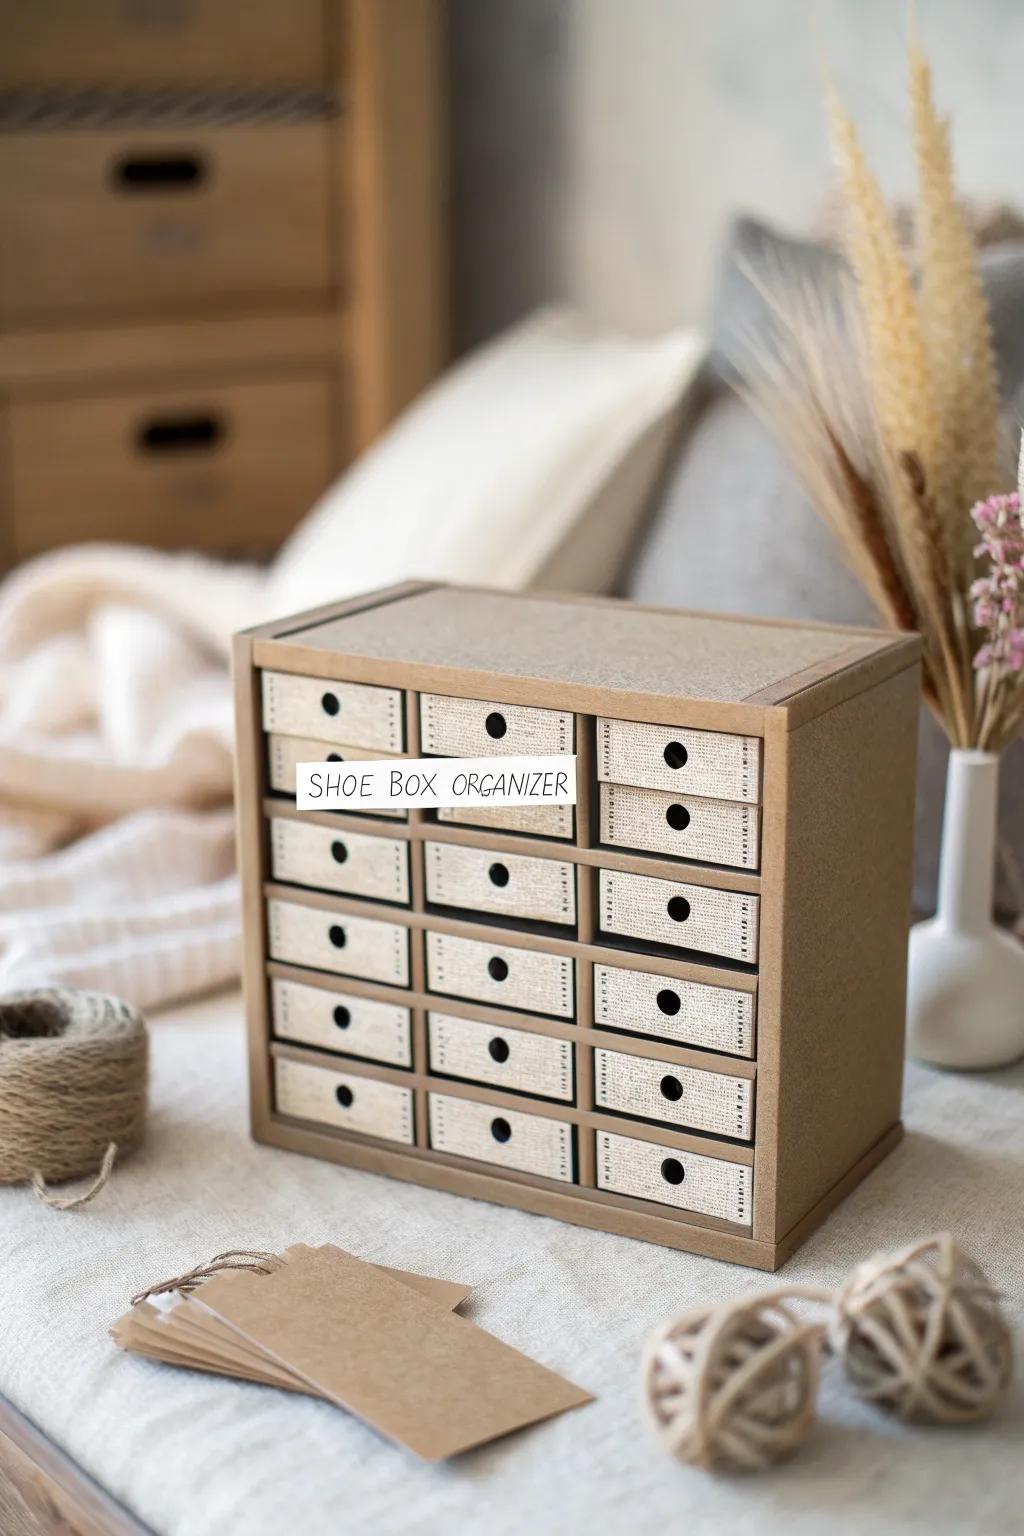
I made tiny matchbox drawers from scrap cardboard for seed beads I use constantly, and they slide into a shoebox frame. It looks surprisingly tidy on a shelf, and I can label the drawer fronts like a mini archive.
Possibly handy products:
- Kraft Cardboard Sheets: Use sturdy, rustic kraft cardboard sheets to construct durable frames and drawers for your custom storage unit.
- Blank Matchbox Sets: Save time on construction by using pre-made blank paper matchboxes as the base for your sliding drawers.
- Precision Craft Knife Set: Ensure clean cuts and professional edges on your DIY organizer with a sharp, reliable precision cutting tool.
Wall Grid With Clip-On Clear Cups
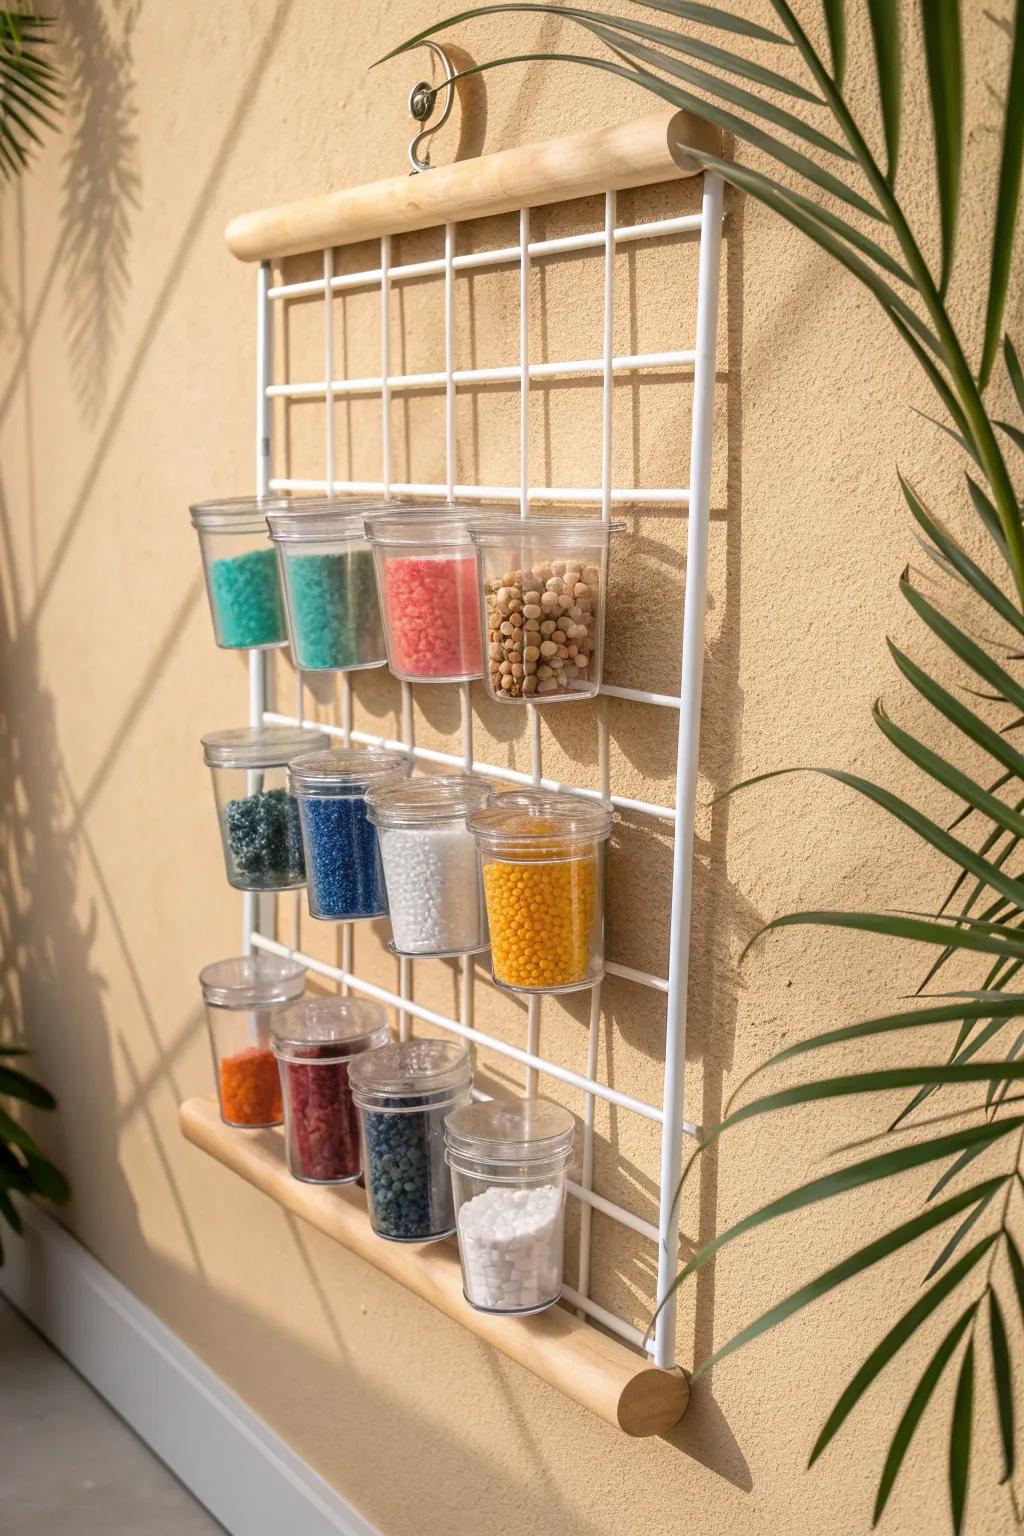
I built a simple wall grid and clipped on clear cups to hold bead tubes and small containers. In my smallest apartment, getting bead storage off the desk felt like adding a whole extra surface.
A few relevant products:
- Wall Grid Panel: Transform your bare wall into functional storage by mounting a sturdy grid panel for organizing crafting supplies.
- Clear Storage Cups with Hooks: Attach these transparent hanging cups to your grid to keep beads visible and within easy reach.
- Wooden Dowel Rods: Add a finished, aesthetic touch to the top and bottom of your grid with smooth wooden dowels.
Test Tube Rack for Rainbow Seed Beads
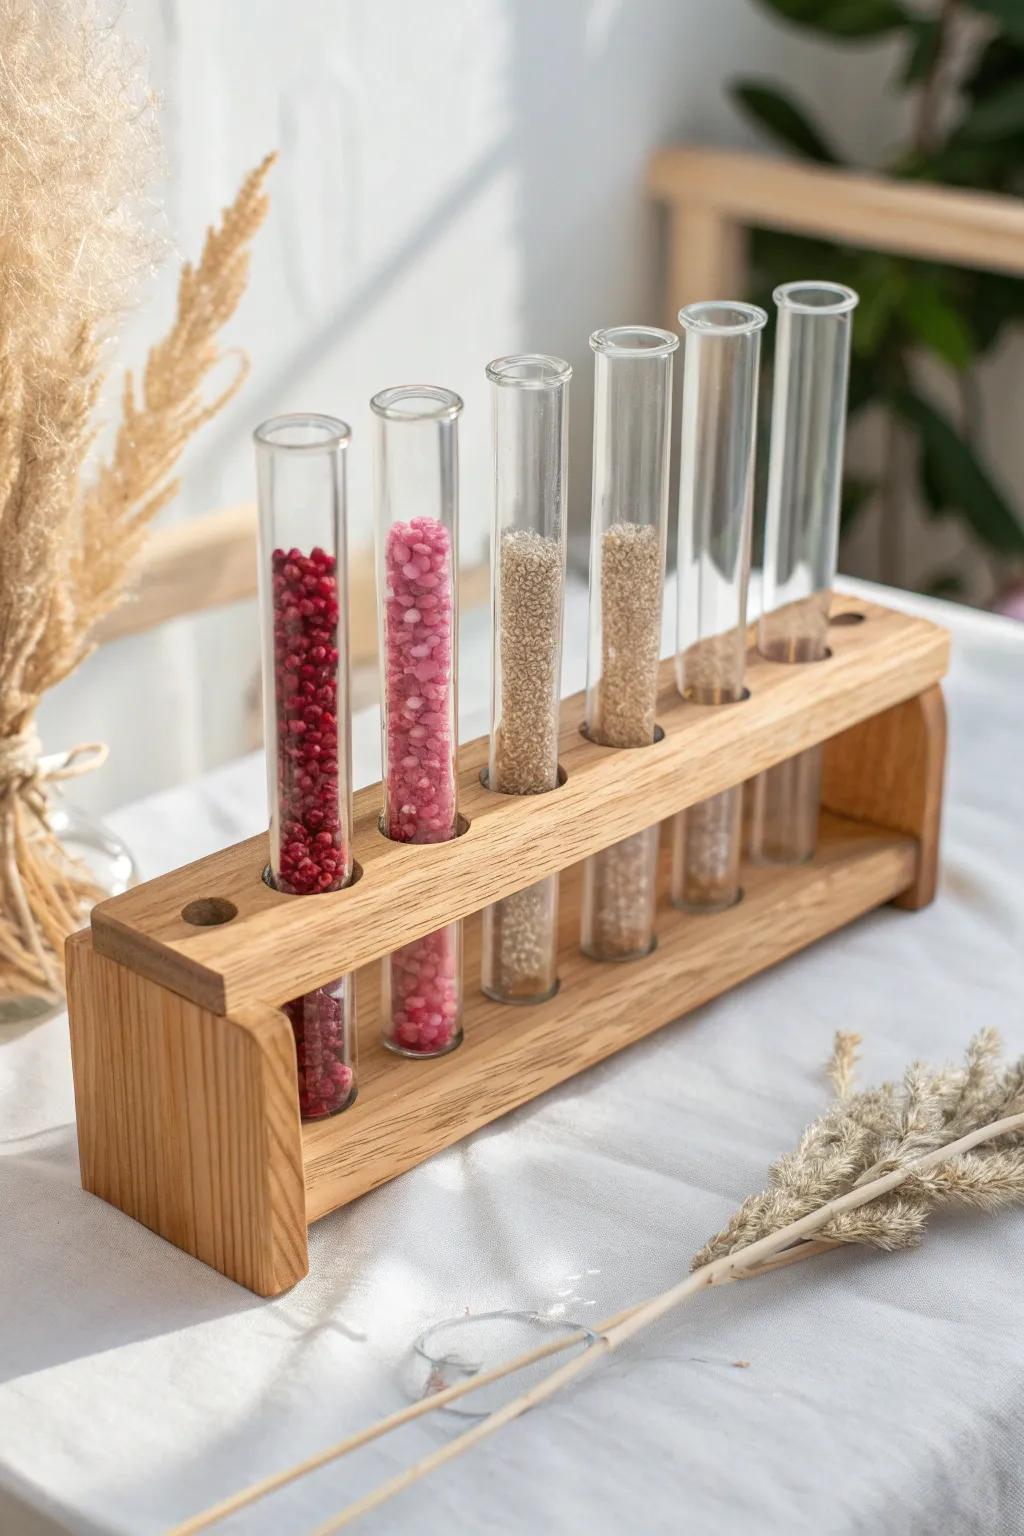
I made a DIY test tube rack and arranged seed beads in a clean rainbow order, and it’s honestly the prettiest storage I’ve ever had. It turns bead storage into decor while keeping every color easy to spot.
Maybe worth checking out:
- Glass Test Tubes with Cork Stopper: Store your tiny seed beads securely in these clear tubes for easy visibility and organized color coordination.
- Wooden Test Tube Rack Holder: Display your colorful bead collection beautifully on your workspace with a sturdy and aesthetic wooden drying rack.
- Assorted Glass Seed Beads: Start filling your new storage system immediately with a vibrant assortment of high-quality, uniform seed beads.
Shadow Box “Bead Library” With Mini Jars

I mounted mini containers inside a deep shadow box so my favorite beads look like a curated display instead of clutter. This is my go-to trick when I want storage to feel intentional in a tight living area.
Try these:
- Deep Wooden Shadow Box Frame: Choose a deep frame to house your collection securely while turning your supplies into beautiful wall art.
- Small Glass Jars with Cork Stoppers: Organize individual bead colors in these tiny, uniform jars for a clean and cohesive visual aesthetic.
- Adhesive Mounting Strips or Glue Dots: Secure your jars in place inside the frame to prevent shifting or tipping when mounted on walls.
Upcycled Muffin Tin With Snap-On Cover
I turned a mini muffin tin into bead sorting storage, then added a clear cover so it travels safely. It’s weirdly perfect for separating “maybe” mixes when I’m auditioning beads for a design.
A few suggestions:
- Mini Muffin Tin with Travel Lid: Secure your bead collection easily by choosing a tin that includes a snug lid for safe transport.
- Assorted Glass Beading Bowls: Keep loose beads contained while you work with small, clear bowls perfect for sorting colors efficiently.
- Airtight Glass Storage Jar: Store bulk leftover beads or base materials in a classic glass jar with a secure clamp seal.
Under-Shelf Sliding Bead Tray From a Cutting Board
I installed a slim under-shelf sliding tray using a small board and simple rails, and it hides a whole bead sorting zone in plain sight. In my 450 sq ft setup, this was the ultimate “wow, where did that come from?” DIY bead storage moment.
These products might help:
- Wooden Drawer Organizer Tray: Use a sturdy, shallow wooden organizer like this to create the base for your hidden sliding bead tray.
- Under-Mount Drawer Slides: Install these smooth-gliding rails beneath your desk or shelf to make your new hidden storage easily accessible.
- Small Gold Cabinet Knobs: Add a touch of elegance and functionality with a simple gold pull knob to match the photo’s aesthetic.


