Art supplies multiply fast, especially in a small home, and suddenly your creative corner starts feeling like clutter central.
Sort Supplies by Medium First
In my smallest studio, I stopped organizing by “random drawers” and started grouping like supplies (paint, drawing, paper, tools), and it instantly made everything easier to find. Once the big categories were set, the smaller sorting basically organized itself.
A few things you might like:
- Wooden Desktop Drawer Unit: Keep your smaller art tools neatly sorted and accessible with a compact, stylish wooden desktop organizer.
- Ceramic or Concrete Pencil Cup: Organize your frequently used brushes and pens upright for easy reaching while you work on projects.
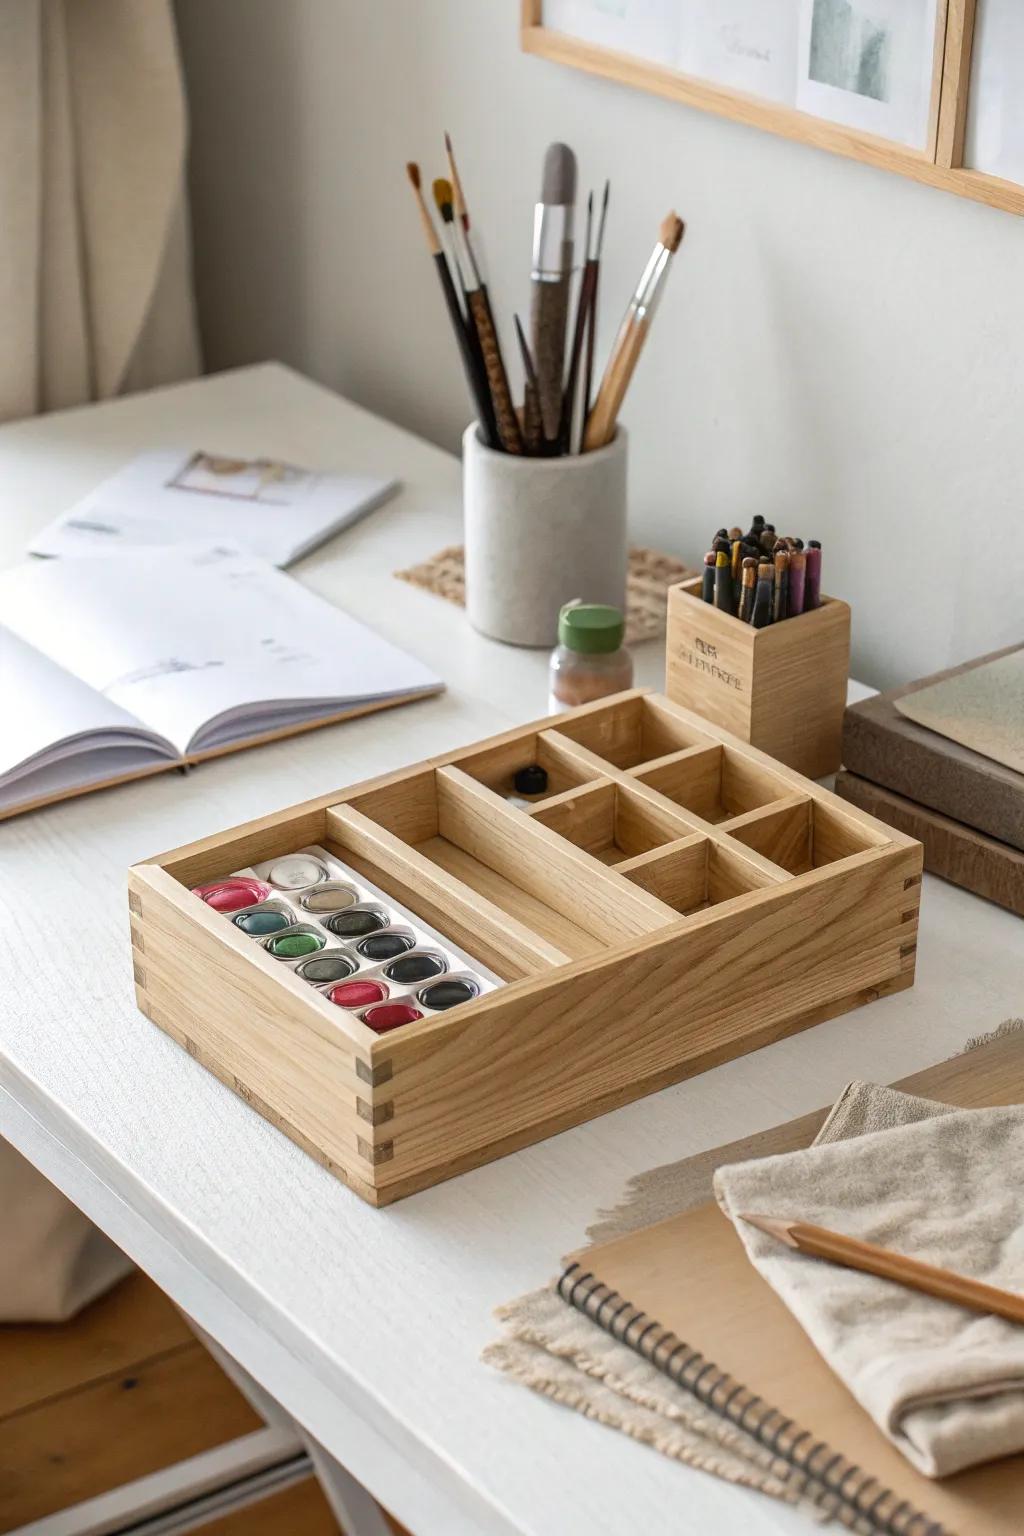
- Divided Wooden Tray Organizer: Separate your paints, beads, or small accessories into dedicated compartments for a clutter-free creative workspace.
Create Simple Art Room Zones
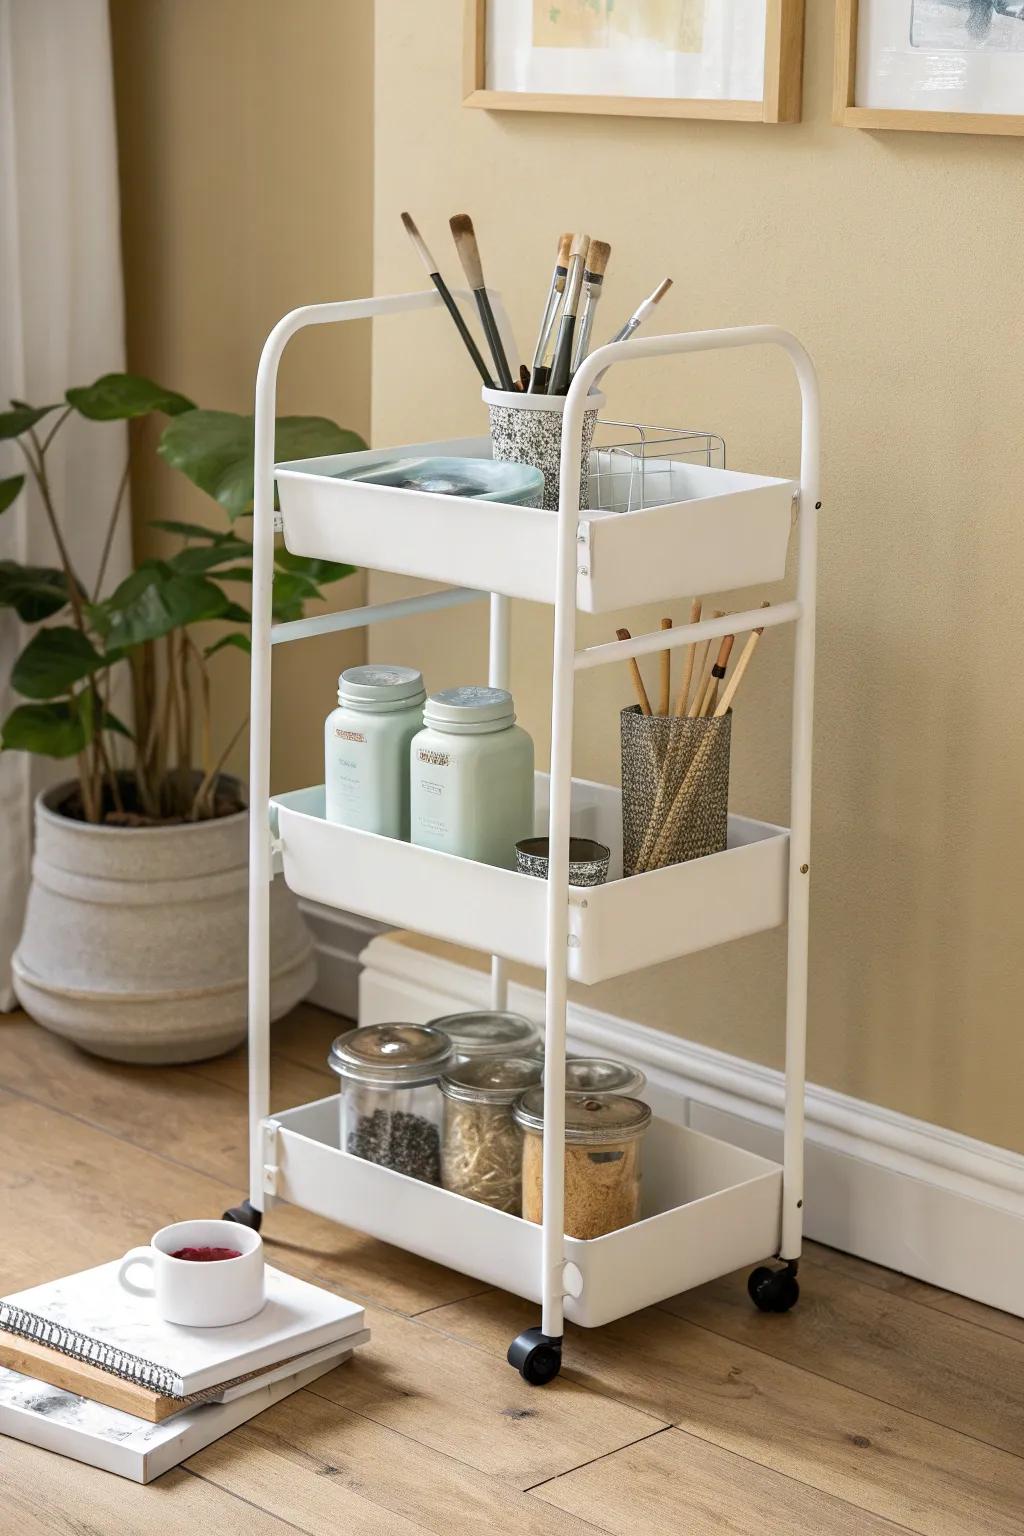
I always set up three art room zones: making (desktop), storage (shelves/cubbies), and mess (paint/water area), even if they’re just a few feet apart. It keeps my brain from scattering supplies all over the room mid-project.
Give these a look:
- 3-Tier Rolling Utility Cart: Transform any corner into a flexible storage zone with this mobile cart, perfect for rolling supplies right to your desk.
- Clear Airtight Storage Jar Set: Keep smaller supplies visible and organized in these streamlined containers that protect materials while reducing visual clutter.
- Desktop Pencil Holder Cup: Create a dedicated ‘making zone’ by keeping brushes and tools upright and accessible with this sturdy organizer.
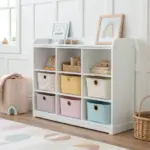
Label Everything You Touch Often
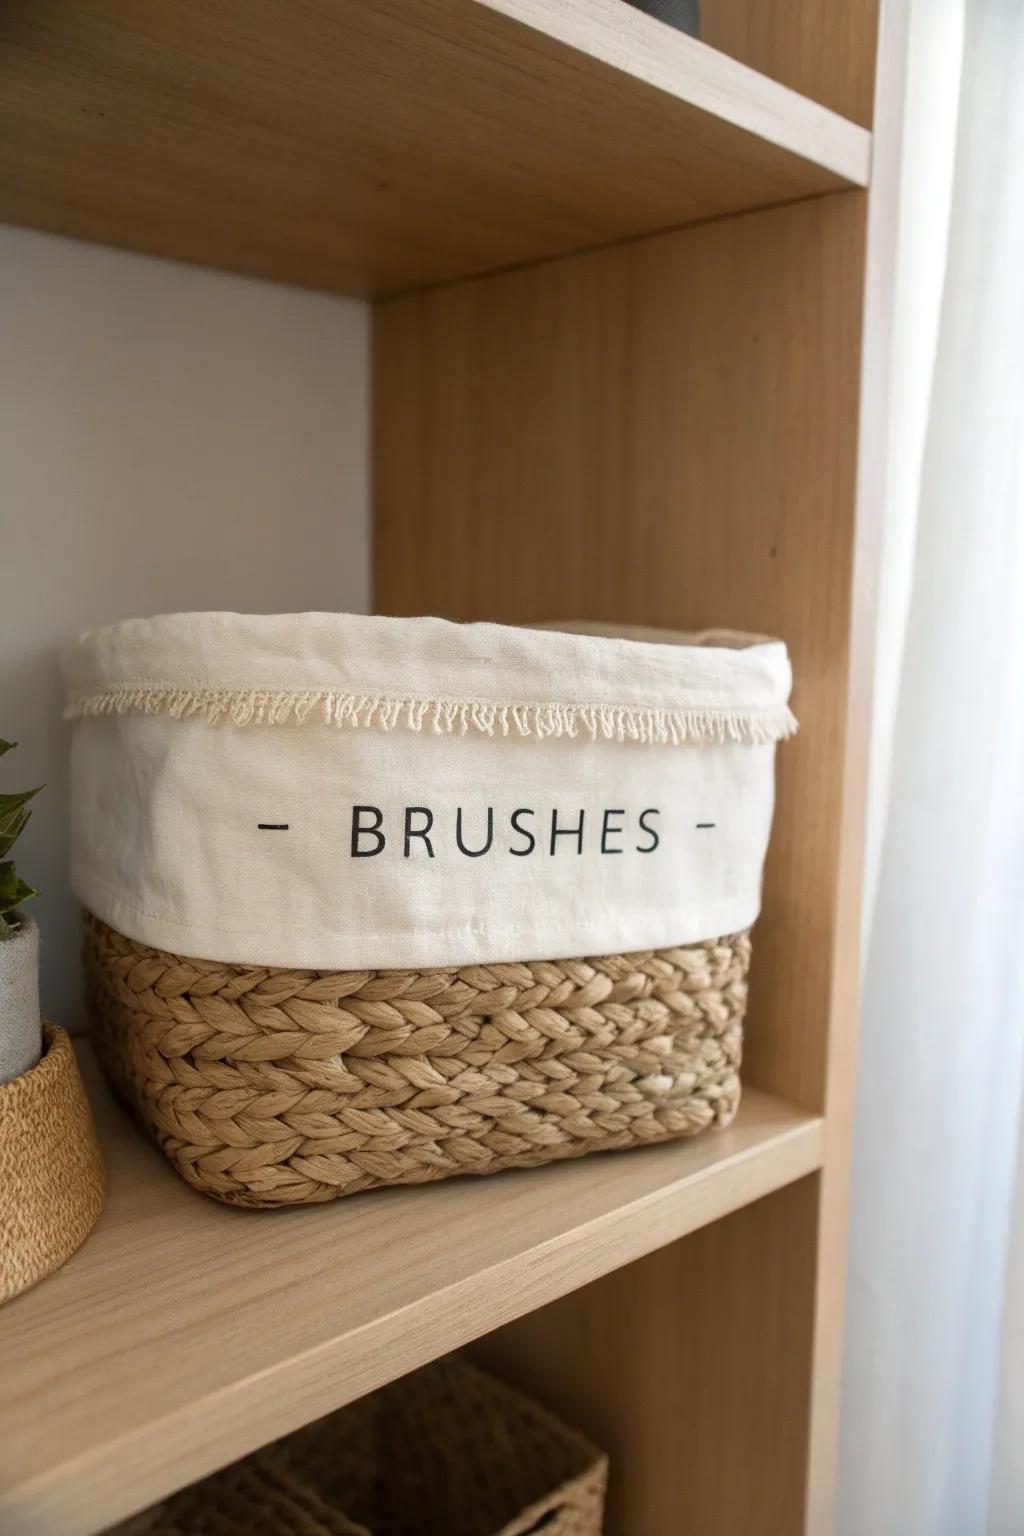
When I started using a consistent label system, I stopped “temporarily” placing things everywhere because returning items became automatic. I label the front edge of bins and shelves so I can read them even when they’re stacked.
Some ideas to consider:
- General Storage Baskets with Fabric Liner: Organize your supplies in these woven bins that offer a stylish look and a built-in surface for easy labeling.
- Iron-On Transfer Paper for Fabrics: Create custom labels directly on your fabric bin liners with these transferable sheets for a professional, permanent look.
- Fabric Marker Pens: Handwrite your category labels instantly onto cloth liners for a quick, personalized organization system that stays put.
Use Clear Bins for Tiny Tools
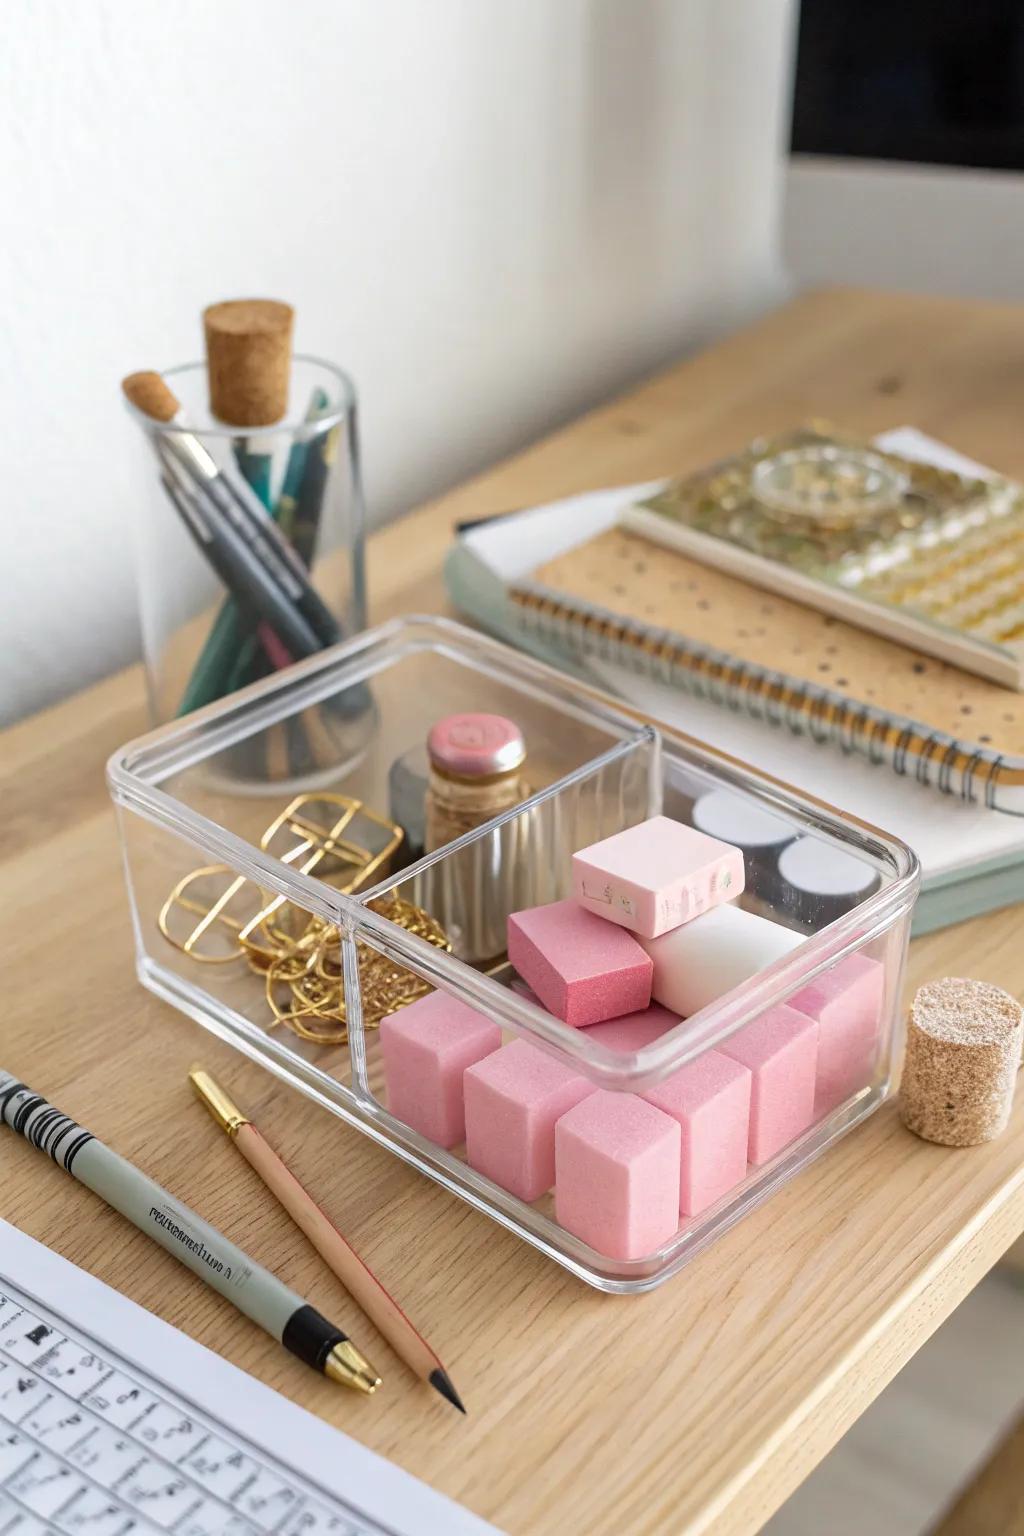
I keep little items like erasers, sharpeners, clips, and blades in clear bins so I don’t have to dig through mystery boxes. In my apartment, this single change cut my setup time in half.
Check these products out:
- Stackable Clear Acrylic Organizer Box: Keep supplies visible and tidy with these stackable organizers, making finding small tools simple and quick.
- Clear Pencil Cup or Brush Holder: Store your brushes and pens upright in transparent holders to grab exactly what you need instantly.
- Gold Metal Binder Clips Set: Group loose papers or sketches stylishly with these specialized clips that add elegance to your workspace.
Stand Pens and Brushes Upright
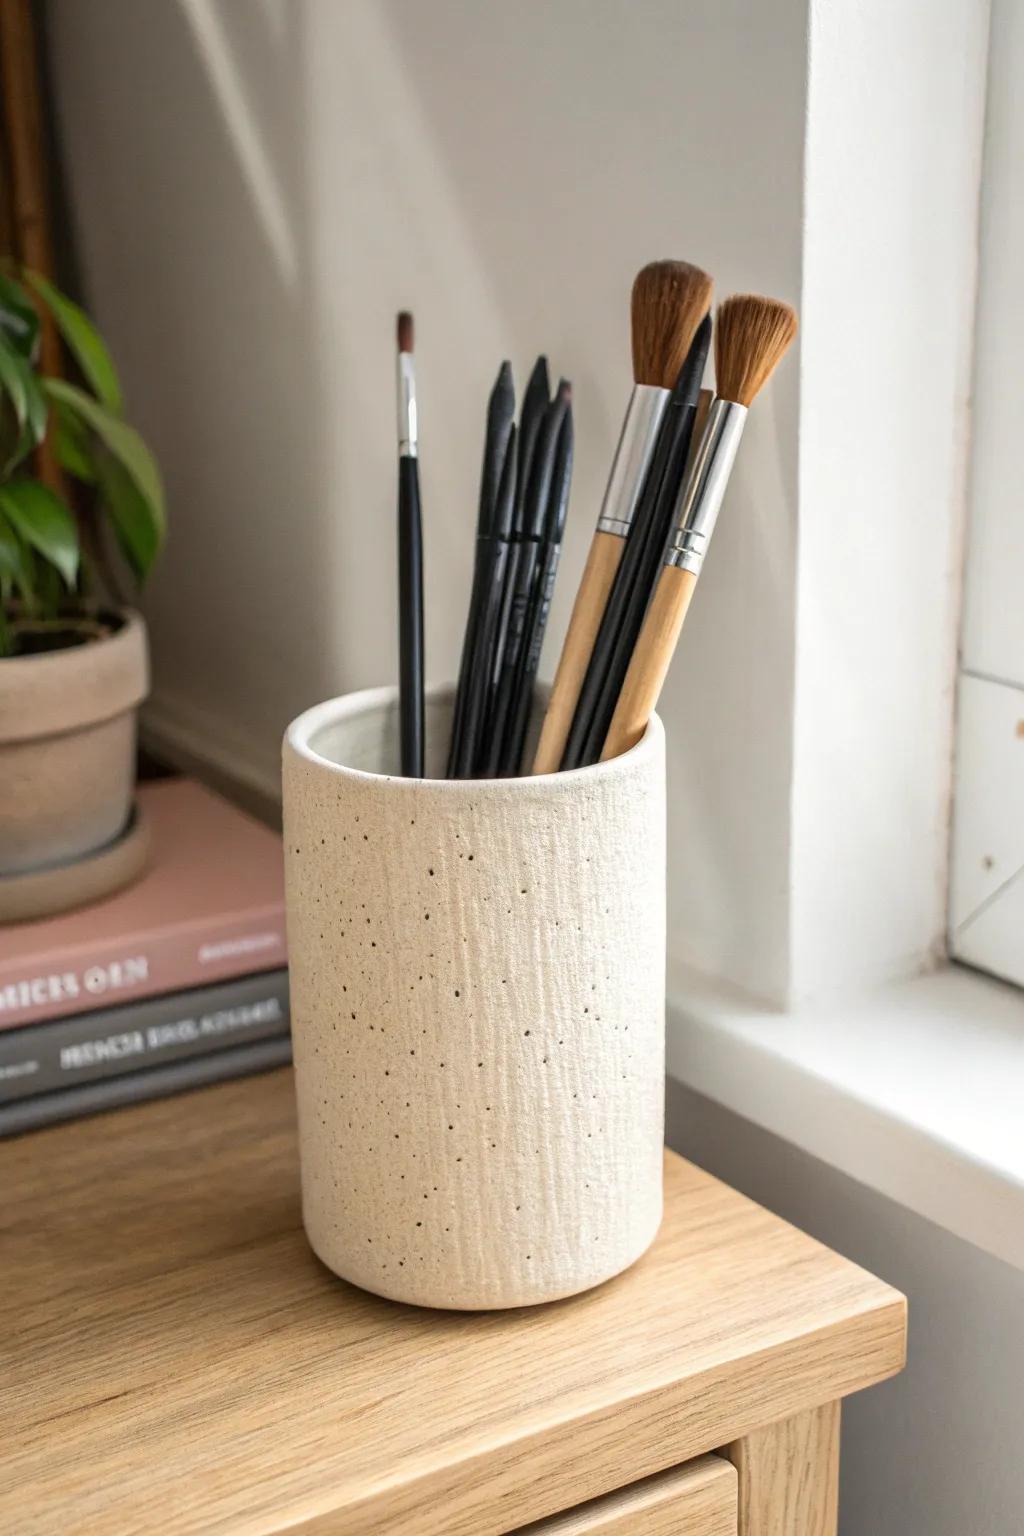
I corral markers, pens, and brushes in sturdy cups so the daily tools live right where my hand naturally reaches. I learned the hard way that tossing them in a drawer bends tips and makes me avoid using them.
Consider these options:
- Ceramic Pencil Cup: Keep your brushes accessible and stylishly organized with a ceramic holder that adds texture to your workspace.
- Artist Brush Set: Upgrade your toolkit with durable, varied brushes that stand tall and ready for your next creative session.
- Graphite Drawing Pencils: Fill your new organizer with high-quality graphite pencils designed for precision sketching and shading work.
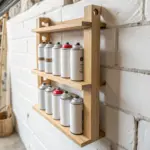
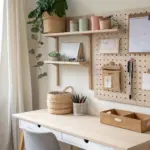
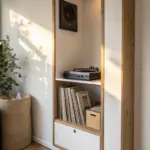
Lean Into Vertical Storage

Whenever my desk felt cramped, I went up the wall with vertical storage—even one slim shelf made a huge difference. I’ve done this in rentals with removable-friendly mounting, and it freed up my actual work surface immediately.
You might like:
- Wall-Mounted Ladder Shelf: Maximize your vertical space with tiered shelving that keeps art supplies organized and your desk clutter-free.
- Ceramic Pencil Holder: Store your brushes and pencils stylishly in a durable holder that keeps essential tools within easy reach.
- Small Glass Storage Jars: Organize small items like nibs, beads, or pigments in clear jars to easily see what you need.

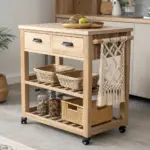
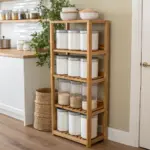
Add a Mobile Supply Cart
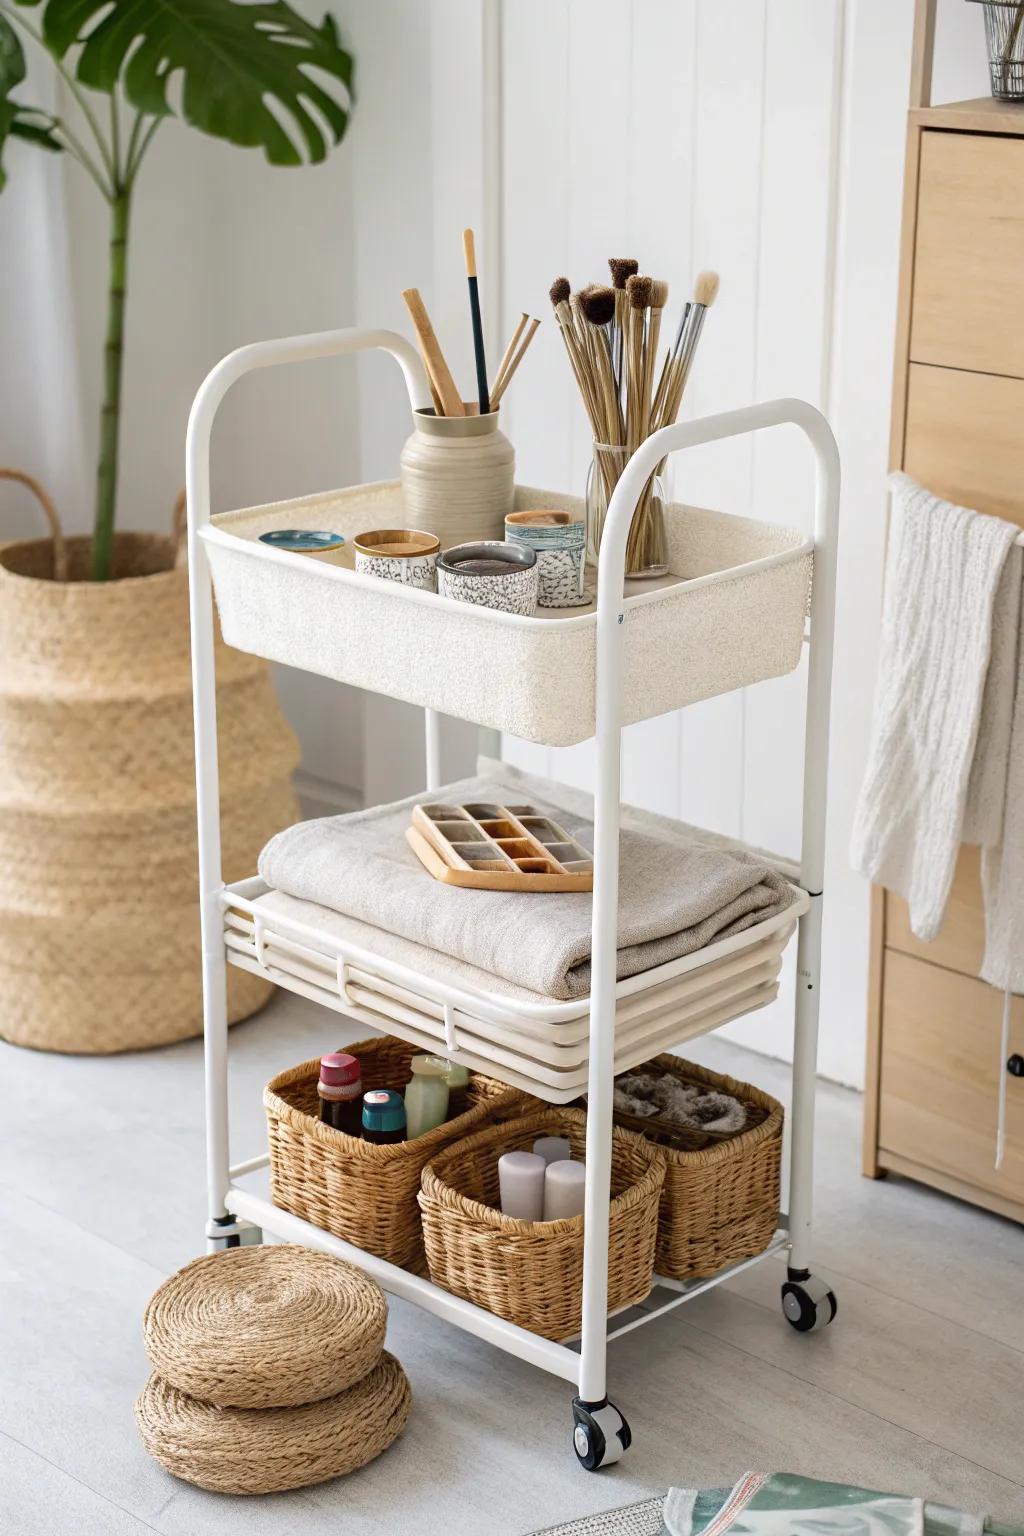
In my 450 sq ft place, a rolling cart became my secret weapon because I could pull it next to me while working, then tuck it away. I dedicate each tier to one category so it doesn’t become a wheeled junk drawer.
These products might be useful:
- 3-Tier Rolling Utility Cart: Keep supplies accessible and mobile with a sturdy cart that easily rolls wherever creativity strikes in your home.
- Woven Storage Baskets: Organize looser items on the bottom shelf using natural woven baskets to maintain a tidy and cohesive look.
- Ceramic Brush Holders: Store your paintbrushes upright and within reach using simple, heavy ceramic jars or holders on the top tier.
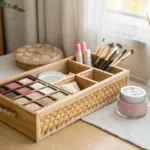
Store Paint by Type and Size
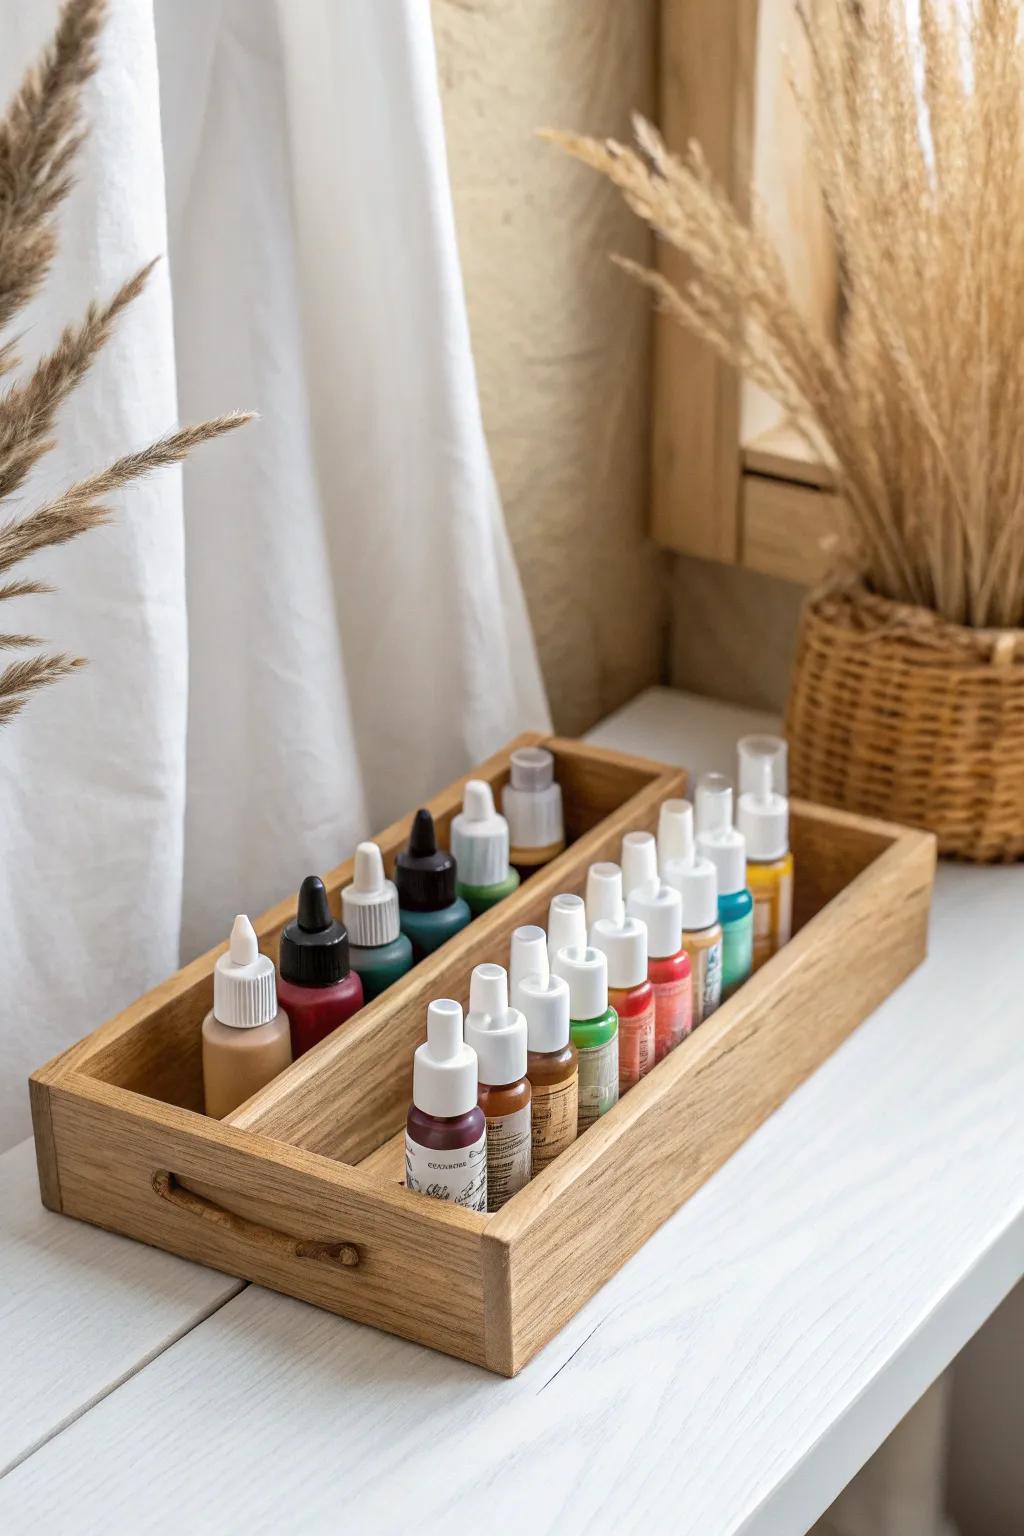
I line up bottles and tubes in shallow bins so paint storage stays upright and nothing leaks onto everything else (yes, I learned this the messy way). Grouping by type first, then color, makes it easy to restock and spot what’s running low.
Check if these fit your needs:
- Wooden Serving Tray with Dividers: Keep small bottles upright and organized with a divided tray that helps prevent messy paint leaks.
- Shallow Bamboo Drawer Organizers: Sort your paints by size or color in these natural bins to make setup and cleanup easier.
- Clear Acrylic Paint Organizer: See your colors instantly by lining up tubes and bottles in these simple, transparent storage containers.
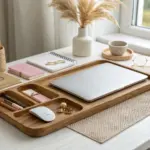
Use Project Trays for Works in Progress
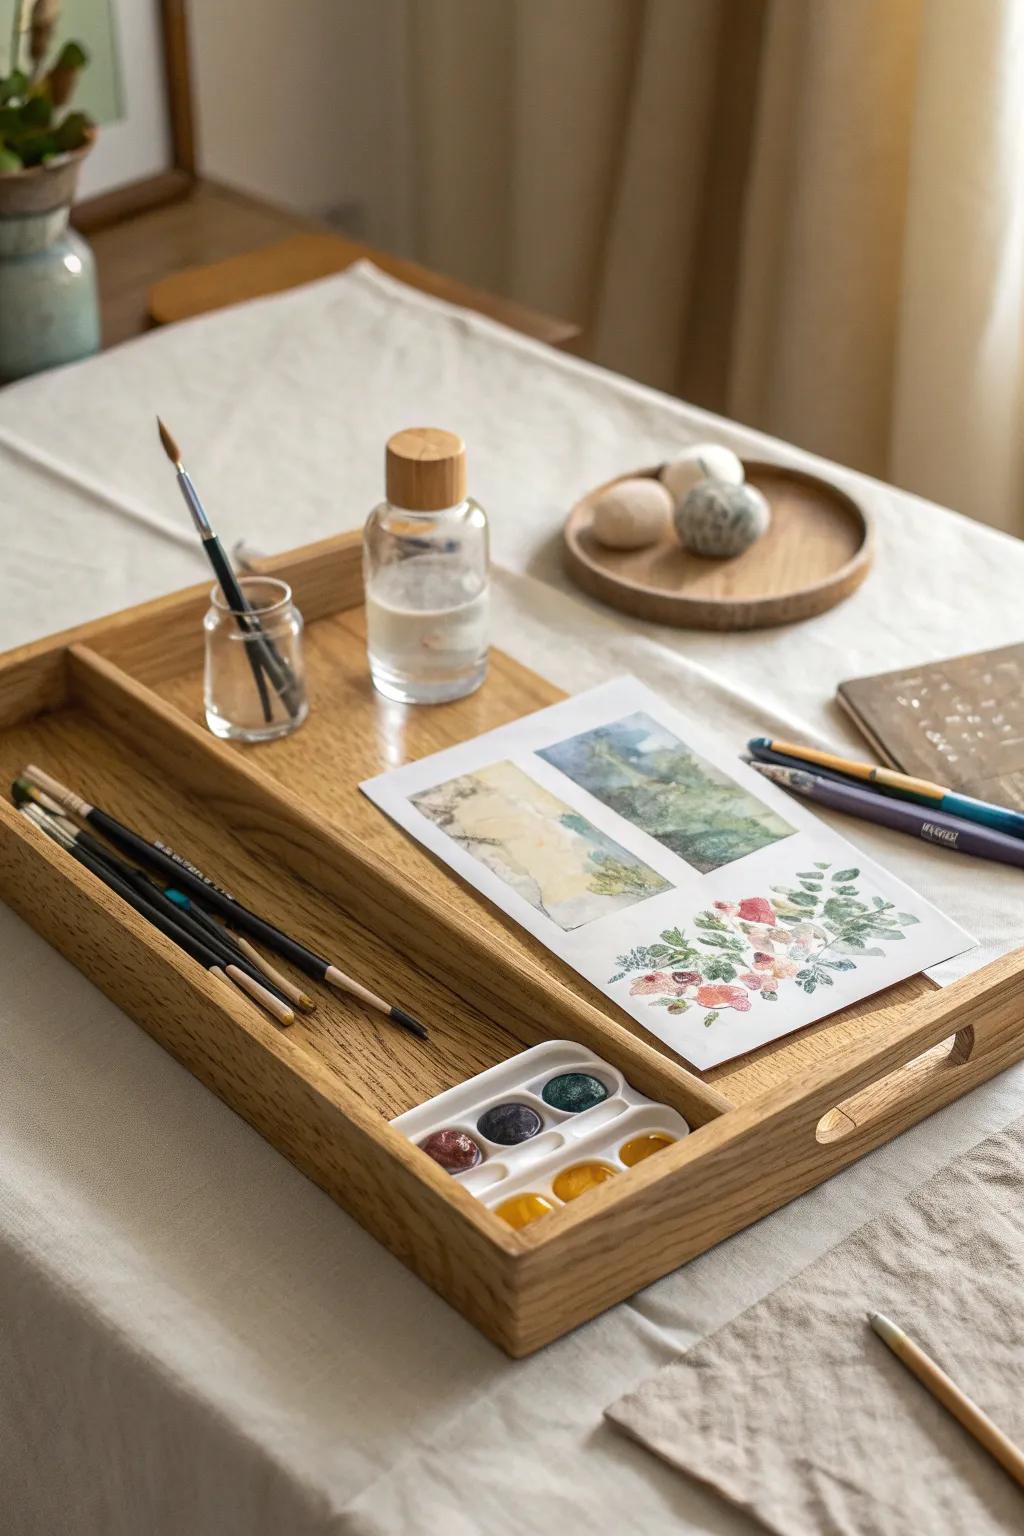
I keep each active piece in its own project tray with the exact supplies needed, and it stops me from leaving half-finished chaos on the table. This was a game-changer when my “art room” was really just the end of my dining table.
These products might help:
- Wooden Serving Tray with Dividers: Keep your brushes and artwork separated neatly with a sturdy, compartmentalized tray designed for easy transport.
- Small Glass Jars with Lids: Store your mixing water or solvents securely in small, leak-proof glass containers that fit perfectly on trays.
- Compact Ceramic Paint Palette: Mix your colors on a smooth, easy-to-clean ceramic surface that nests comfortably within your project tray.
File Finished Art Flat
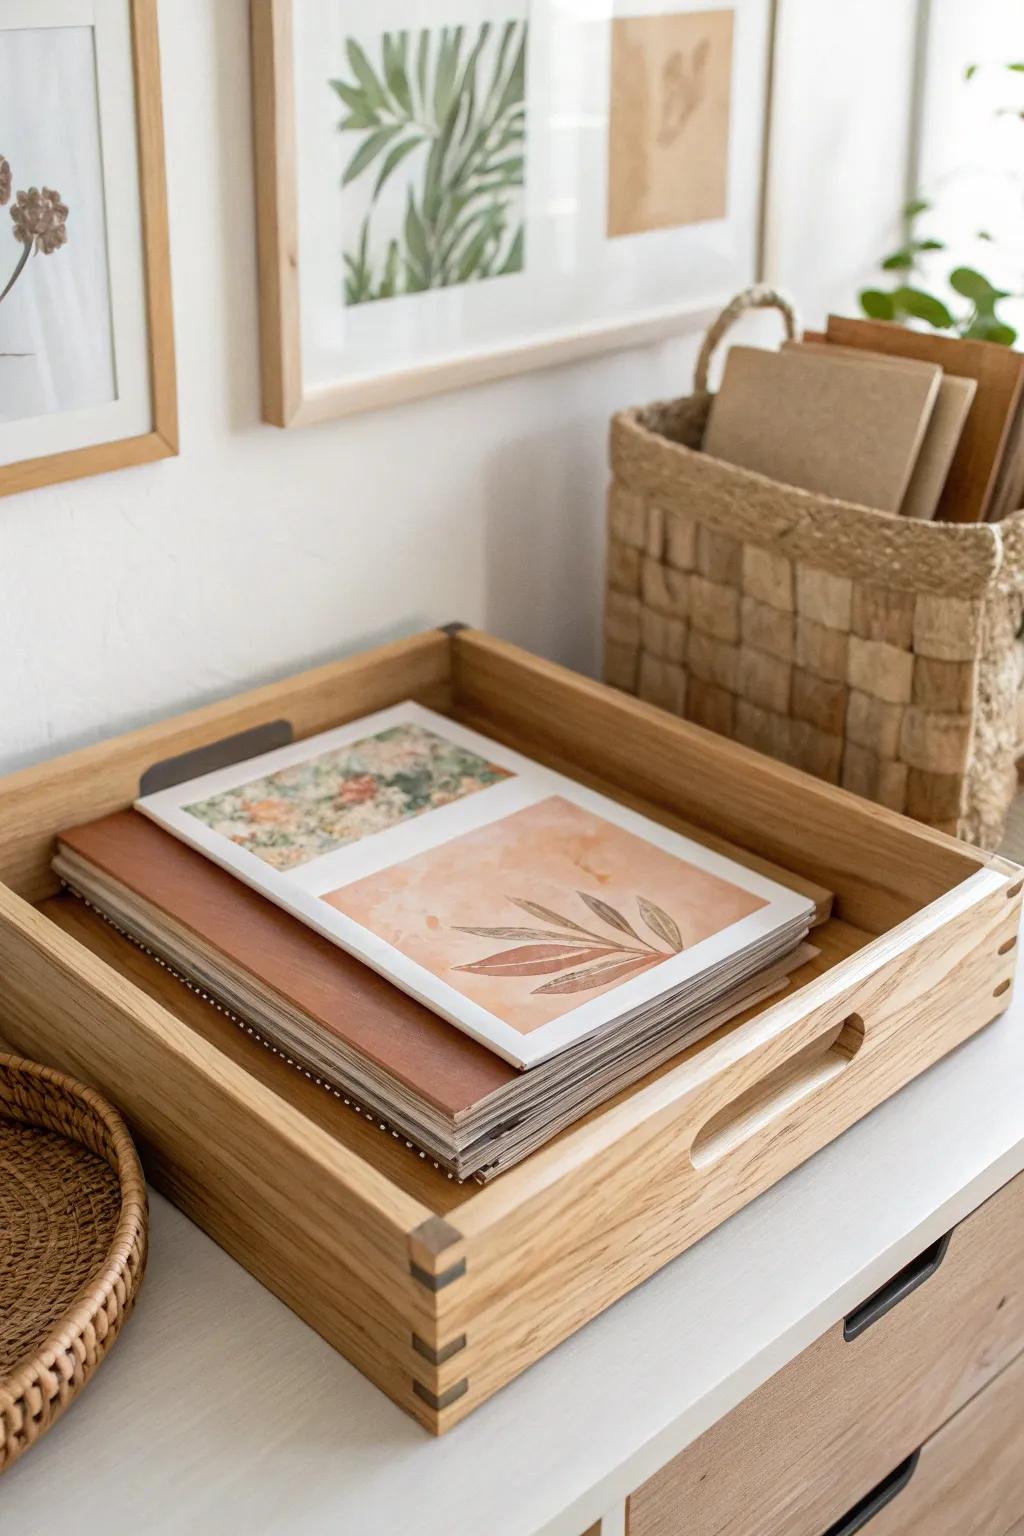
To avoid bent corners and curling paint paper, I store finished work in a flat-file style stack—basically shallow, wide storage where nothing gets folded. I started doing this after ruining a few pieces by leaning them behind furniture.
Might be a good match:
- Stackable Wooden Paper Tray: Organize your finished prints and sketches effortlessly with these classic trays that keep your artwork completely flat.
- Large Flat Storage Box: Protect larger art pieces from dust and damage by storing them inside these wide, durable archival boxes.
- Woven Storage Basket: Stash notebooks, sketchpads, or mounted canvases stylishly in a textured basket that complements natural decor themes.
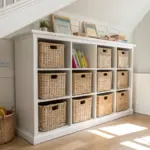
Use Hidden Storage in Dead Space
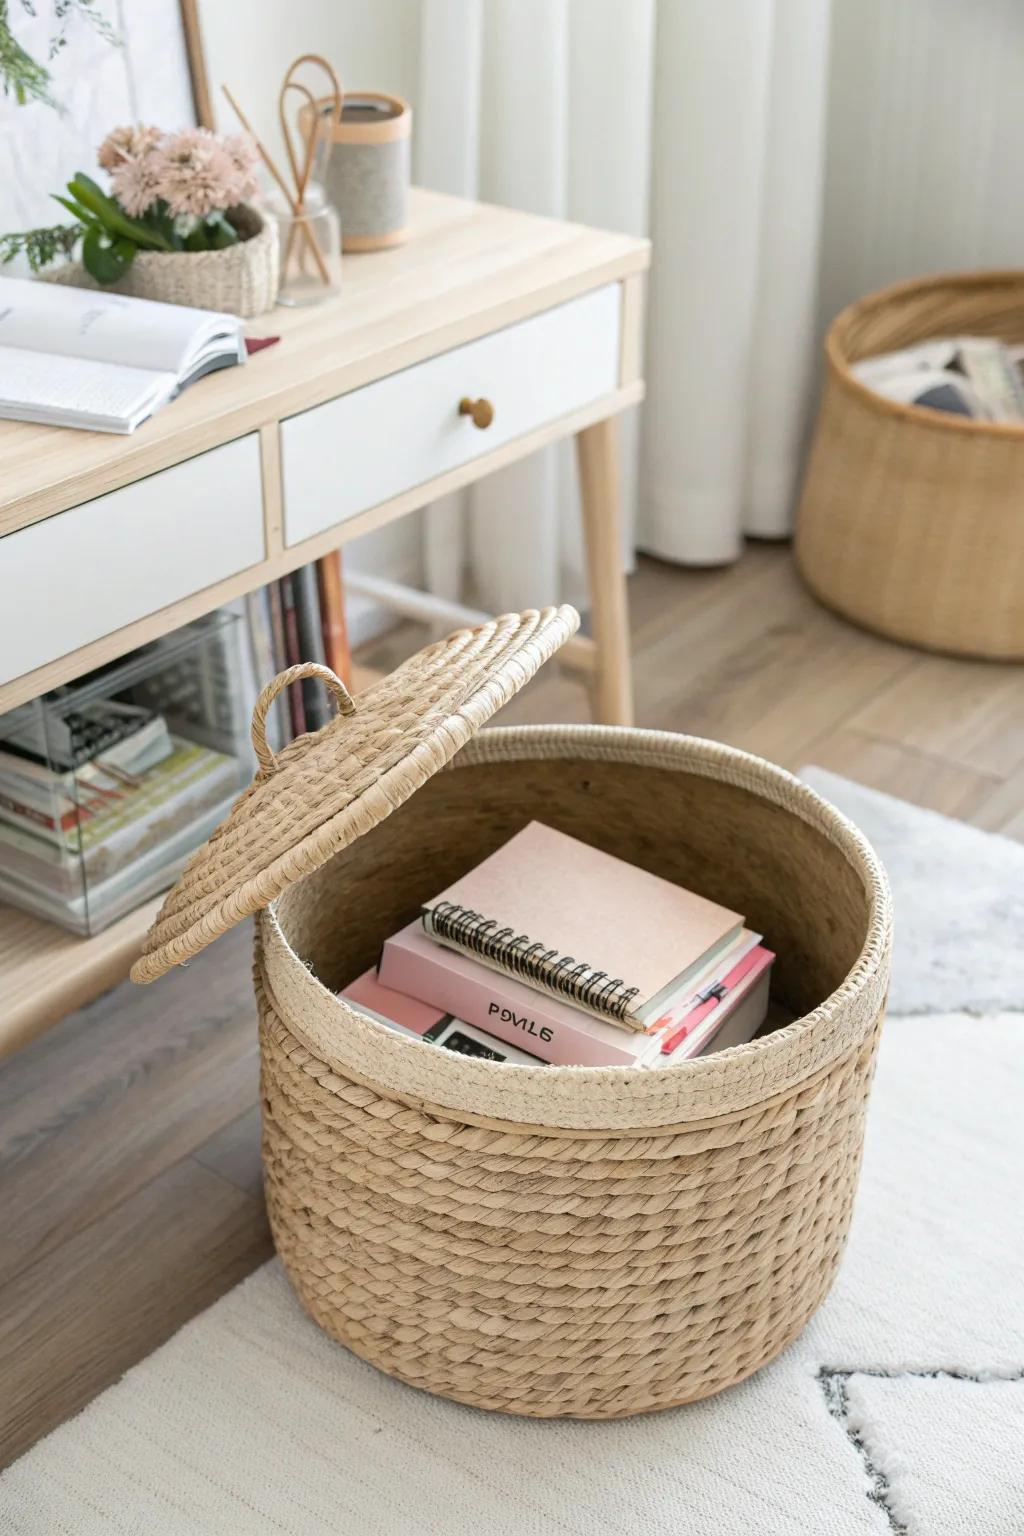
I stash rarely used supplies in under-table storage and behind-the-door organizers, because those spots don’t steal visual space. In my tiny apartment, that hidden storage is what let my art area look calm even when I owned a lot of materials.
You might give these a try:
- Woven Storage Basket With Lid: Tuck away bulky supplies in a stylish, lidded basket to reduce visual clutter while keeping items accessible.
- Clear Stackable Drawer Organizer: Maximize vertical space under desks or on shelves with see-through drawers that make finding small tools easy.
- Large Open Floor Basket: Store oversized paper rolls or fabric scraps in a roomy, open basket that slides neatly into corners.
Try a Wall-Mounted “Art Menu” System
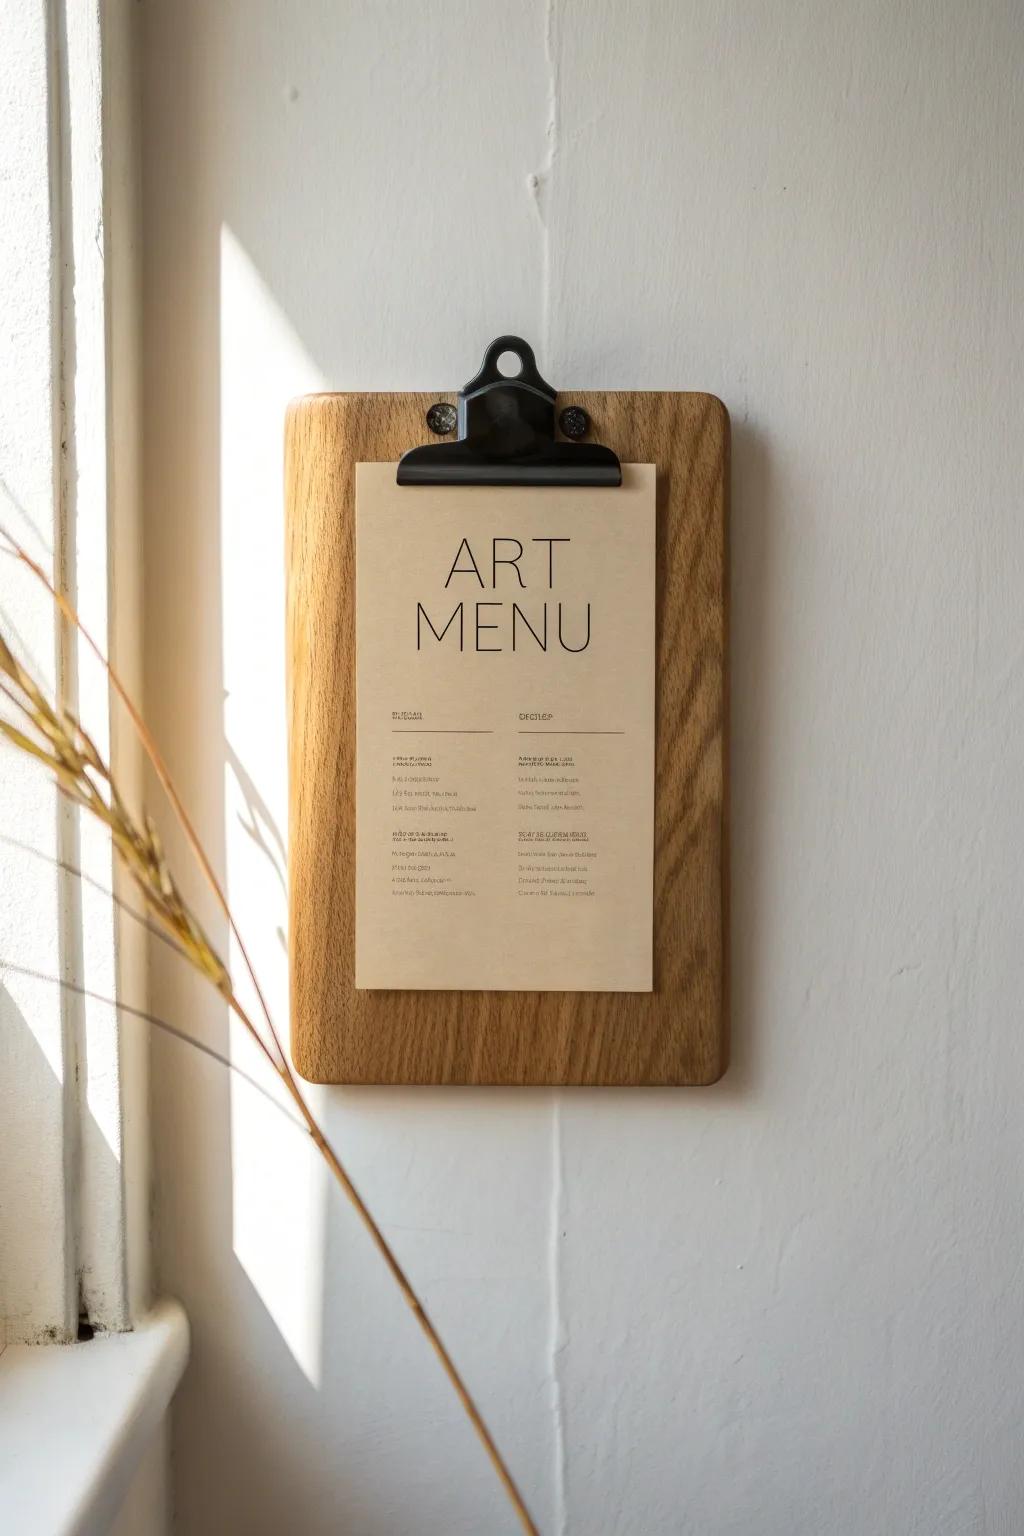
This is my favorite weird-but-amazing trick: I hang a few clipboards or clips on the wall as an art menu, each holding a project plan plus the supply list. When I did this, I stopped rummaging through bins because I could see exactly what to pull for the next session.
A few relevant products:
- Wooden Clipboard with Hanging Hole: Choose sturdy wooden clipboards to create a professional look for displaying your project plans clearly.
- Command Wall Hooks or Strips: Use damage-free wall hooks or strips to easily mount and rearrange your art boards anywhere.
- Kraft Cardstock Paper: Print your project lists on thick kraft paper to match the aesthetic and improve durability.


