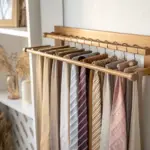
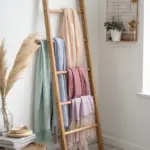
Jewelry gets messy fast in a small space, especially when necklaces start tangling and earrings lose their mates.
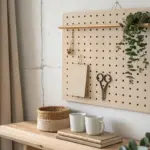
Pegboard Jewelry Wall
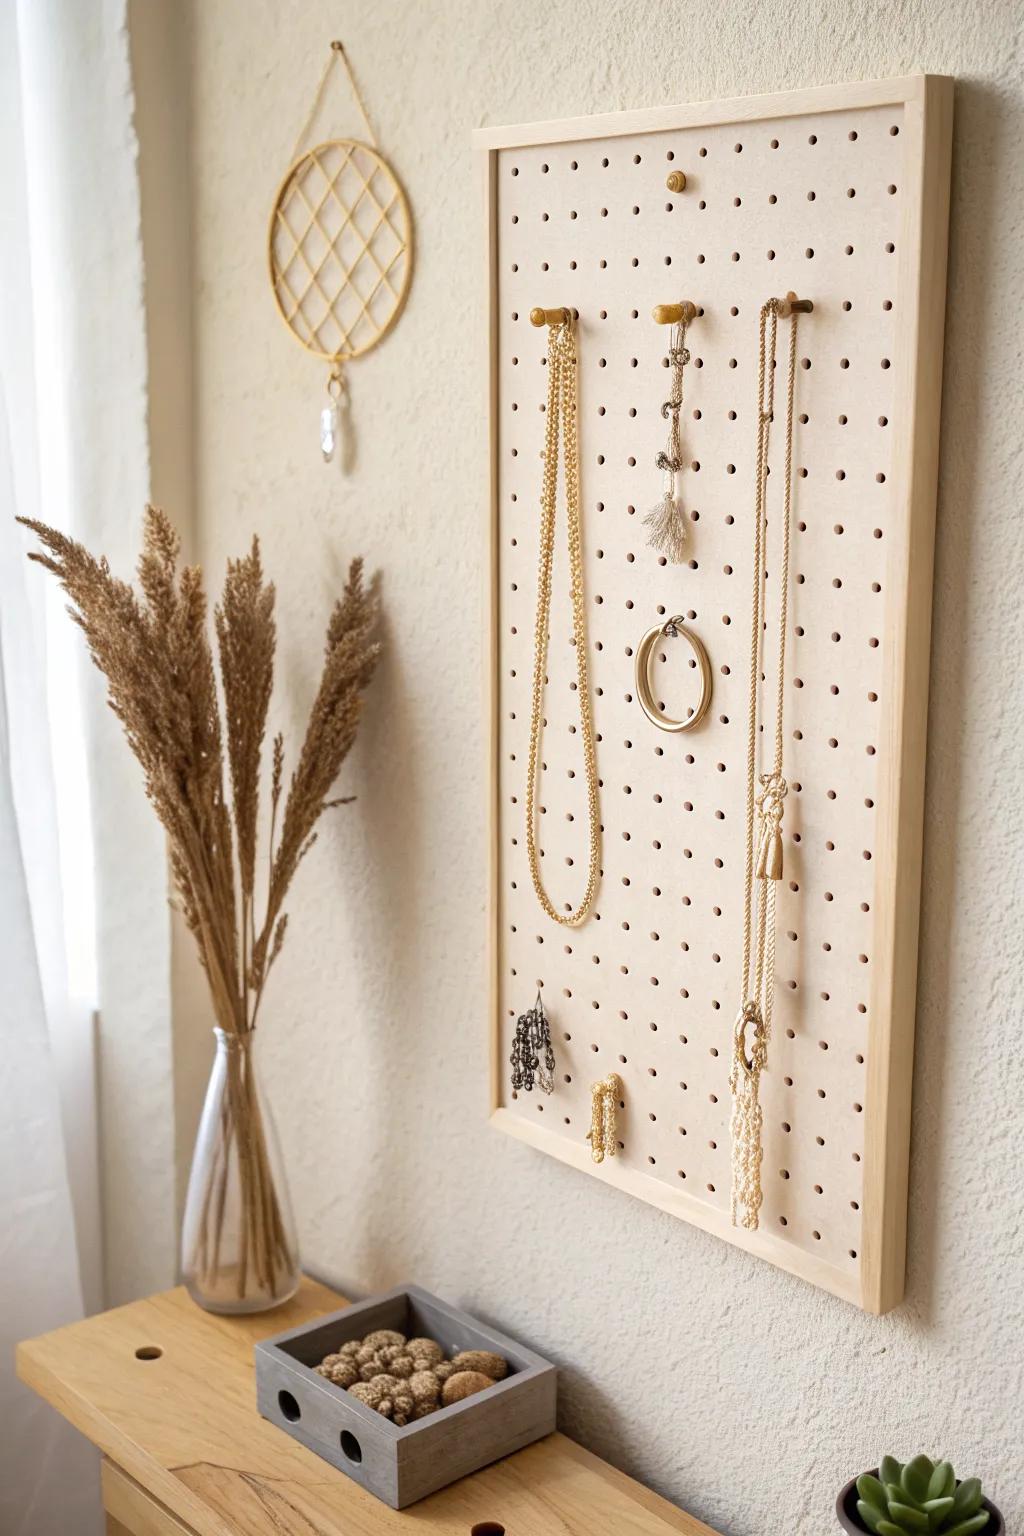
When I was living in a studio, I mounted a small pegboard and used mini pegs and hooks to create zones for necklaces and bracelets. It’s one of those setups you can keep tweaking as your collection changes, which I find weirdly satisfying.
Might be a good match:
- Wooden Pegboard: Choose a neutral or wood-toned pegboard base to create a clean, natural backdrop for your jewelry collection.
- Pegboard Hooks & Dowels: Use varied hooks and wooden dowels to securely hang everything from delicate chains to chunky statement bracelets.
- Small Wooden Tray Box: Place a small organized tray nearby or on a shelf below to catch rings and loose earrings safely.

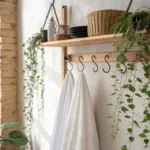
Wall Hook Rail
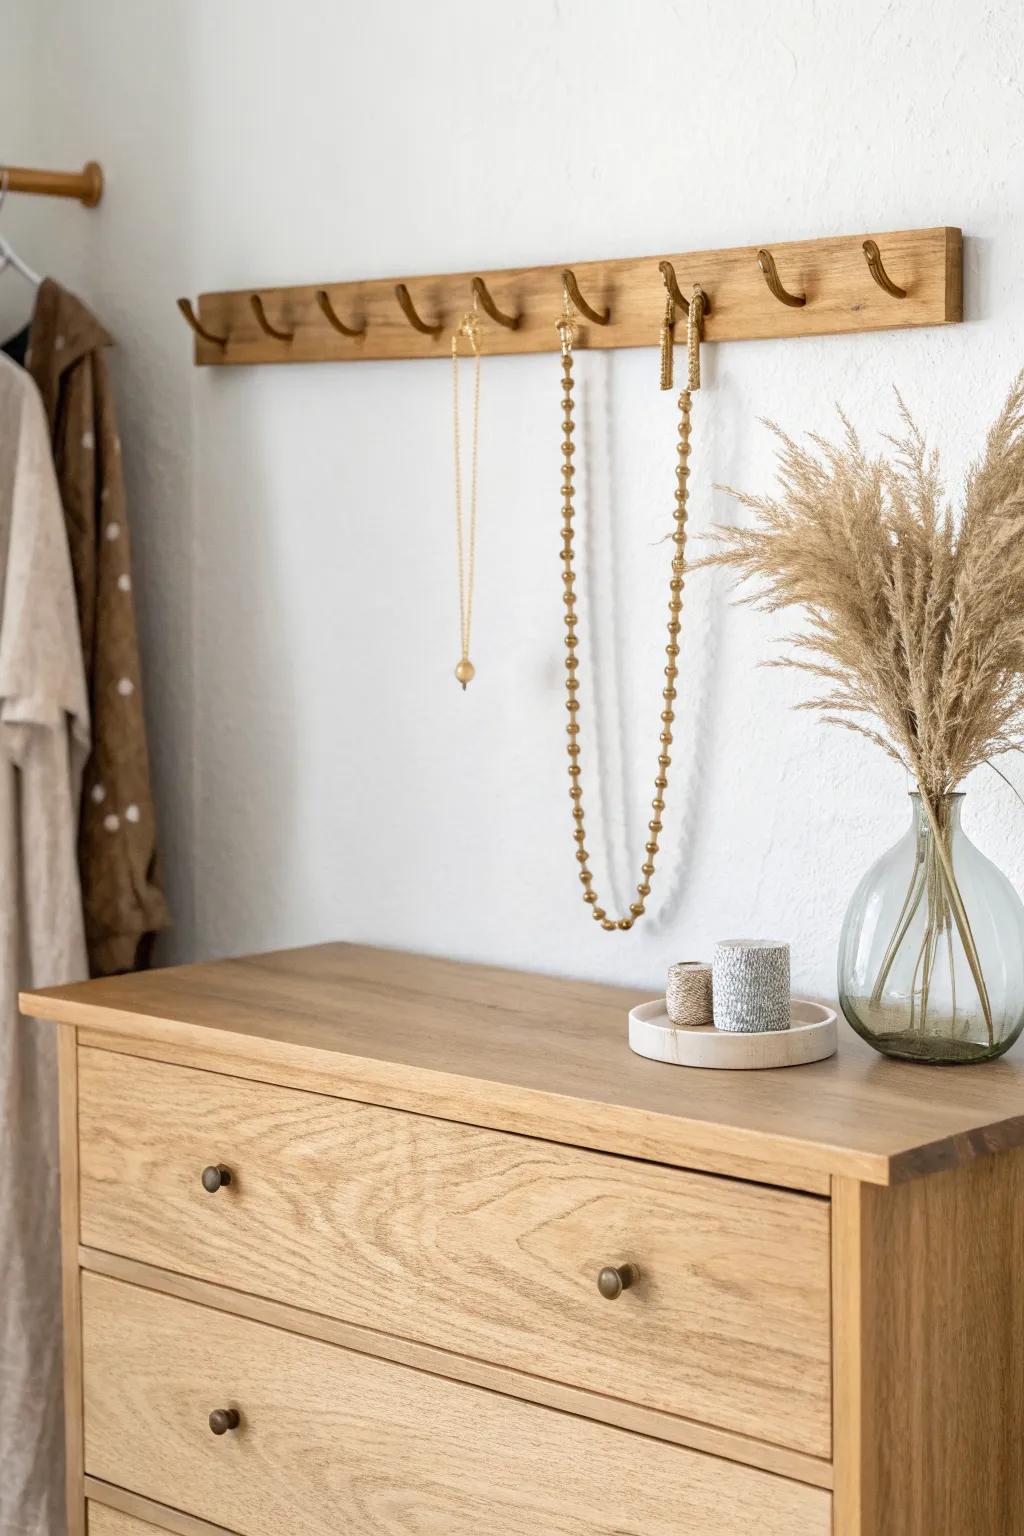
In my 450 sq ft place, a simple wall-mounted wood rail with evenly spaced hooks instantly stopped my necklaces from becoming one giant knot. I like hanging it above my dresser so it doubles as decor and I can grab a piece in seconds.
Explore these options:
- Wooden Wall Hook Rack: Organize your necklaces easily with a classic wooden rack that prevents tangles and displays your favorite pieces stylishly.
- Individual Brass Screw Hooks: Create a completely custom jewelry rail by screwing these sturdy brass hooks into any piece of reclaimed wood.
- Unfinished Wood Strip: Design the perfect backing for your jewelry station using a simple wood strip ready for staining or painting.

Framed Mesh Earring Board
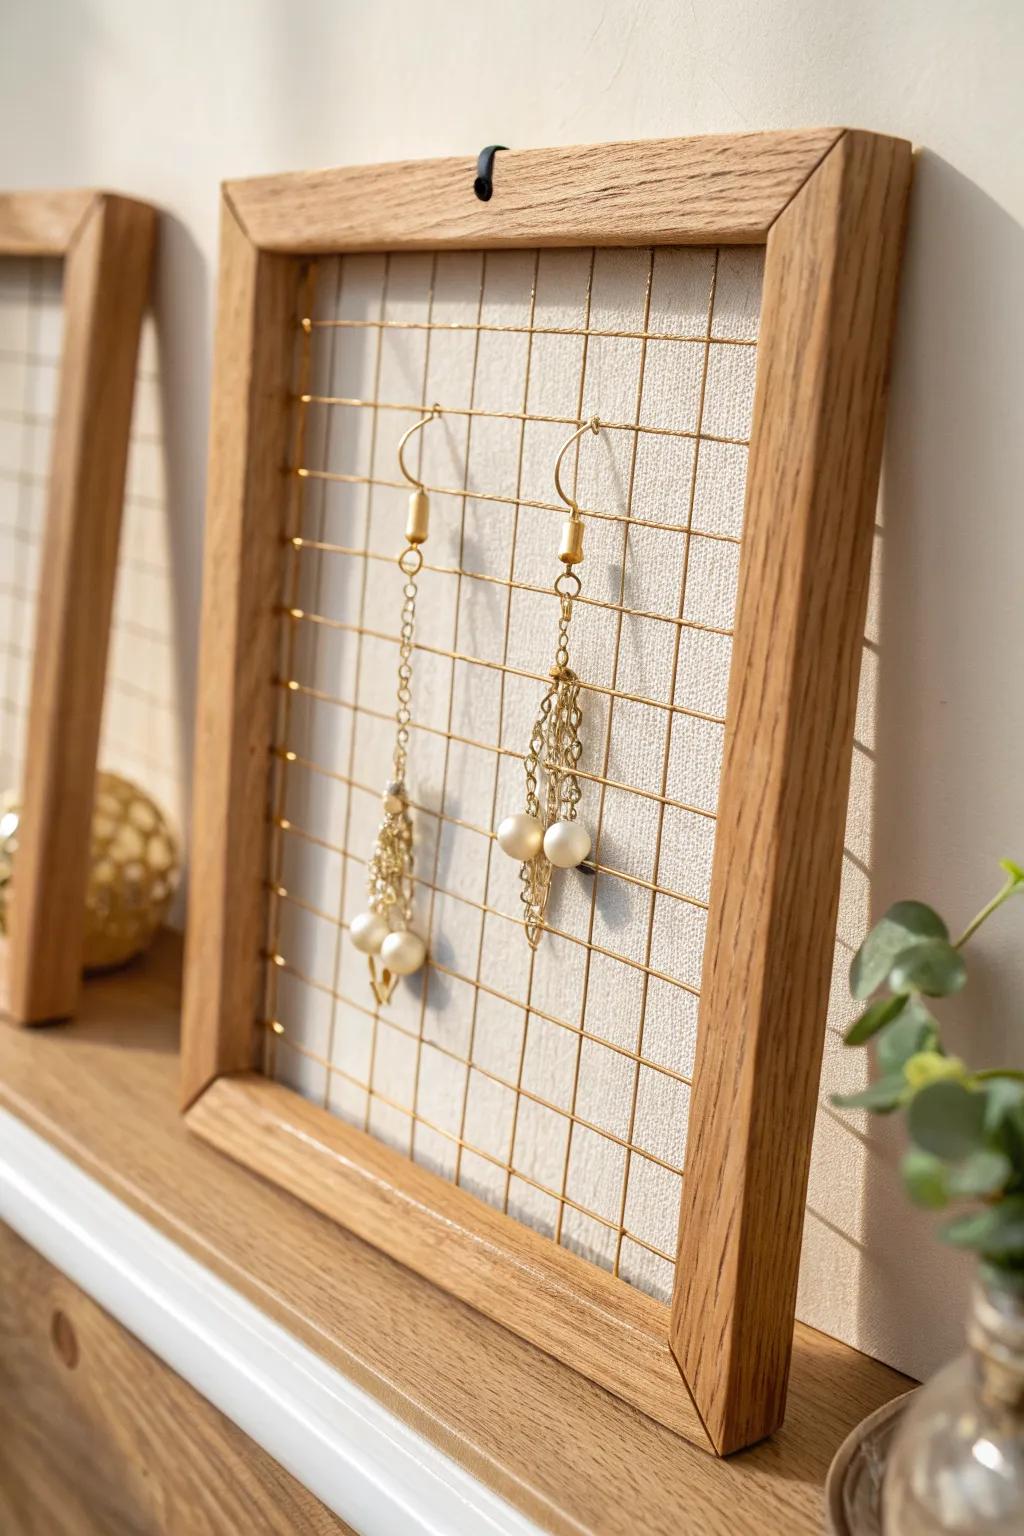
I turned an old frame into an earring holder by stapling wire mesh inside, and it’s been my easiest fix for dangle earrings ever. I love that I can see every pair at once without digging through a box.
Some ideas to consider:
- Gold Wire Mesh or Hardware Cloth: Create the perfect grid for hanging your jewelry by stapling this mesh securely onto the back of any frame.
- Heavy Duty Staple Gun: Secure the wire mesh firmly to your wooden frame with a durable staple gun designed for upholstery or crafting projects.
- Unfinished Wood Picture Frames: Start your project with a simple wooden frame that you can stain or paint to match your room’s decor perfectly.
Knob-and-Slat Necklace Strip
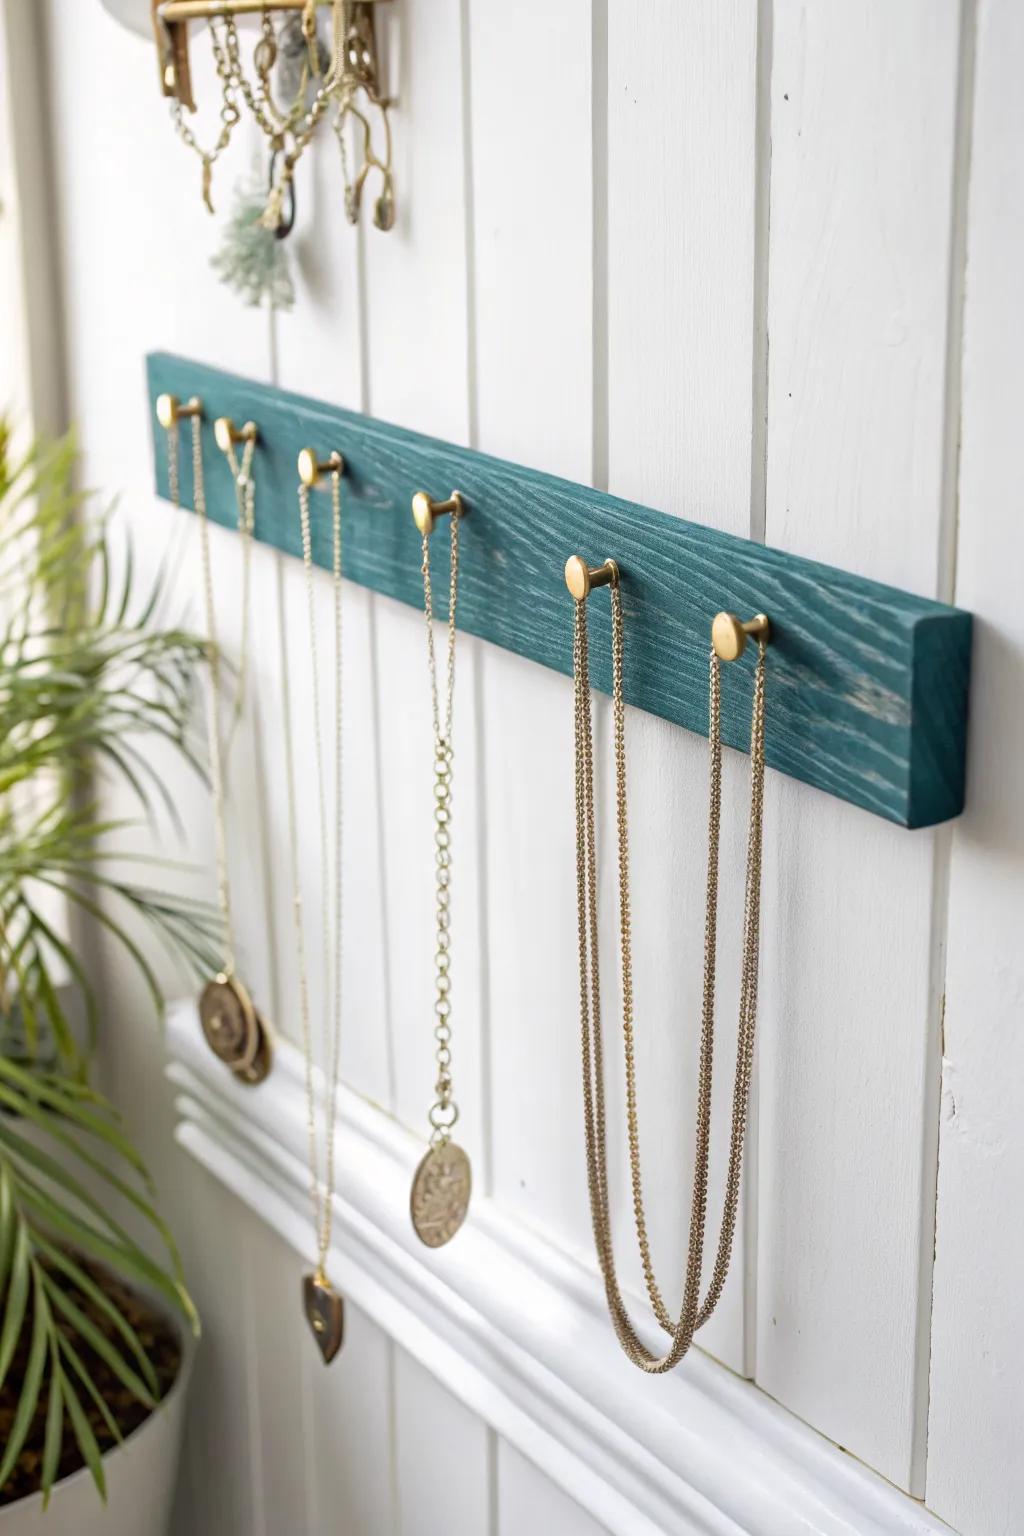
I’ve made this for clients in tight bedrooms: a painted wood slat with spaced cabinet knobs as individual necklace hangers. My favorite part is how it keeps chains tangle-free because each one gets its own knob.
A few suggestions:
- Brass Cylindrical Cabinet Knobs: Choose sleek gold knobs to easily hang your necklaces while adding a modern metallic touch to your wall decor.
- Unfinished Wood Slat Board: Grab a sturdy wooden strip as your base, ready to be cut to size and painted to match.
- Teal Chalk Style Paint: Apply a coat of rich teal paint to recreate the look and make your jewelry display pop against white walls.
Upcycled Hanger Holder
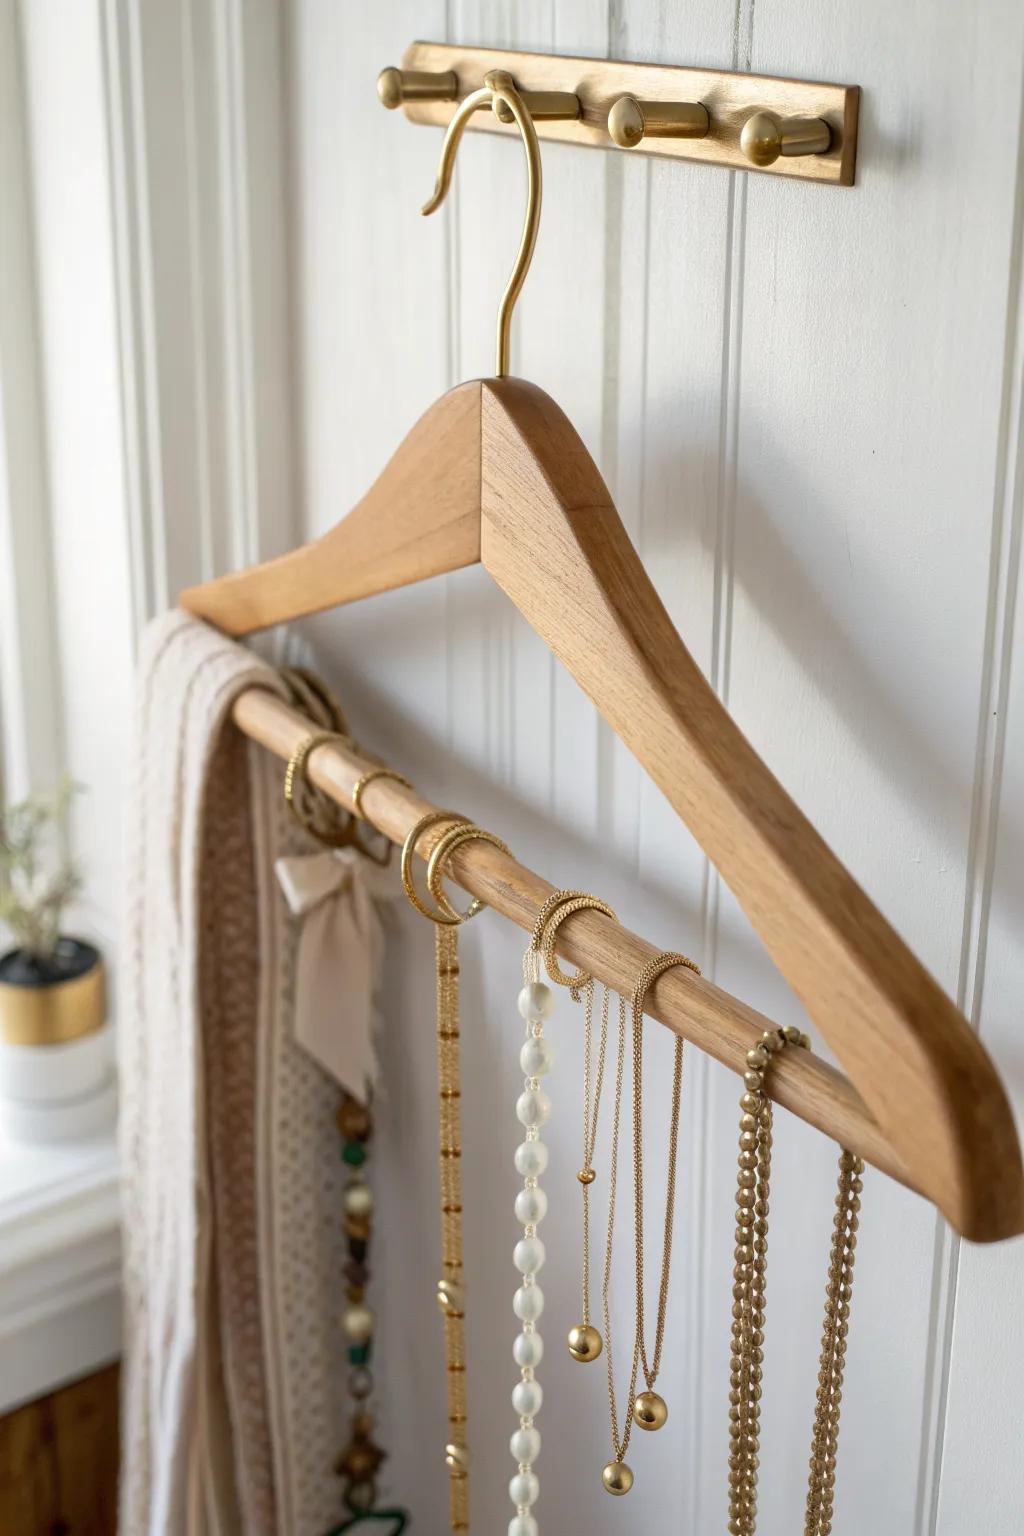
I’ve used a sturdy clothes hanger organizer with added screw-in hooks along the bottom to hang necklaces in neat rows. It’s perfect when you need a small-space solution that can live on a closet rod and disappear.
Some handy options:
- Sturdy Wooden Hangers: Start your project with a durable base by choosing a solid wooden hanger that supports heavier statement pieces.
- Small Brass Screw Hooks: Securely organize your necklaces by screwing these simple, elegant metal hooks directly into the hanger’s bottom edge.
- Gold Wall Hooks: Display your newly created organizer on your wall or closet door with these stylish, easy-to-install hanging racks.
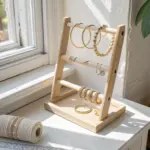
Tabletop Jewelry Tree Stand
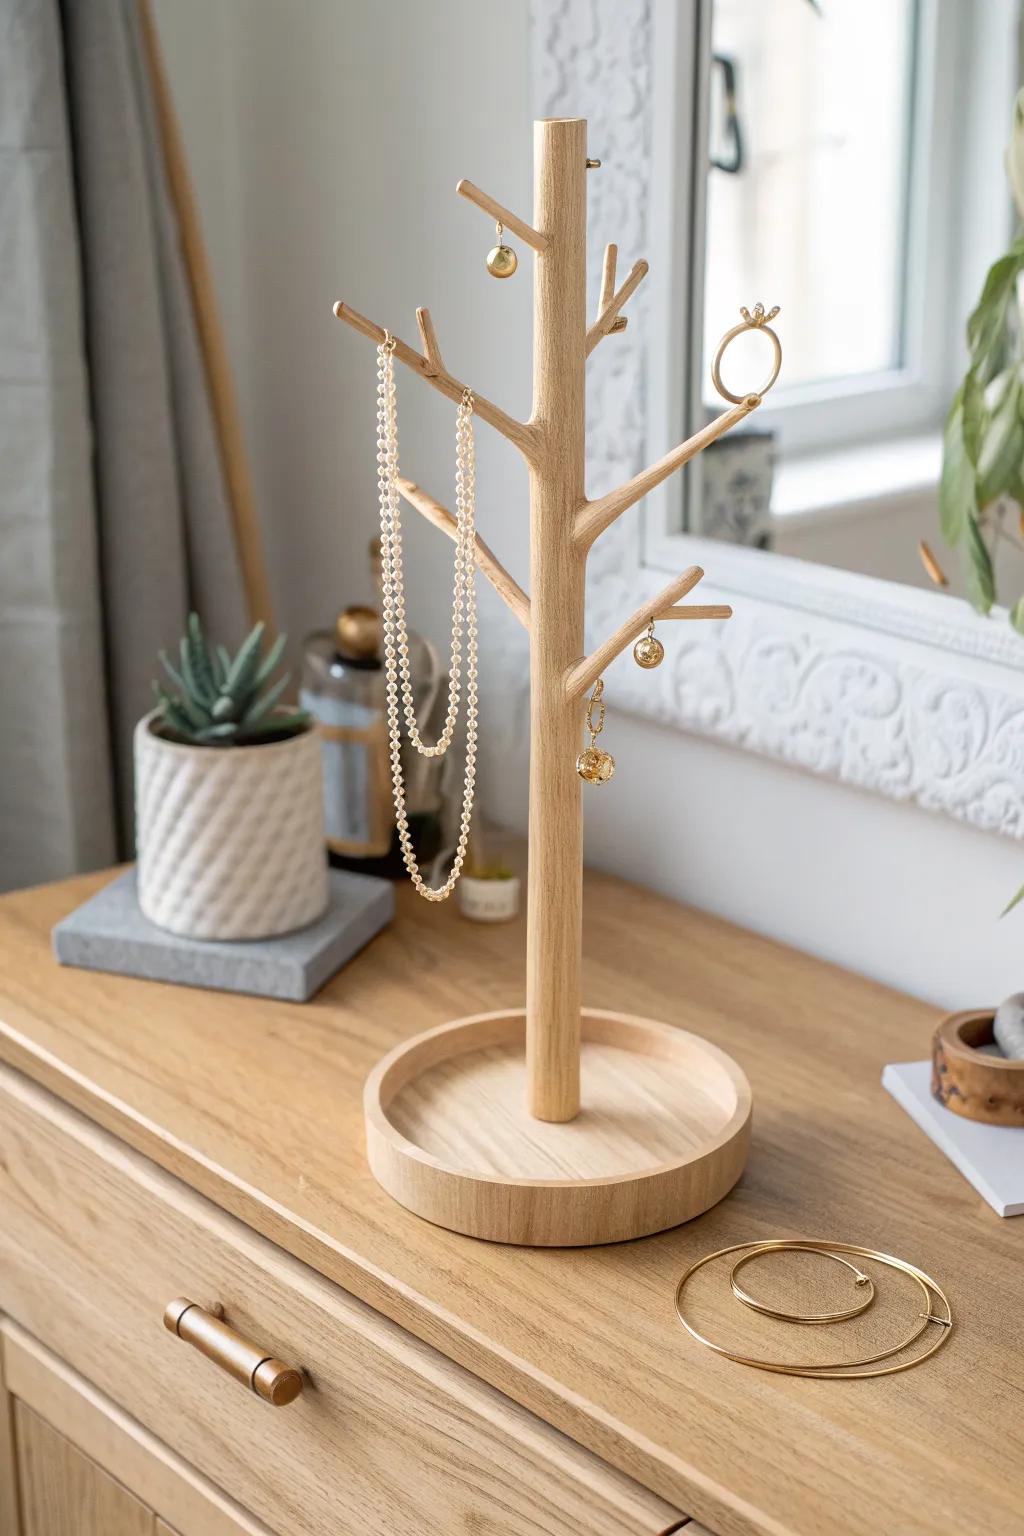
I’ve made a simple tabletop stand with a vertical post and branching pegs, and it instantly made my vanity feel more pulled together. I keep my most-worn necklaces on the taller pegs and hang smaller pieces lower so nothing overlaps.
A few things you might like:
- Wooden Jewelry Tree Stand: Organize your necklaces and rings effortlessly with a natural wood stand that adds minimalist charm to your vanity.
- Unfinished Wood Dowel Rods: Craft your own custom jewelry tree by using smooth, sturdy dowels for the main post and branches.
- Round Wooden Tray Base: Create a stable foundation for your stand that doubles as a catch-all dish for smaller earrings and rings.
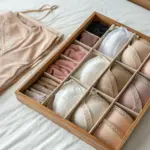
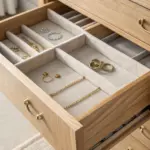
Repurposed Compartment Tray Caddy
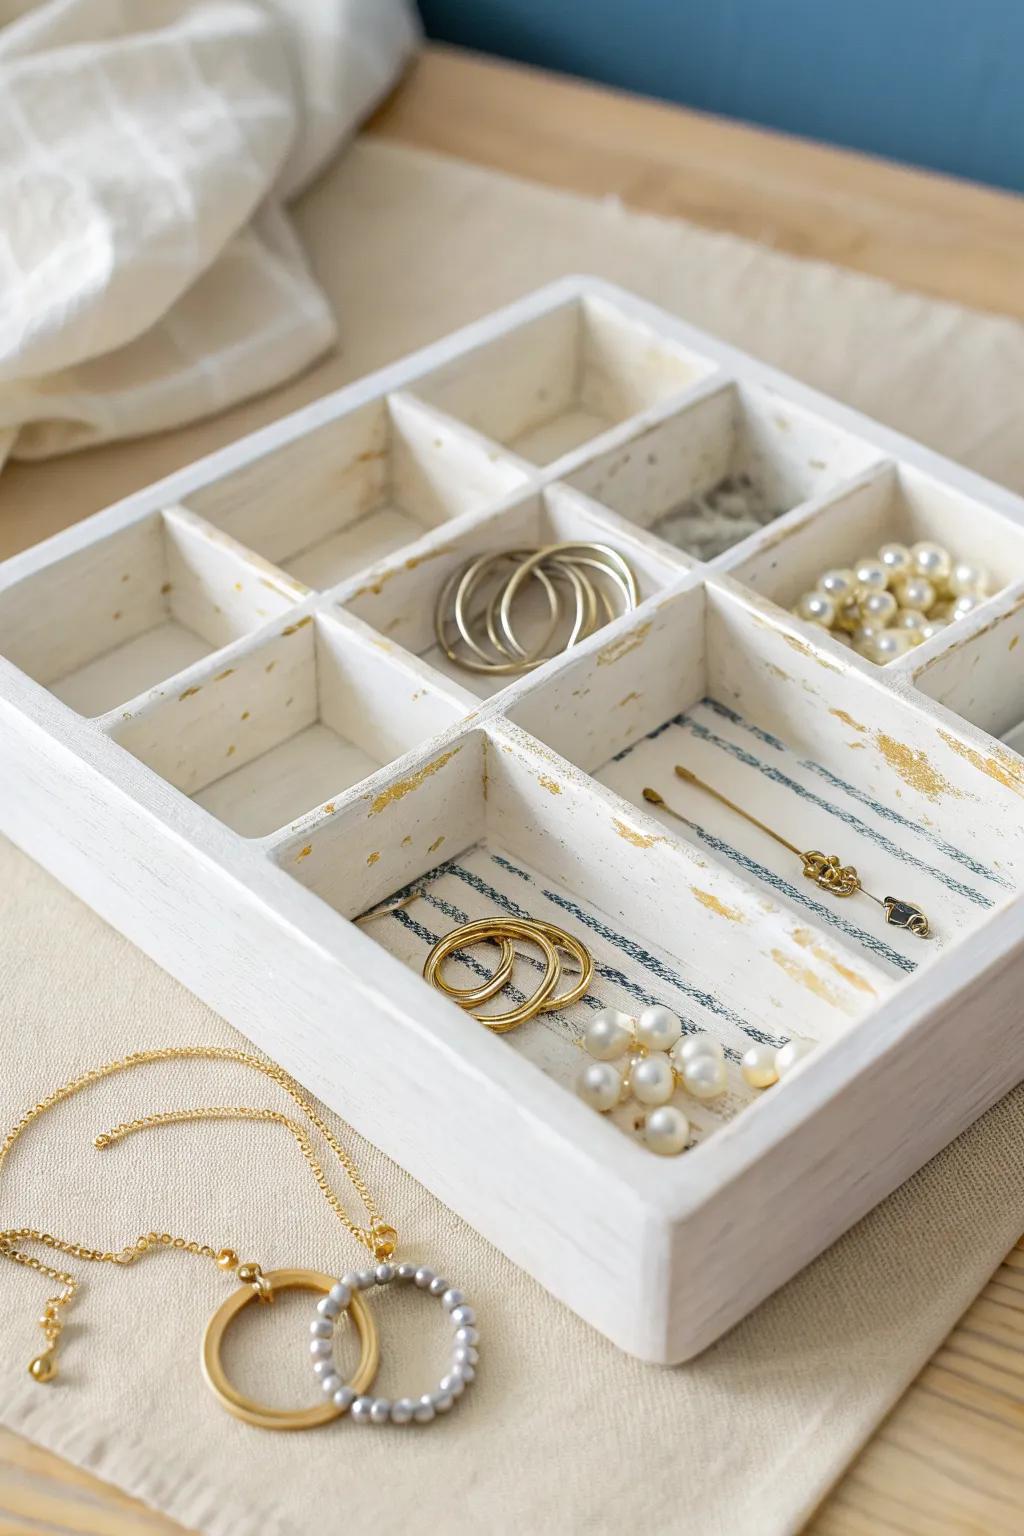
I’ve repainted an old compartment tray and used it as a jewelry holder for studs, pins, and tiny chains that don’t hang nicely. In small apartments, I love anything that turns into grab-and-go storage without adding visual clutter.
Check if these fit your needs:
- Wooden Compartment Organizer Box: Start your project with a basic wooden tray, ready for painting or staining to match your decor perfectly.
- Chalky Finish Paint: Achieve that trendy distressed vintage look effortlessly by applying this matte finish paint to your new jewelry holder.
- Self-Adhesive Velvet Liner: Protect your delicate jewelry scratch-free by lining the bottom of each compartment with soft, cut-to-size velvet fabric.
Driftwood Necklace Branch
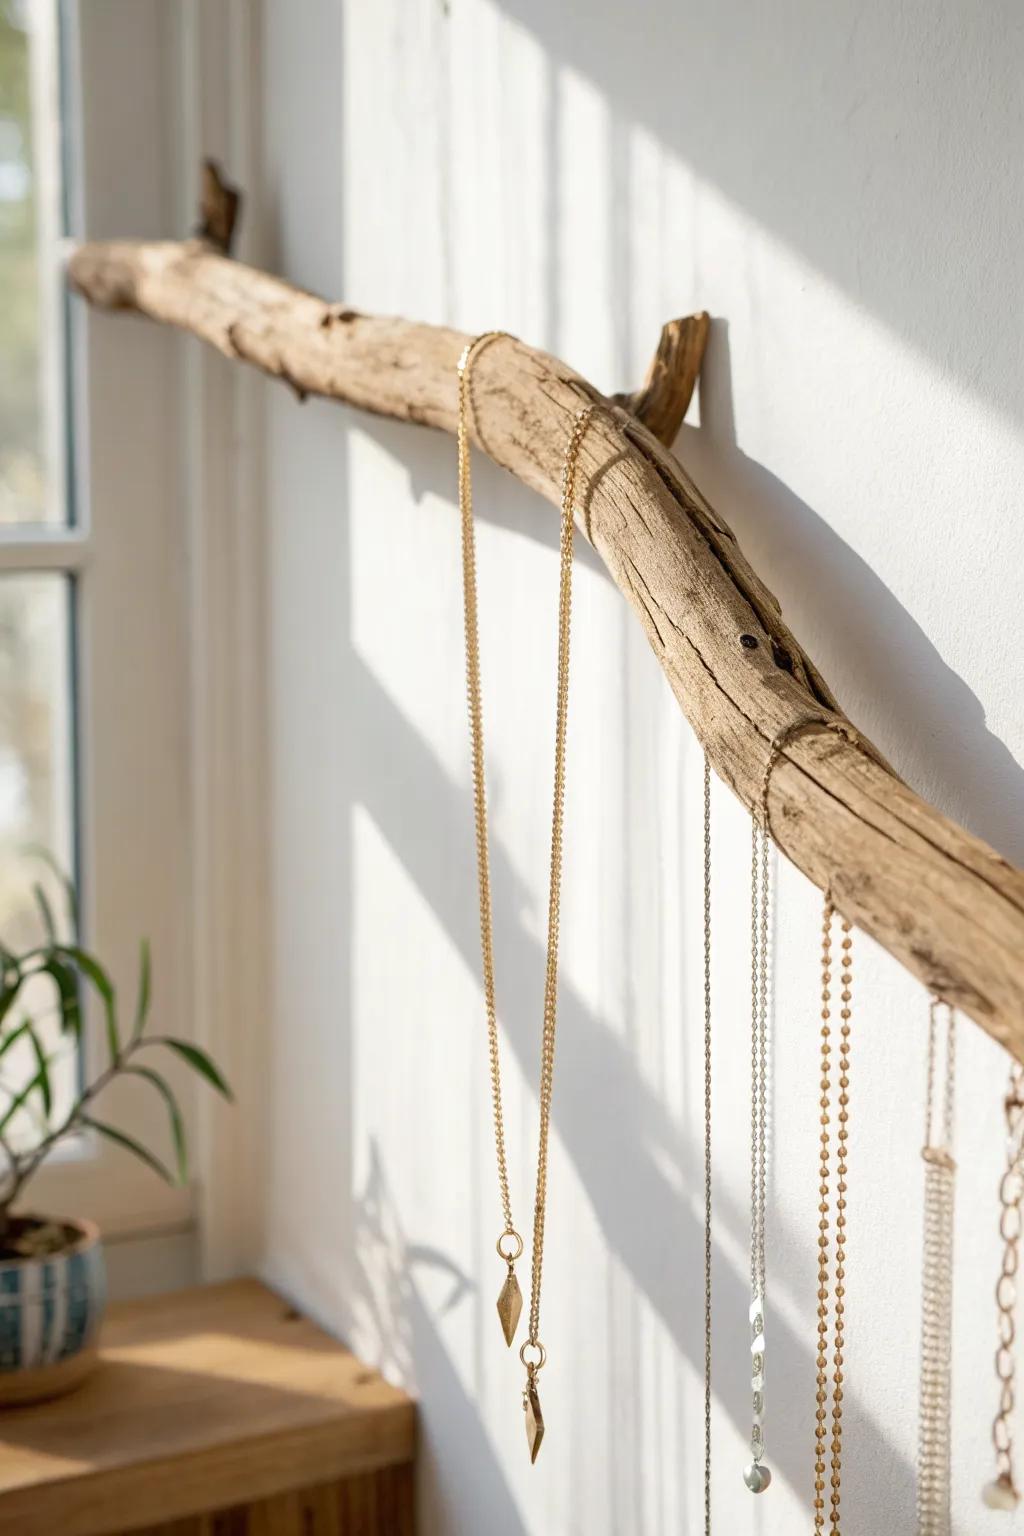
I’ve used a sanded driftwood branch mounted on brackets as a rustic necklace hanger, and it always gets compliments. The uneven shape actually helps separate chains, so my long necklaces don’t slide into each other.
Useful items to consider:
- Natural Driftwood Branch: Find the perfect rustic base for your display with a natural driftwood piece ready for mounting.
- Wall Hooks or Brackets: Securely mount your wooden branch to the wall with sturdy hooks that complement your room’s style.
- Gold Plated Chains: Fill your new jewelry holder with elegant gold plated chains that shimmer beautifully against natural wood.
Decorative Bust Necklace Holder
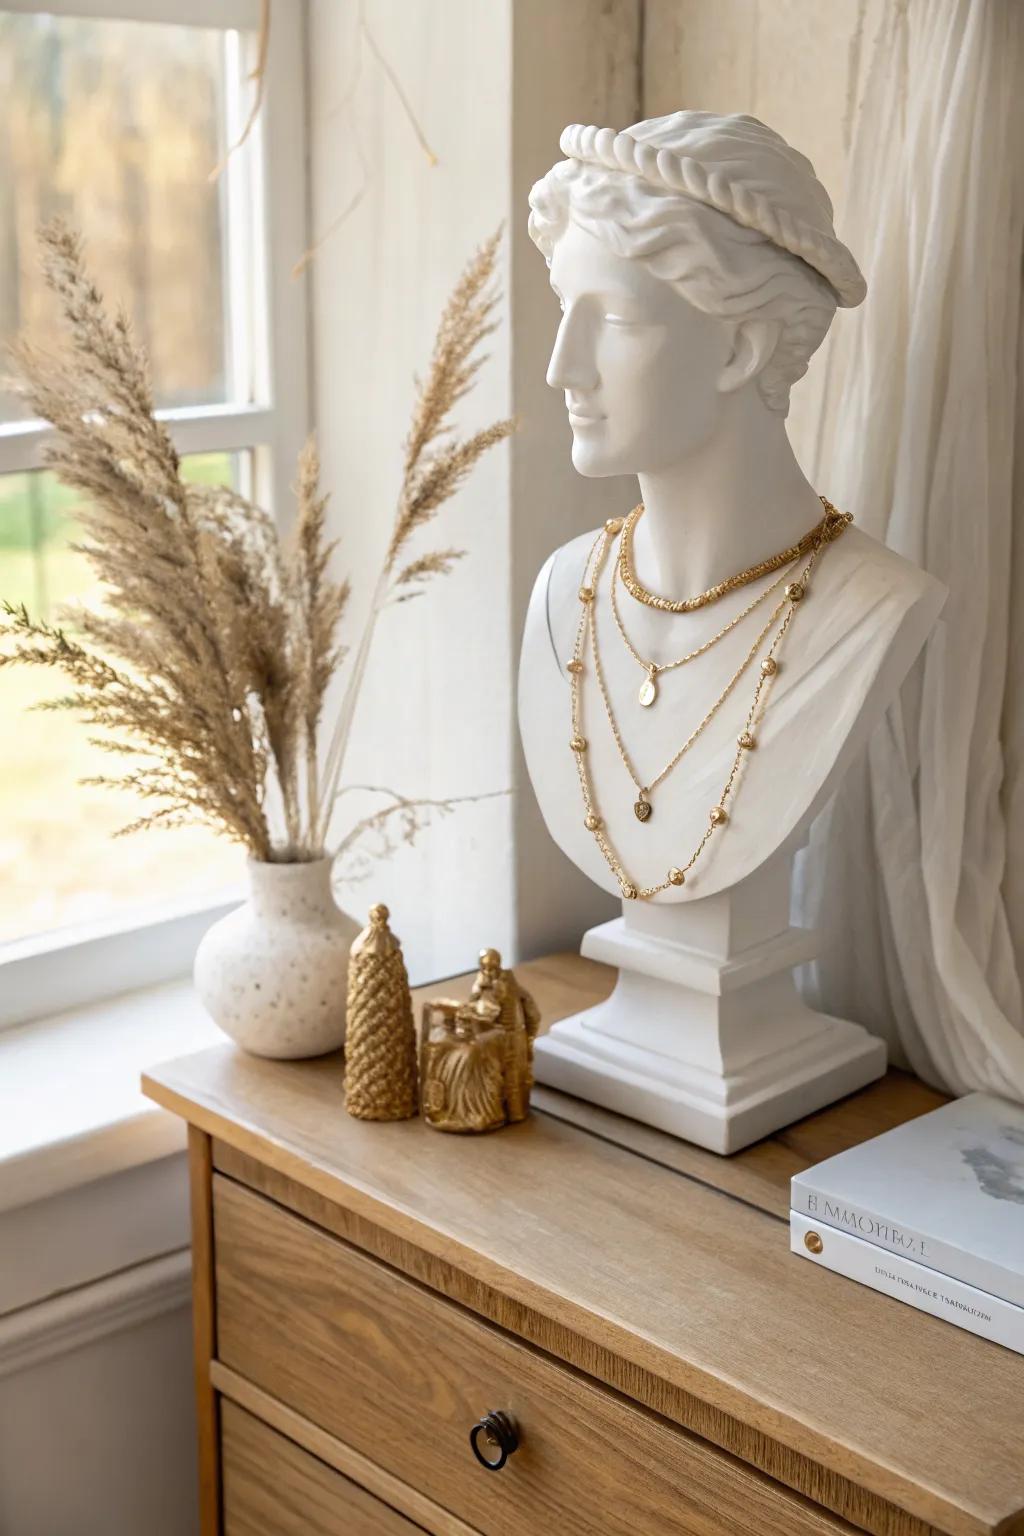
I’ve used a simple decorative bust as a necklace stand, and it feels like having a tiny art piece on my dresser. It’s surprisingly practical for layering because you can see how different chains and pendants fall together.
A few helpful options:
- Classical Statue Bust: Display your favorite necklaces in style with a classical bust that adds an elegant, artistic touch to your dresser.
- Gold Layered Necklace Set: Experiment with different chain lengths and pendants with a versatile layered set that perfectly complements your new display.
- Ceramic Vase Dried Flowers: Complete your styling vignette by adding natural textures with a neutral ceramic vase perfect for dried pampas grass.
Swivel Stack Jewelry Tower
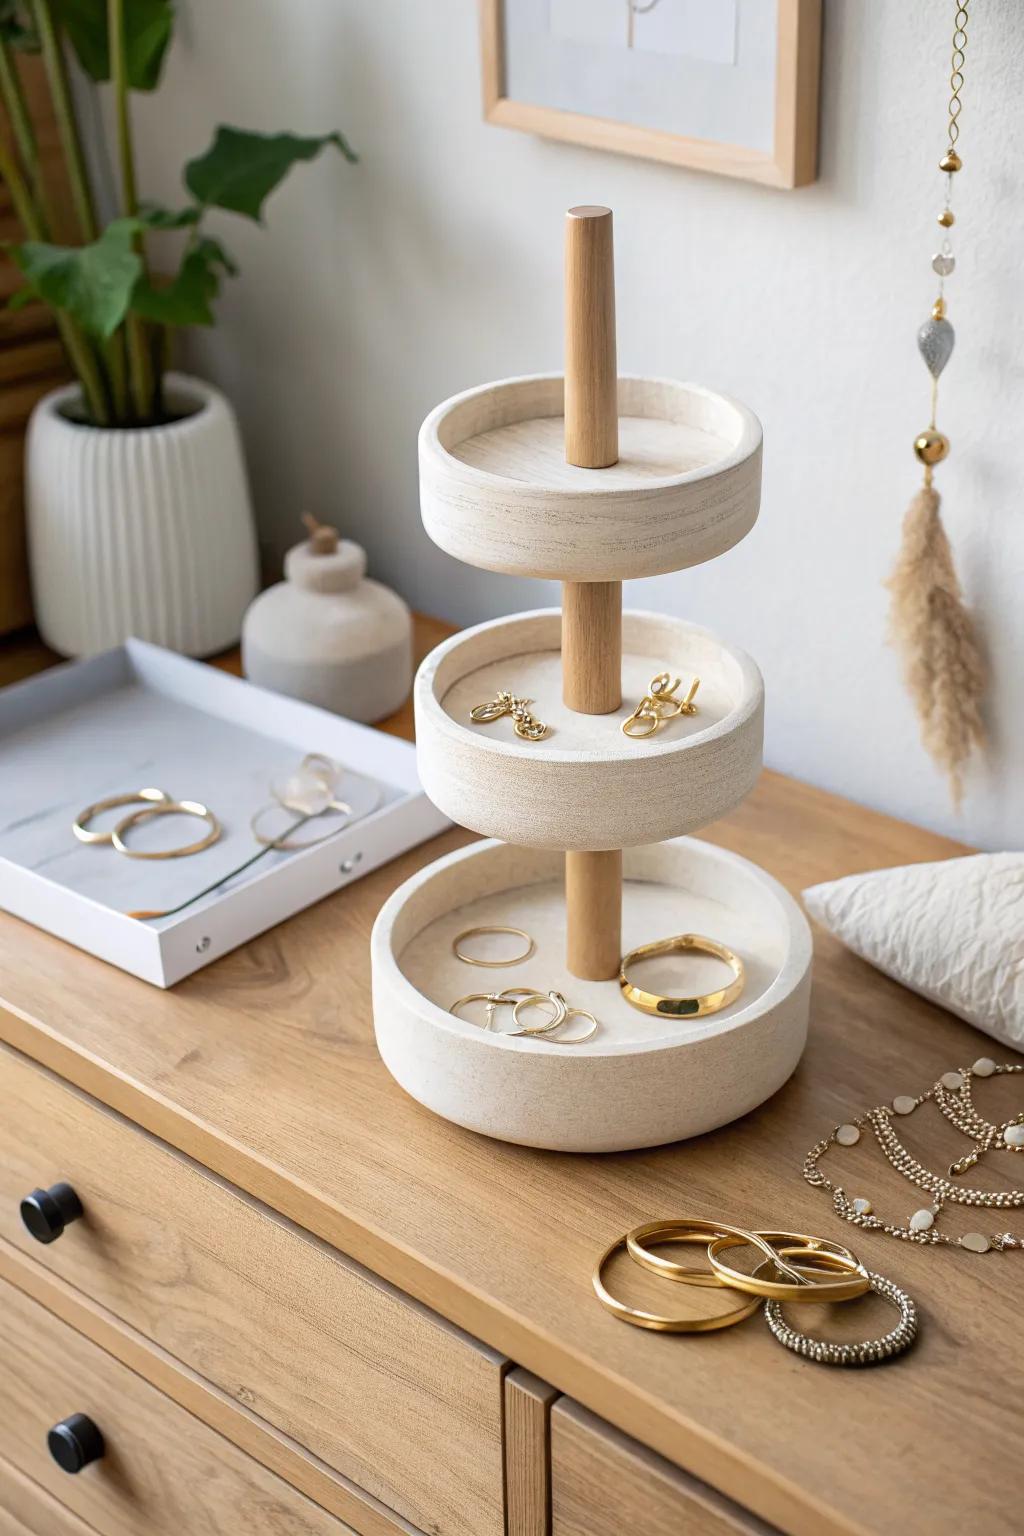
I DIY’d a rotating tower using stacked round platforms and a center dowel, and it holds a surprising amount of jewelry in a tiny footprint. If you’re short on surface space like I usually am, a vertical organizer with a spinning base feels like magic.
Possibly helpful picks:
- Wooden Round Serving Trays Set: Use these wood trays as the perfect base tiers for your tower to hold rings and earrings securely.
- Lazy Susan Turntable Hardware: Attach this smooth bearing mechanism to the bottom tier to make your entire jewelry tower spin effortlessly.
- Assorted Wooden Dowel Rods: Create the central support pillar for your tower with these sturdy rods, easily cut to your desired height.


