A shower niche can look custom and expensive—or a little unfinished—and the trim is what makes the difference. In my tiny-apartment bathroom projects, I’ve learned that the right edge detail is the fastest way to make a niche look intentional and polished.
Light-Channel Trim for a Glowing Edge
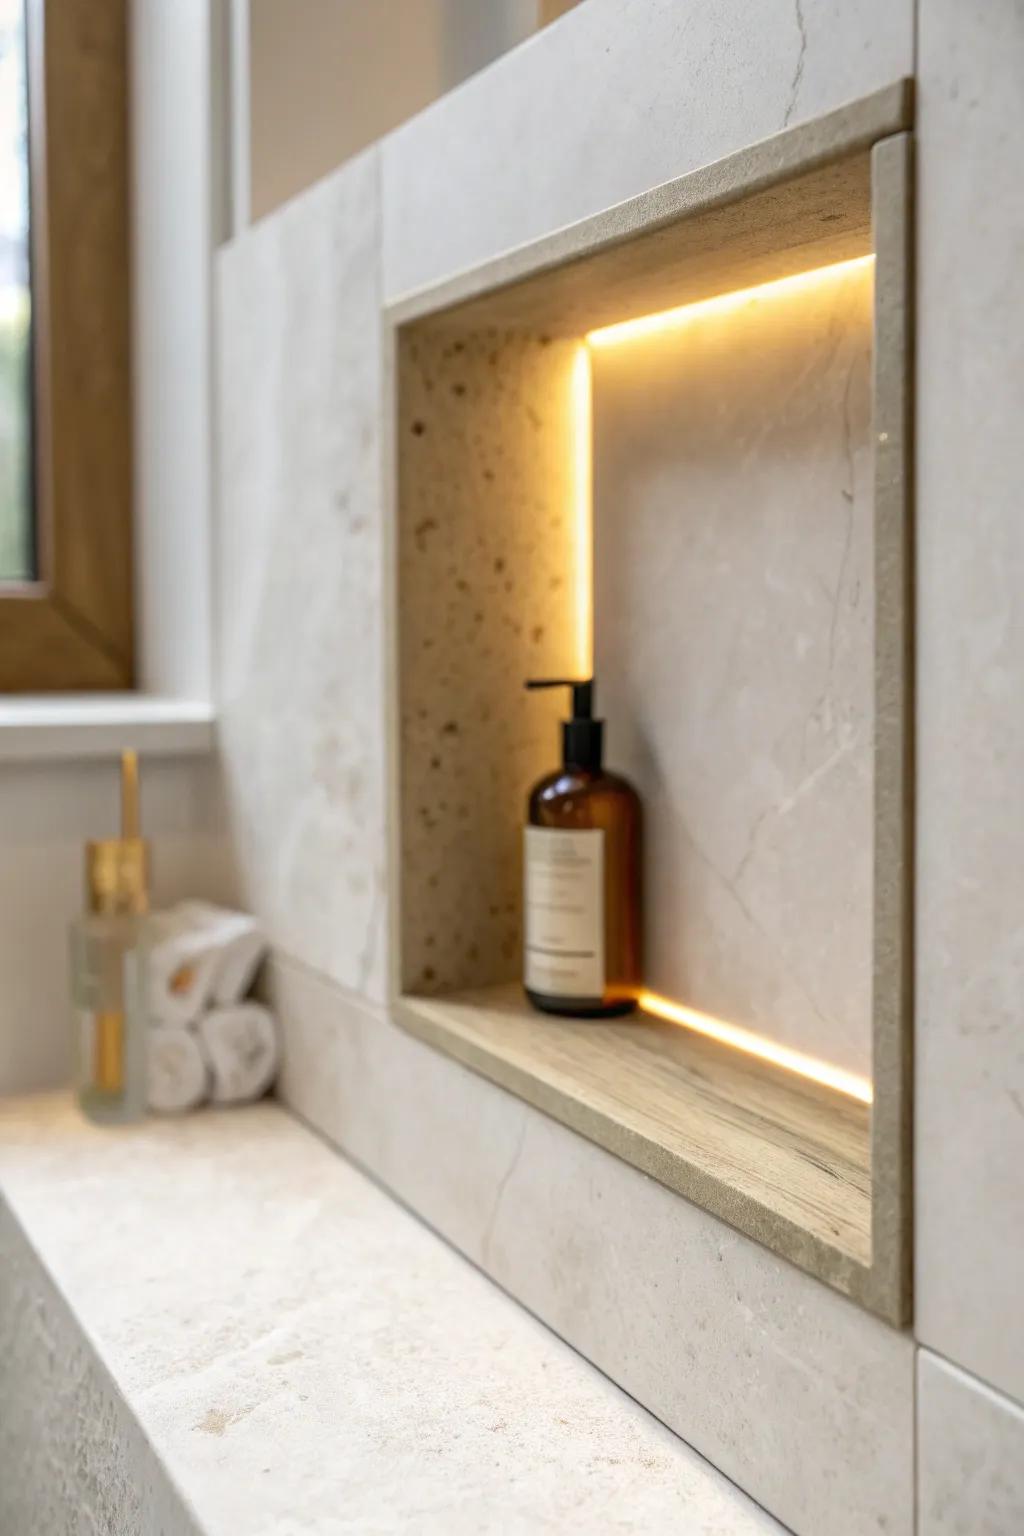
In a dim bathroom makeover, I designed the niche trim area to hide a slim light channel so the niche edge softly glows. It felt wildly luxurious in a small space—and it also made grabbing shampoo way easier at night.
A few relevant products:
- Waterproof LED Strip Light (Warm White): Instantly add a warm, luxurious glow to your shower niche with these flexible, moisture-resistant light strips.
- Aluminum LED Channel Diffuser: Create a seamless, professional look by hiding light strips inside these slim channels for smooth diffusion.
- Low Voltage Waterproof LED Driver: Ensure your bathroom lighting operates safely and reliably with this essential power converter for damp environments.

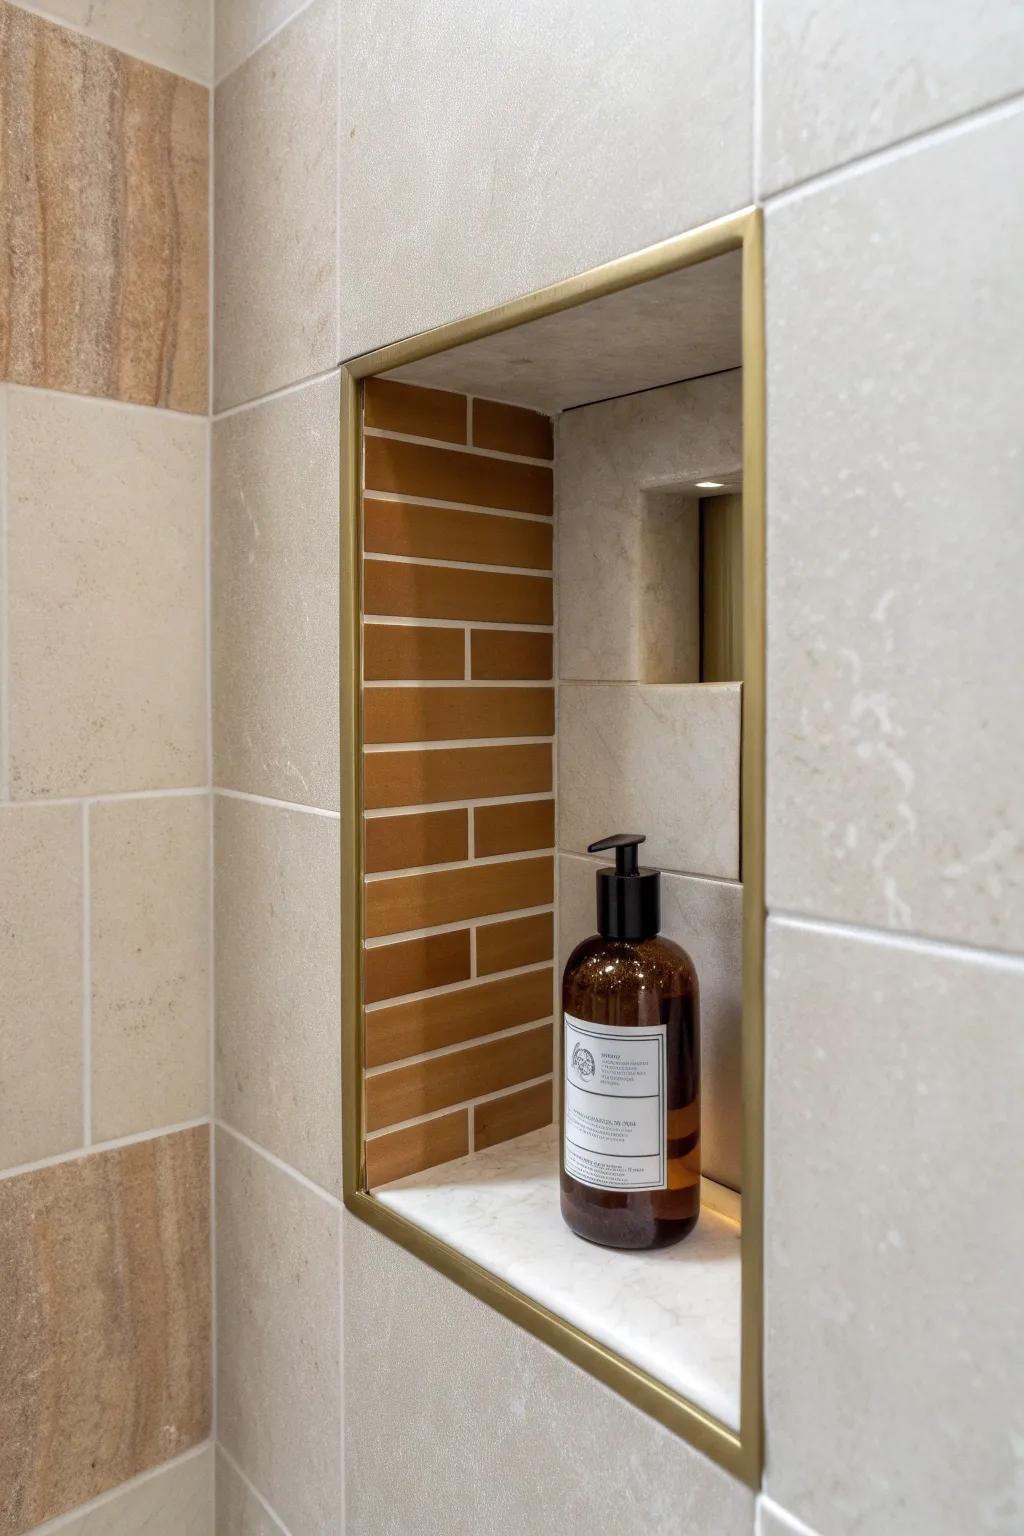
Slim Metal Edge Trim
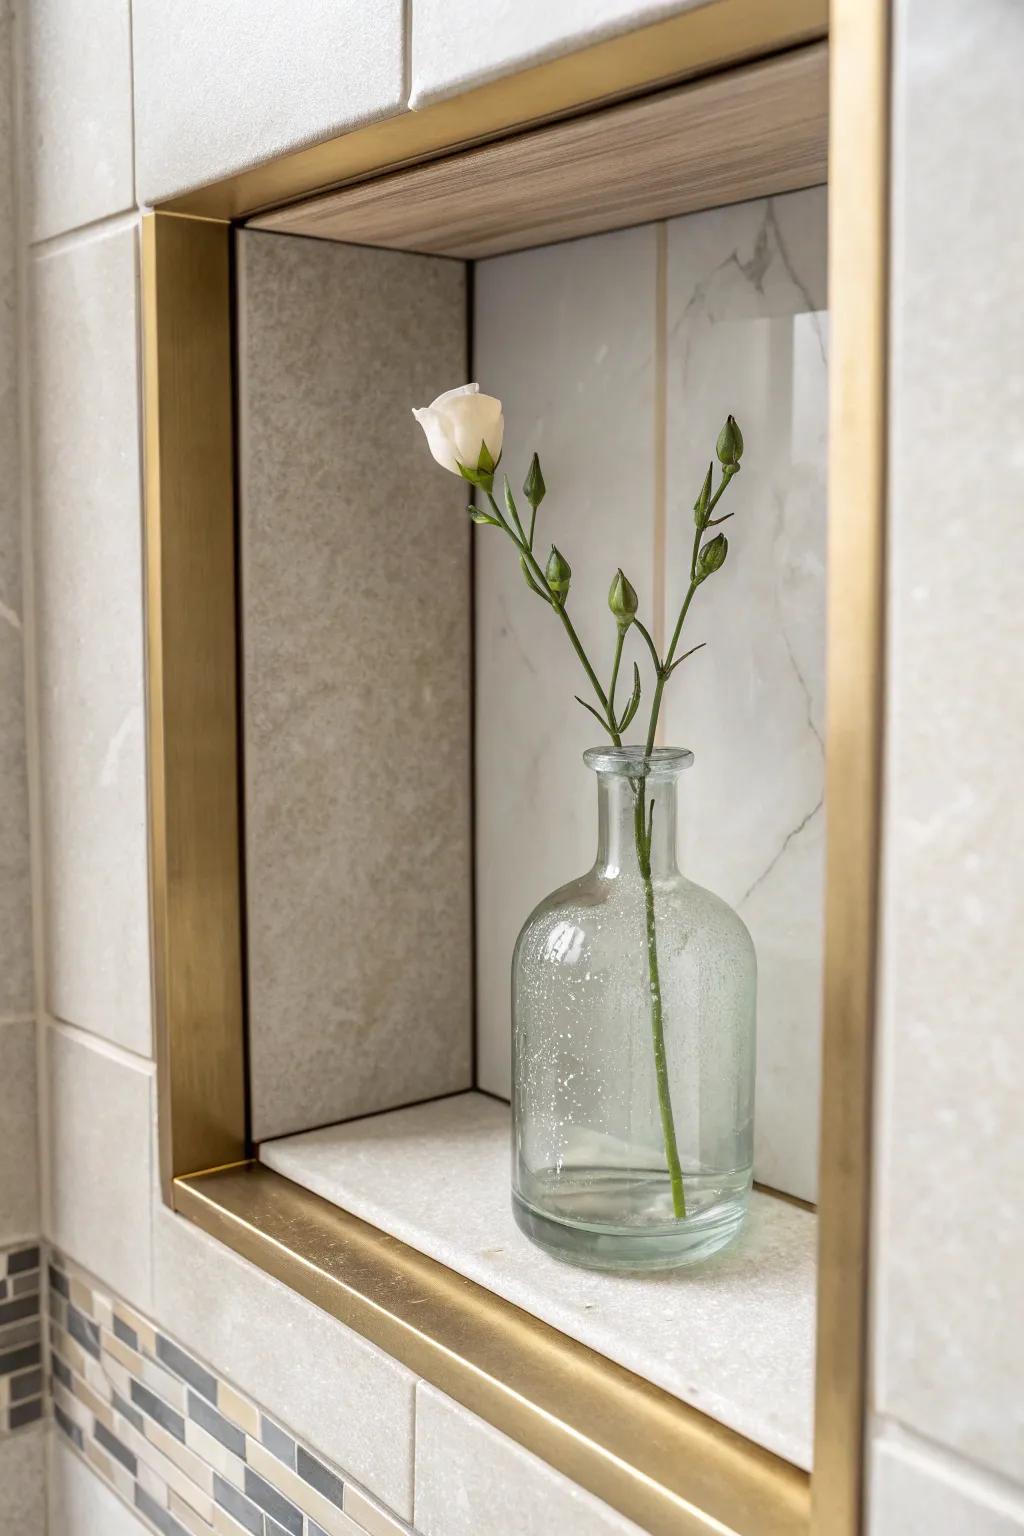
When I needed a crisp, modern finish fast, metal edge trim gave my shower niche that clean “built-in” look with almost no visual clutter. I love how it neatly hides raw tile edges, especially in tight showers where every line stands out.
A few things you might like:
- Brushed Gold Schluter-Style Trim: Achieve that crisp, custom border by installing this sleek metal edging to hide raw tile sides perfectly.
- Brass Bullnose Tile Edge: Create a seamless frame for your niche; this classic metal finish adds instant warmth and modern elegance.
- Metal Angle Trim Profile: Protect your niche corners with this durable metal profile that offers a refined, minimalist finishing touch.
Matching Metal to Fixtures
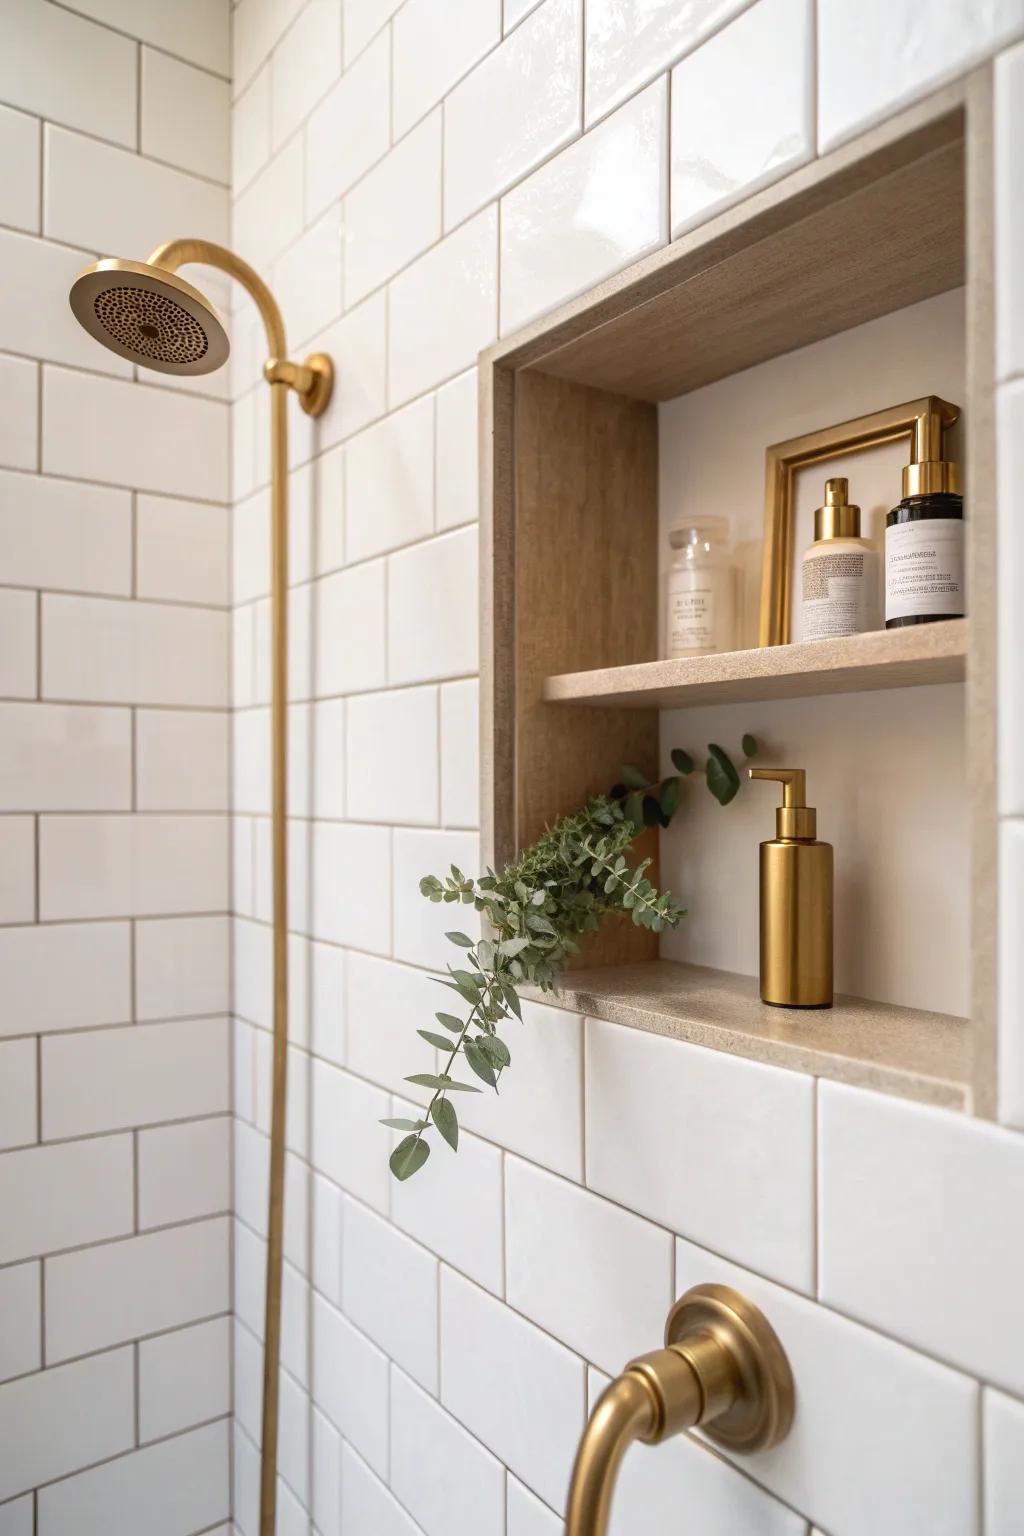
In my 450 sq ft apartment, I matched the niche’s metal trim to my other bathroom finishes and it instantly looked cohesive. It’s such a small detail, but it makes the niche feel like it was always part of the plan.
Items that may come in handy:
- Brass Tile Edge Trim: Create a seamless transition for your niche edges with this metallic trim to complement your gold fixtures.
- Brushed Gold Shower System: Match your new trim perfectly by updating your shower head and controls to a cohesive brushed gold finish.
- Amber & Gold Soap Dispenser Set: Accessorize your styled niche with matching dispensers that echo the warm metallic tones of your trim work.

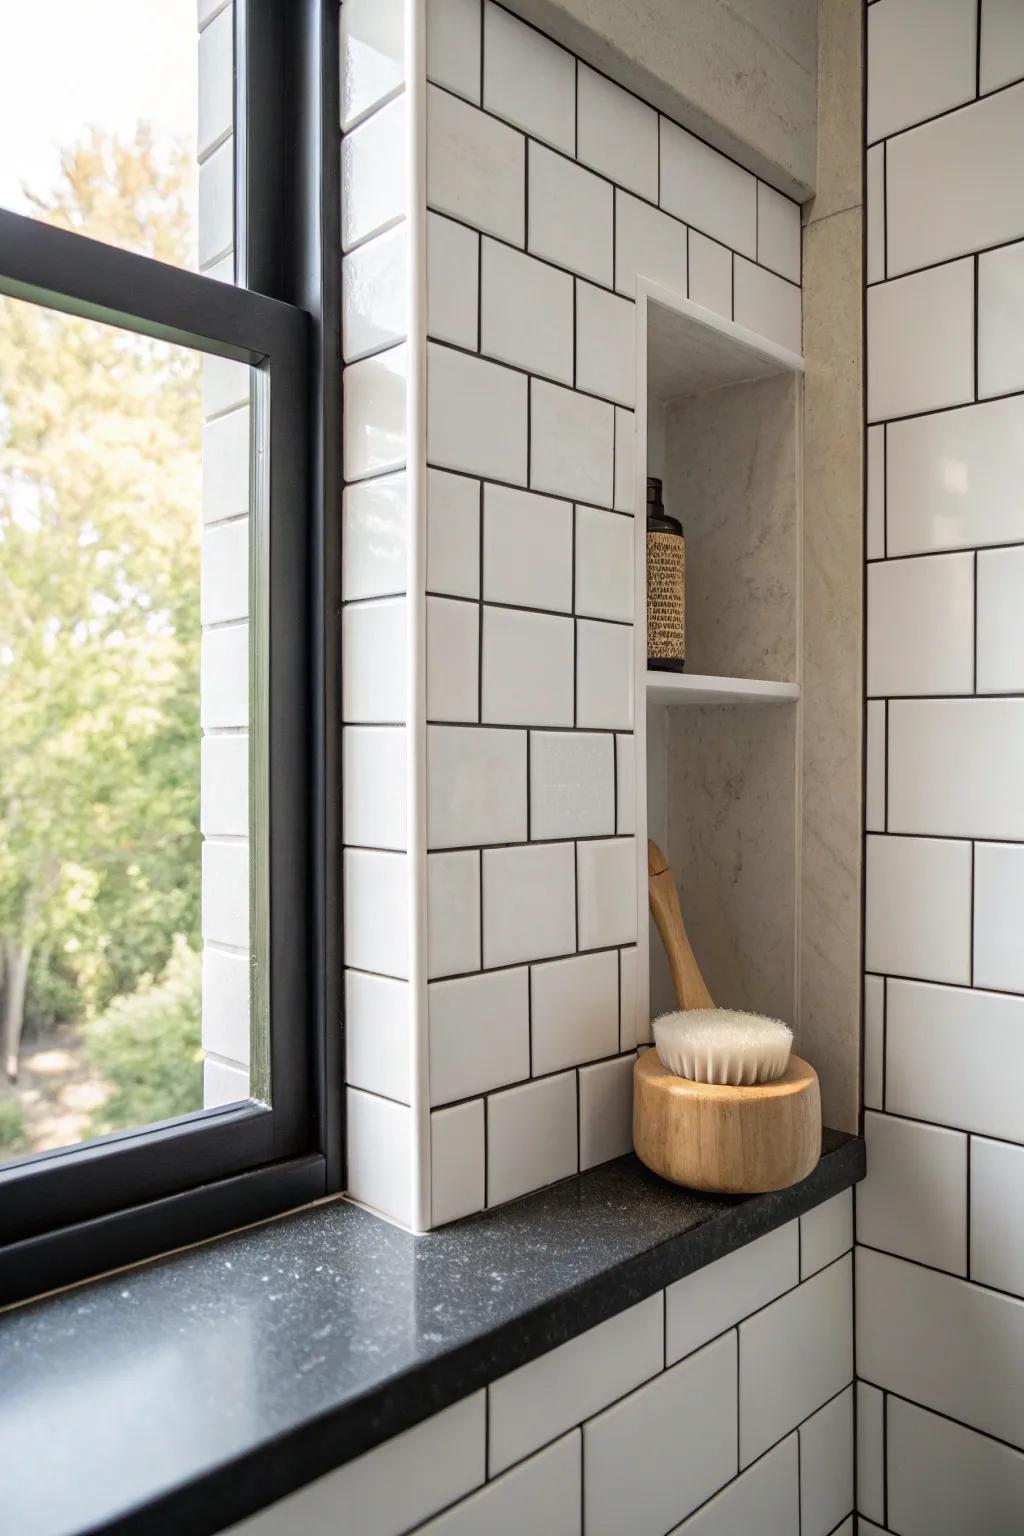
Classic Bullnose Tile Border
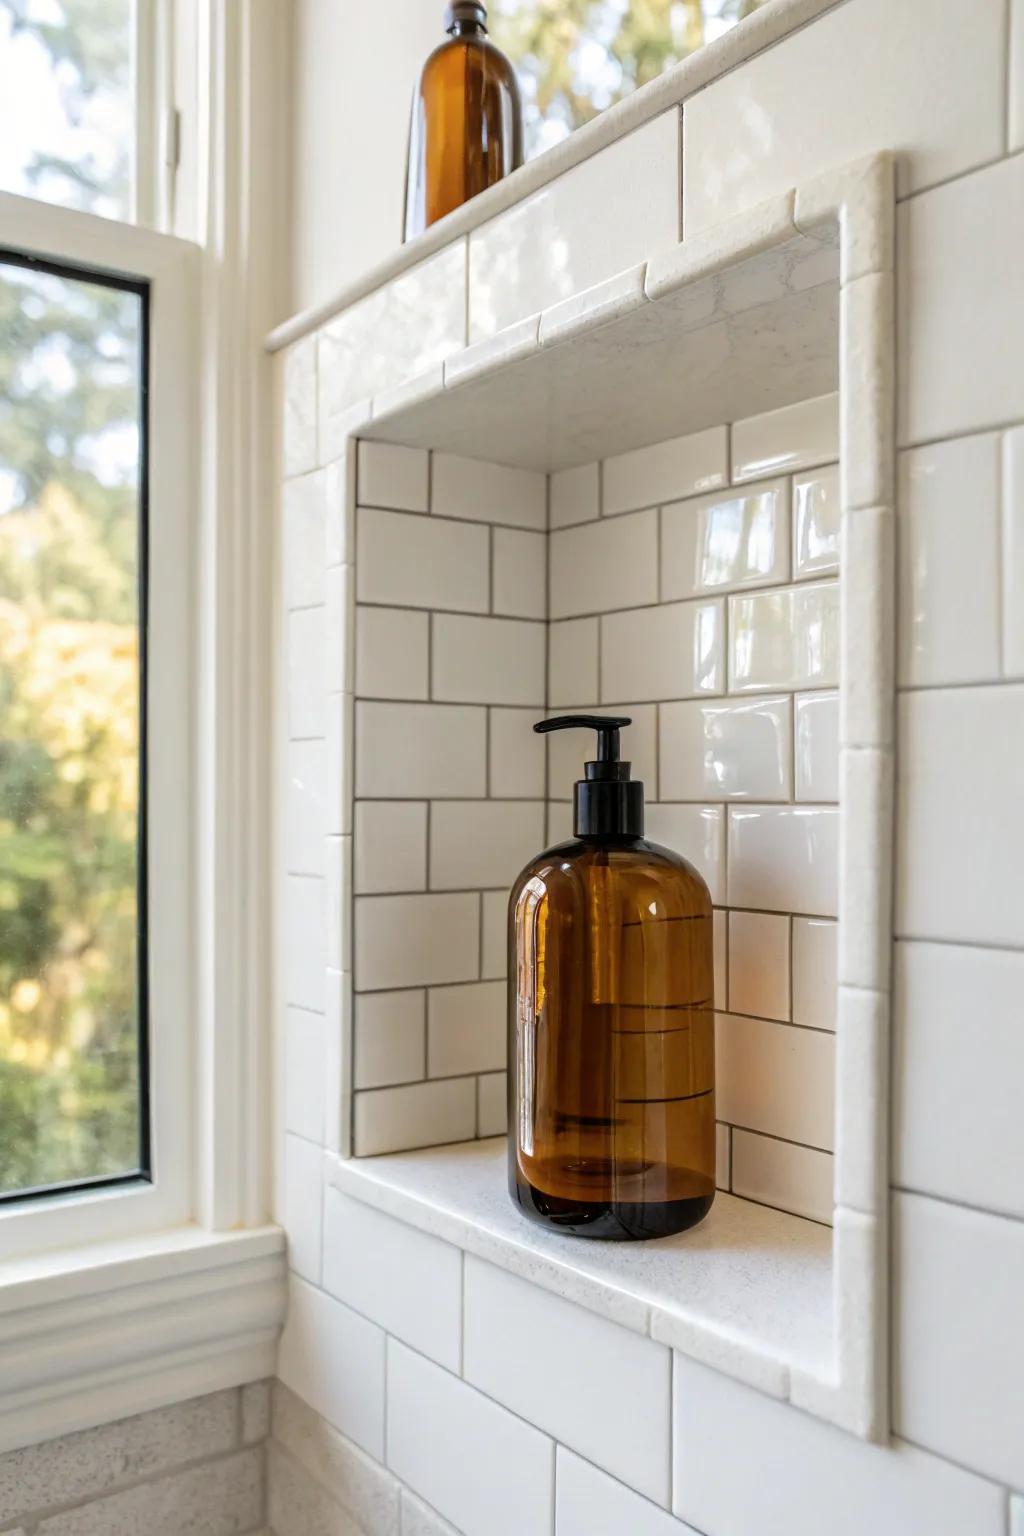
I’ve used bullnose trim when I wanted a softer, more traditional edge that feels comfortable and familiar. It’s my go-to when the shower has timeless tile and I don’t want the niche to look too sharp or industrial.
Some handy options:
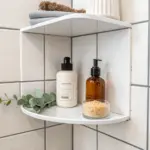
- White Ceramic Bullnose Trim Tiles: Create a seamless, professional edge for your shower niche with these classic finishing tiles.
- Amber Glass Soap Dispenser Bottles: Add warmth and contrast to your white tile niche with these reusable, stylish pump bottles.
- Waterproof Shower Grout Sealer: Protect your beautiful new tile installation and keep grout lines pristine with a quality sealer.
Mitered Tile for a Seamless Wrap
For my favorite “no-trim” look, I’ve had tiles cut into mitered edges so the niche appears wrapped and seamless. It’s a little more work, but the finished effect feels super high-end and calm.
Some ideas to consider:
- Wet Tile Saw with Miter Function: Achieve professional-grade angled cuts for seamless tile corners by equipping yourself with a reliable wet saw.
- Diamond Hand Polishing Pads: Smooth out sharp mitered edges on ceramic or glass tiles to ensure a safe, polished finish.
- Color-Matched Waterproof Grout: Create a unified look in your shower niche by selecting grout that perfectly blends with your tile.
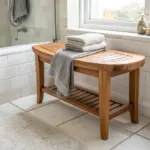
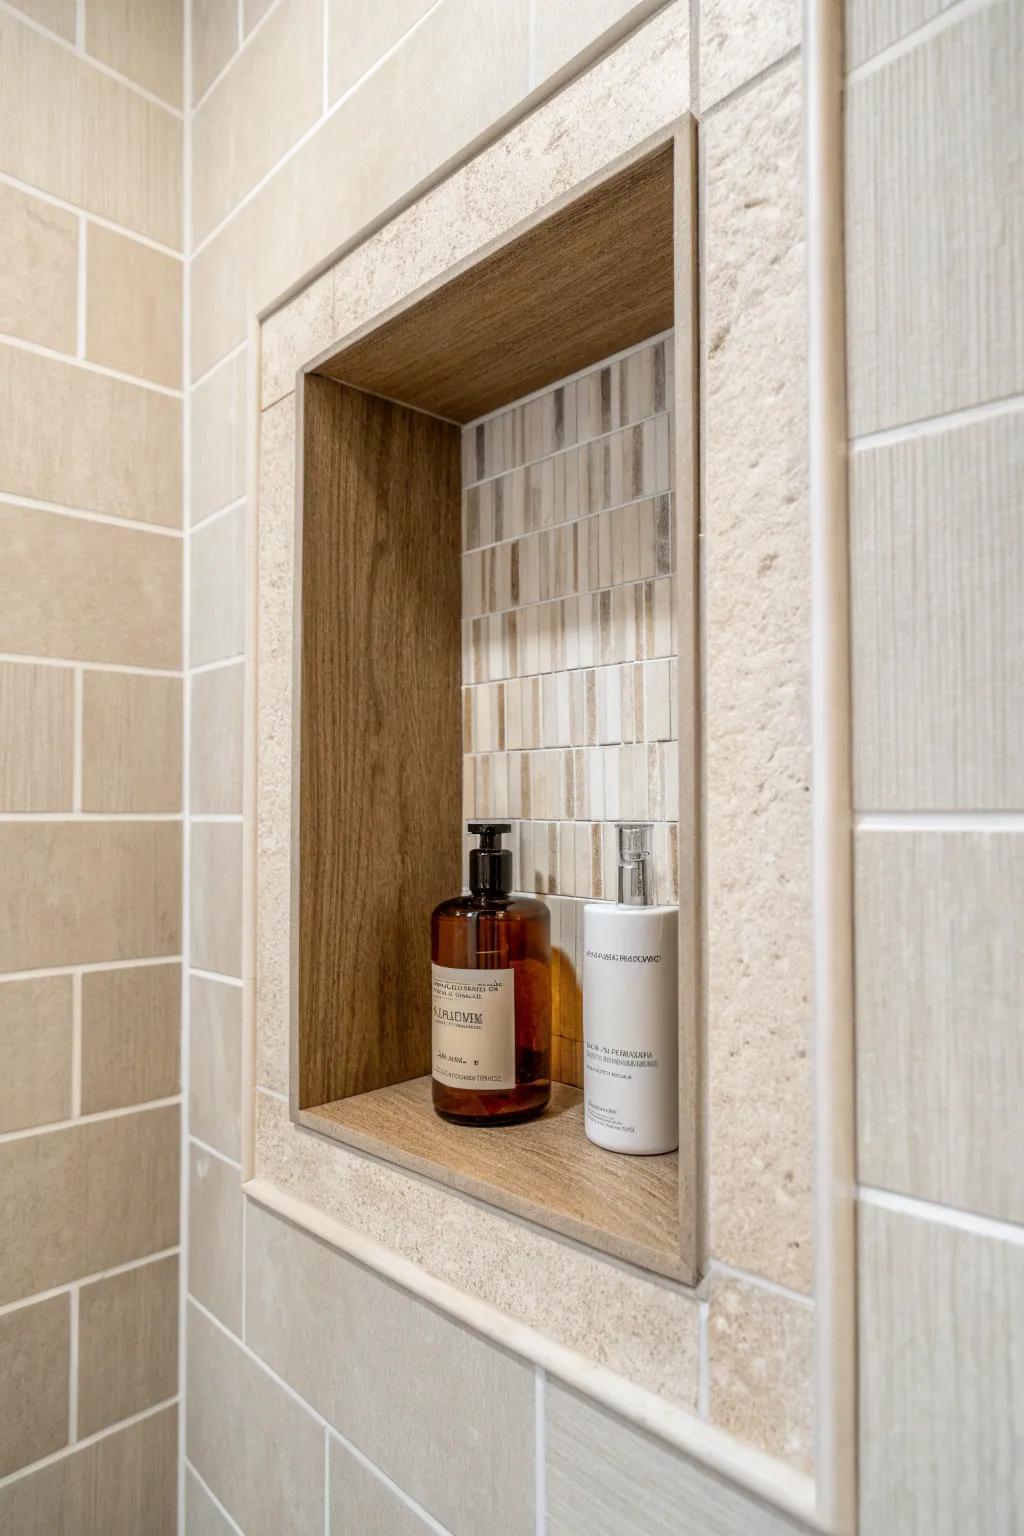
Stone Sill That Doubles as Trim
In one compact bathroom refresh, I used a stone sill shelf that slightly overhung the niche, and it acted like both the shelf and the trim. I loved the tiny “ledge” moment—it made the niche feel substantial without adding bulk.
Check if these fit your needs:
- Travertine Stone Sill or Threshold: Choose a natural stone sill with a finished edge to create that substantial, overhanging ledge effect in your shower.
- Bullnose Tile Trim Pieces: Use rounded bullnose tiles to frame your niche edges cleanly, softening corners and providing a professional, finished look.
- Natural Stone Sealer: Protect your porous stone shelf from water absorption and stains to keep that beautiful ledge looking pristine for years.

Picture-Frame Border Around the Niche
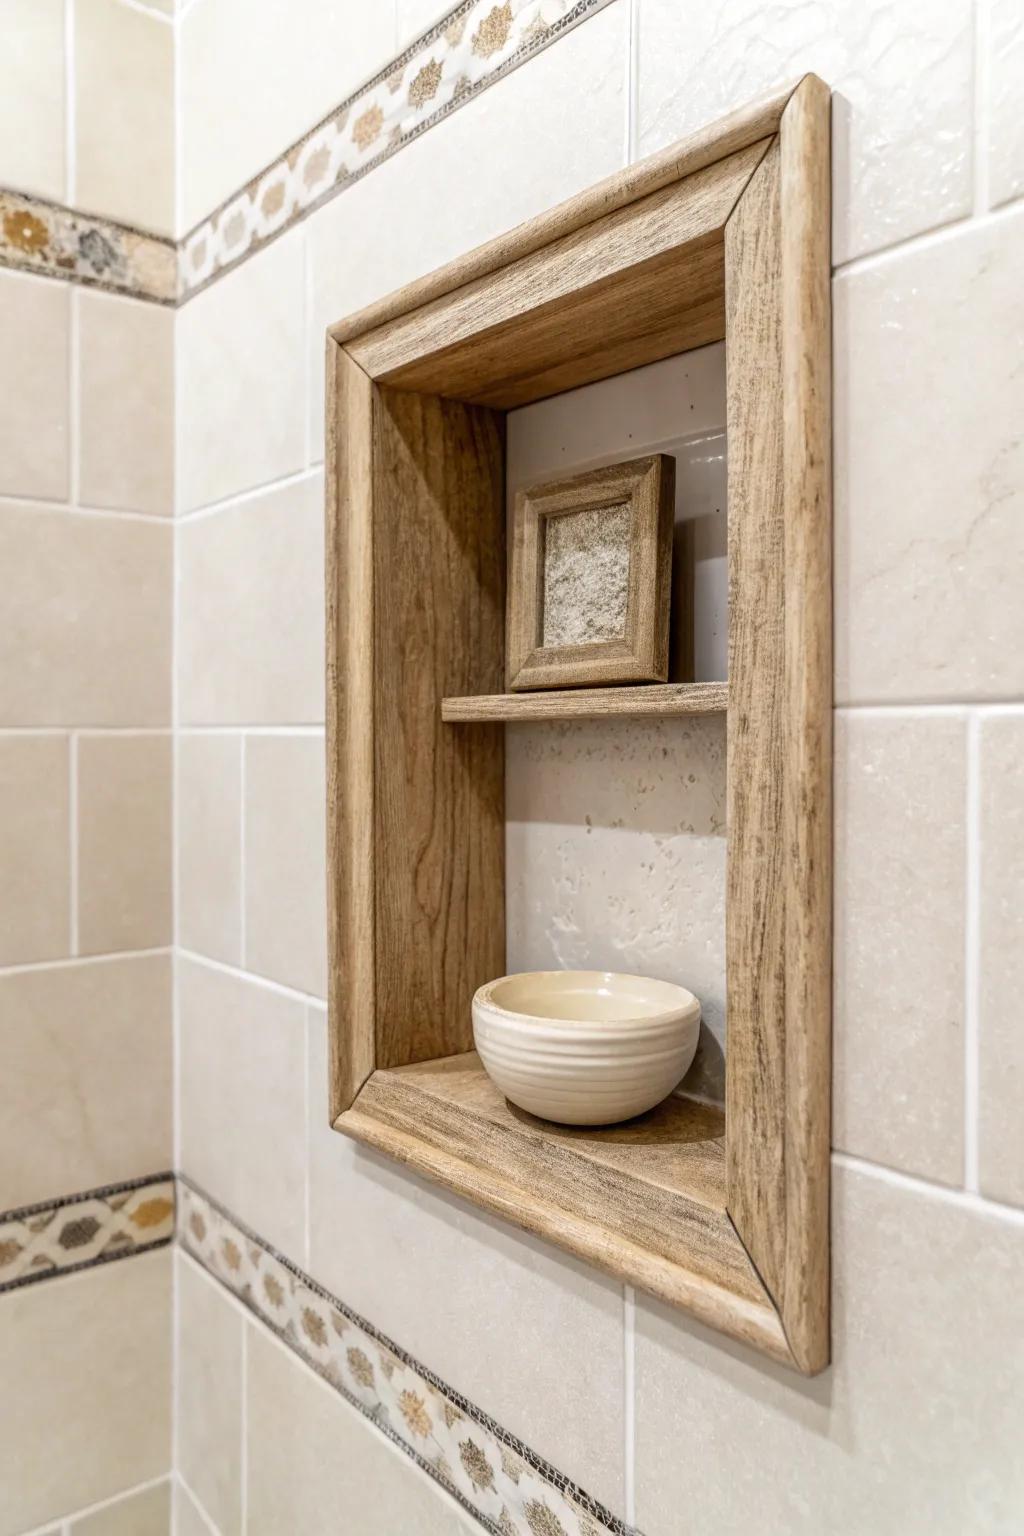
I once framed a niche with picture-frame molding pieces, and it turned the niche into a mini feature without changing the main wall tile. It’s perfect when you want that classic, finished outline that reads like architecture.
Check these products out:
- Waterproof Molding Trim: Upgrade your shower’s look quickly with moisture-resistant trim that mimics traditional molding for a finished edge.
- Decorative Tile Pencil Liner: Create a sophisticated border around your niche using these slender tiles designed for seamless edging and transitions.
- Waterproof Construction Adhesive: Ensure your new niche border stays permanently in place with a heavy-duty adhesive built for wet environments.
Pencil Liner for a Thin Accent Frame
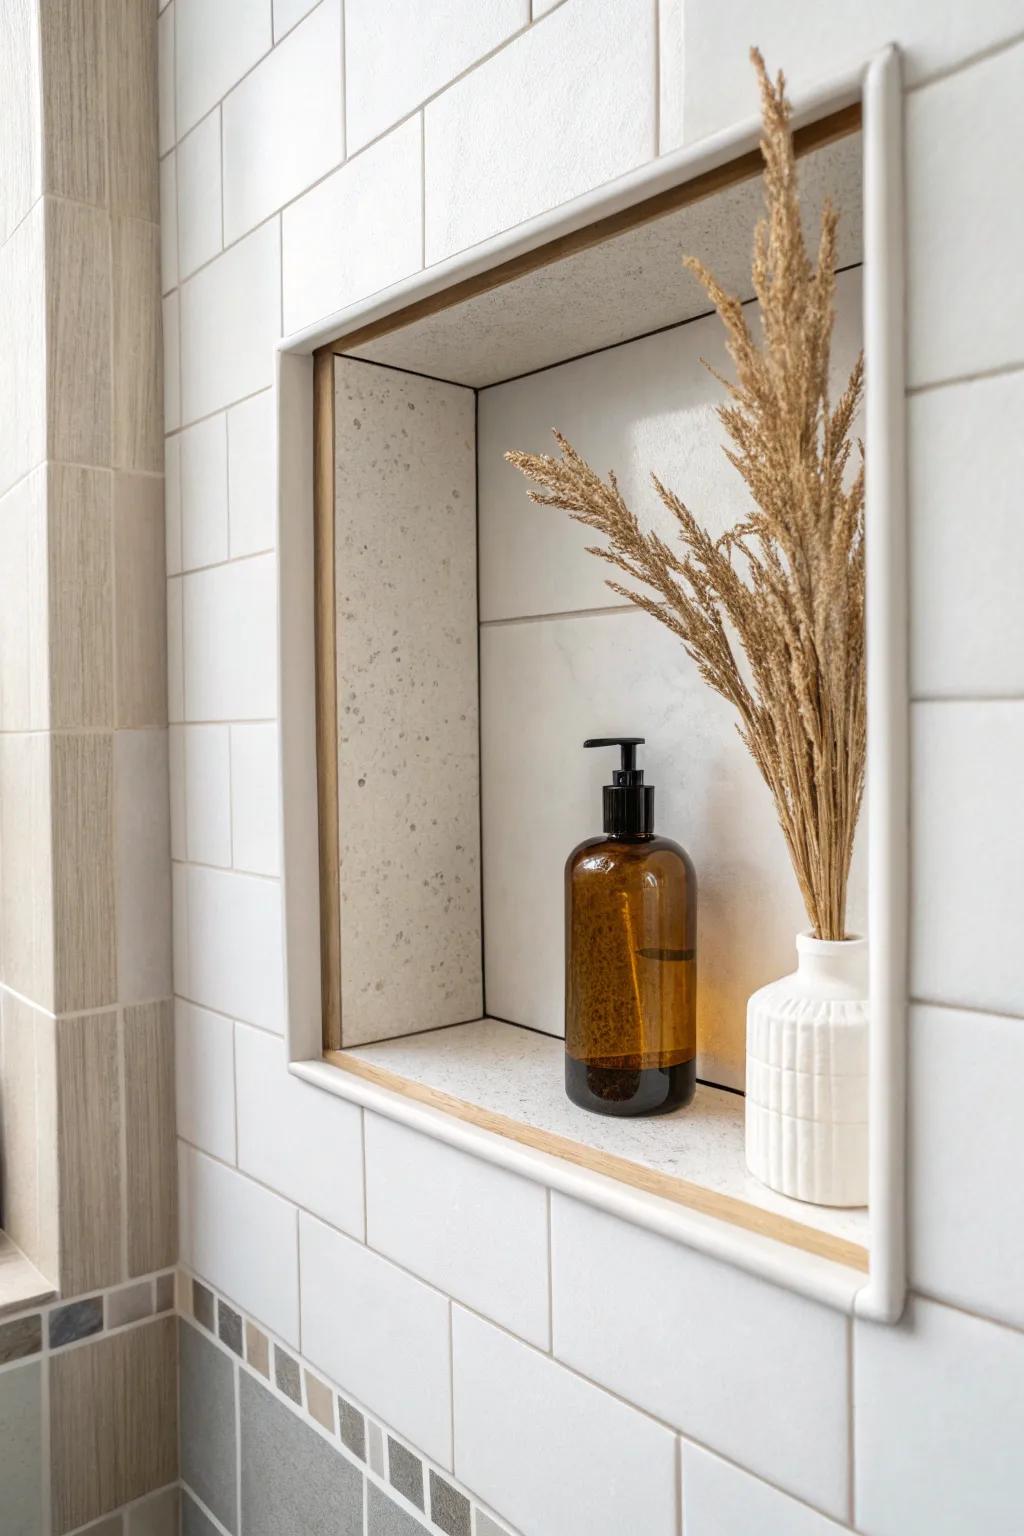
When I didn’t want metal, I used a pencil liner trim to outline the niche and it gave just enough definition. I like this trick in small showers because it adds detail without visually shrinking the space.
Explore these options:
- White Ceramic Pencil Tile Liner: Frame your shower niche elegantly with this slender trim piece, adding subtle borders without overwhelming your tile design.
- Amber Glass Soap Dispenser: Recreate the warm contrast seen here by using amber pump bottles to store your shower essentials in style.
- Small White Ceramic Bud Vase: Add a decorative touch to your niche shelf with a textured ceramic vase ideal for dried botanical accents.
Micro-Mosaic Border as Trim
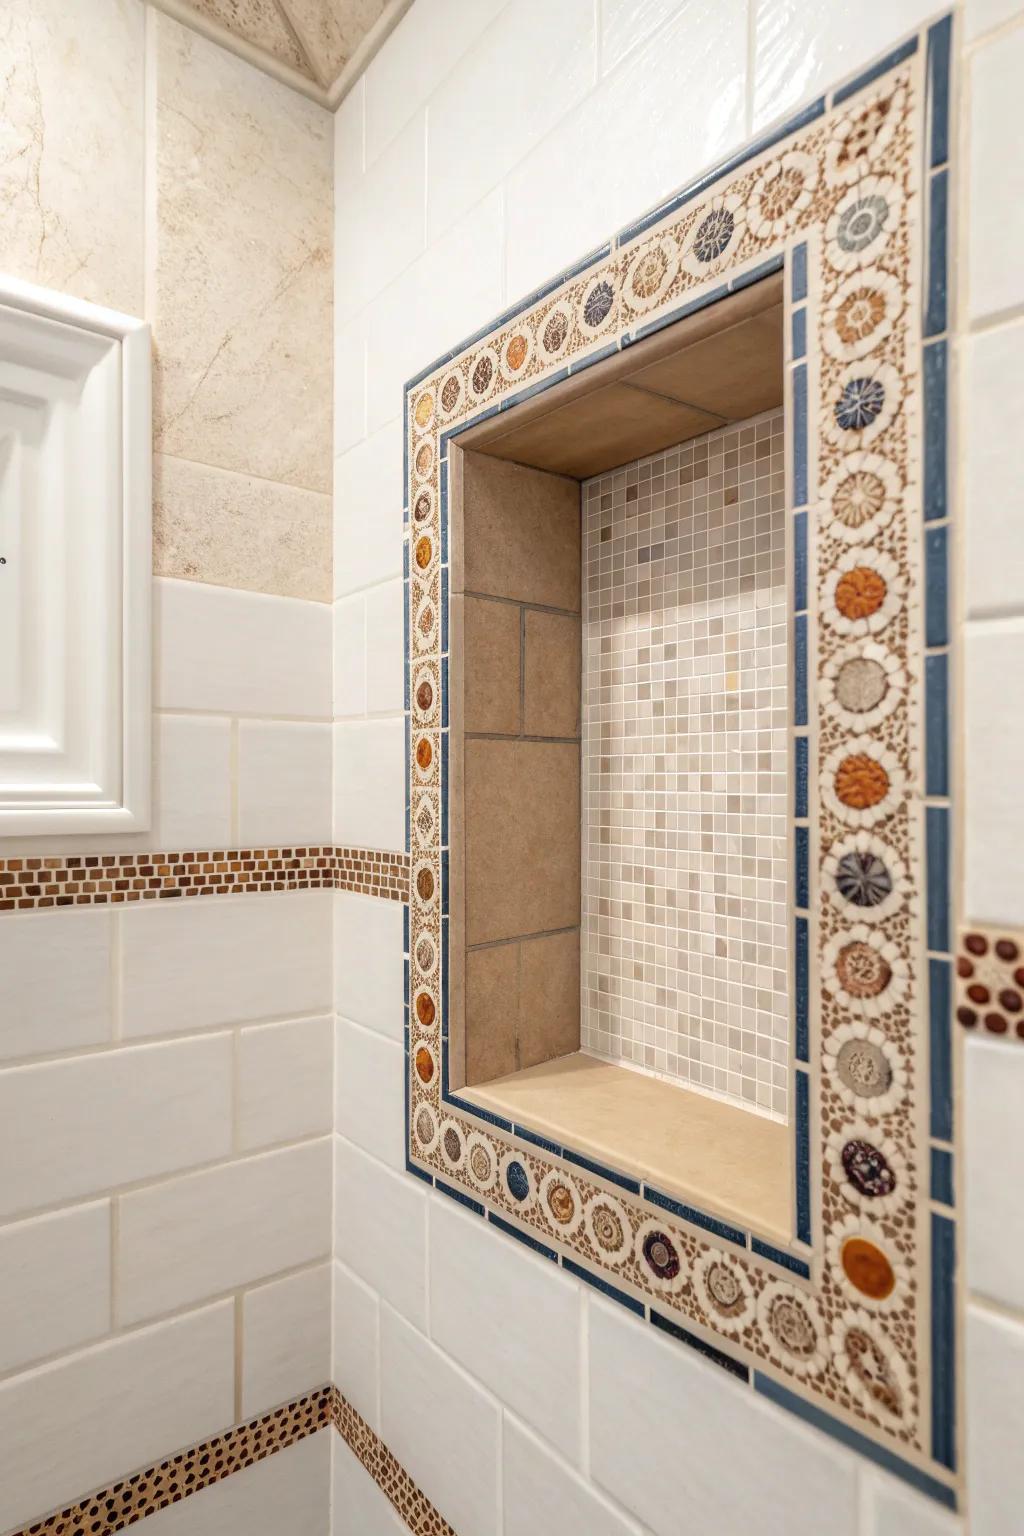
I’ve outlined a niche with a one-tile-wide mosaic border and it looked like jewelry around the opening. It’s a fun way to add texture while still keeping the niche edges clean and intentional.
Products that could assist:
- Decorative Mosaic Border Tiles: Add a jewelry-like finish to your shower niche with these intricate border strips available in various artistic patterns.
- Pencil Liner Tile Trim: Create a clean, defined edge around your mosaic border to professionally transition between different tile styles seamlessly.
- Glass or Stone Mini Mosaic Sheets: Cut these versatile sheets into custom strips to design your own unique, textured frame for any wall niche.
High-Contrast Trim Color
In a mostly neutral shower, I tried contrasting niche trim and it made the niche pop in the best way. If you’re nervous, I always tell my clients to start with just the edge—small commitment, big payoff.
You might like:
- Matte Black Metal Tile Edging Trim: Create a bold, modern outline for your niche by installing this sleek, high-contrast metal edging.
- Prefabricated Black Niche Insert: Simplify your renovation with a ready-to-tile or finished black stainless steel niche for instant contrast.
- Black Waterproof Silicone Sealant: Finish your high-contrast look with matching black sealant to ensure lines stay sharp and water-tight.
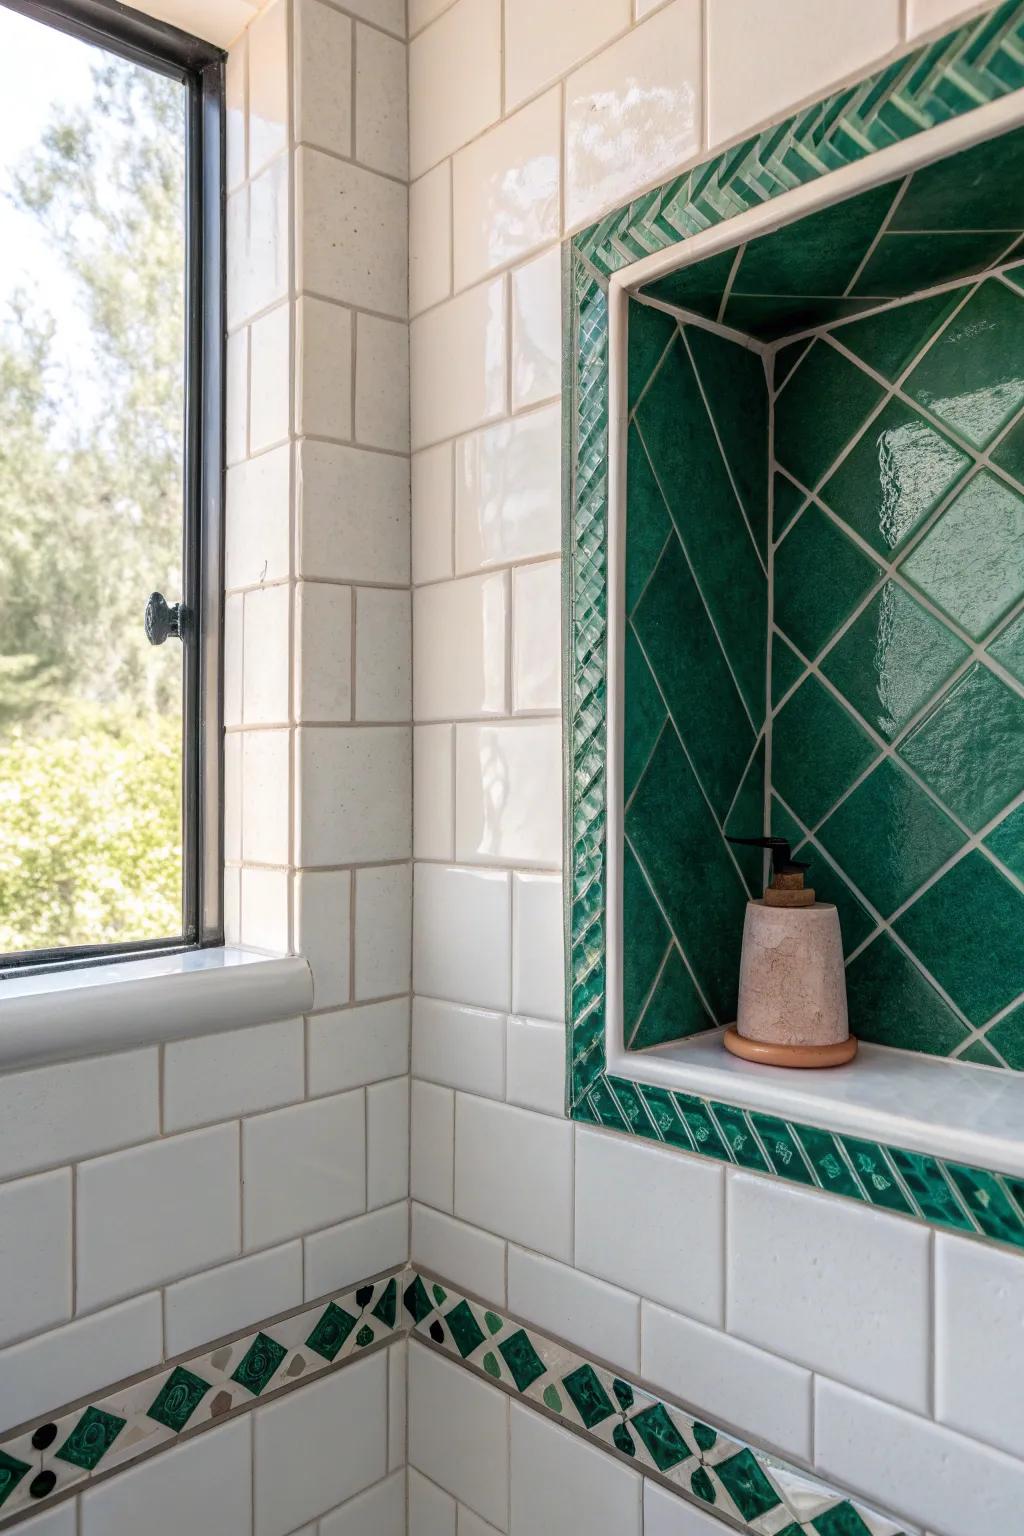
Tone-on-Tone Trim for Quiet Luxury
For my most calming look, I kept tone-on-tone trim (same family as the wall tile) so the niche blends in. It’s my favorite approach in tiny bathrooms where too many lines can feel busy.
Consider these options:
- Beige Bullnose Tile Trim: Create seamless transitions with rounded edges that match your tile, softening corners for a clean, cohesive appearance.
- Travertine Pencil Liner: Frame your niche elegantly using pencil liners in natural stone tones to add subtle depth without bold contrast.
- Spa-Inspired Bath Accessories: Complete the calming look with neutral-toned brushes and bottles that harmonize perfectly with your tranquil tile choices.
Dark Grout Outline to Define the Edge
I’ve used contrasting grout to outline the niche perimeter, and it created a subtle frame even when the trim material stayed simple. It’s one of my budget-friendly moves when you want definition without adding another trim piece.
Maybe worth checking out:
- Charcoal or Black Grout: Create bold contrast and define your tile edges clearly by selecting a dark-colored, durable grout.
- Grout Sealer Applicator Bottle: Ensure your new dark lines stay crisp and clean by applying sealer precisely where it is needed.
- Grout Colorant Pen: Easily darken existing light grout lines to achieve this defined look without needing to fully regrout.
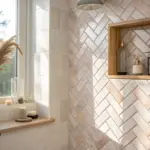
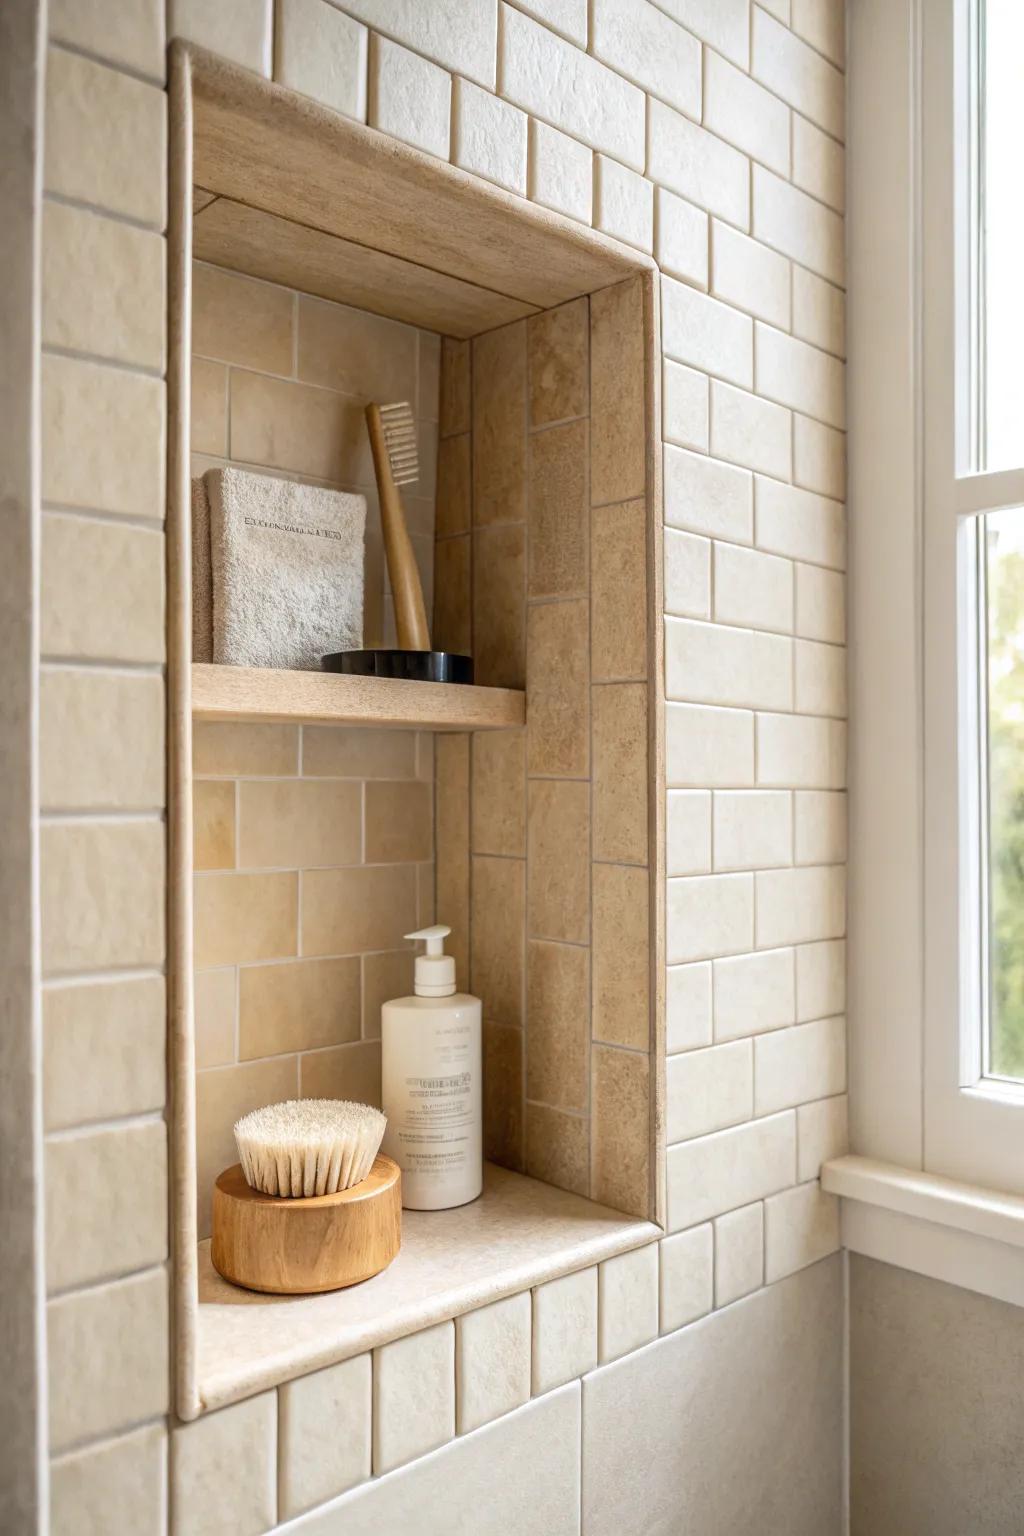
Beveled Trim for a Softer Profile
When I wanted something more forgiving than sharp corners, a beveled edge trim made the niche feel smoother and a bit more refined. I’ve found it also helps hide tiny alignment issues that can jump out in small spaces.
Try these:
- Decorative Ceramic Pencil Molding: Use decorative pencil molding to frame your niche, adding dimensionality and softening sharp tile edges elegantly.
- Travertine Chair Rail Trim: Install chair rail trim to create a sophisticated, substantial border that elevates your shower niche design.
- Textured Tile Border Trim: Choose a patterned or textured accent border to replicate the decorative detail seen in the example photo.
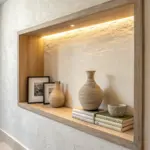
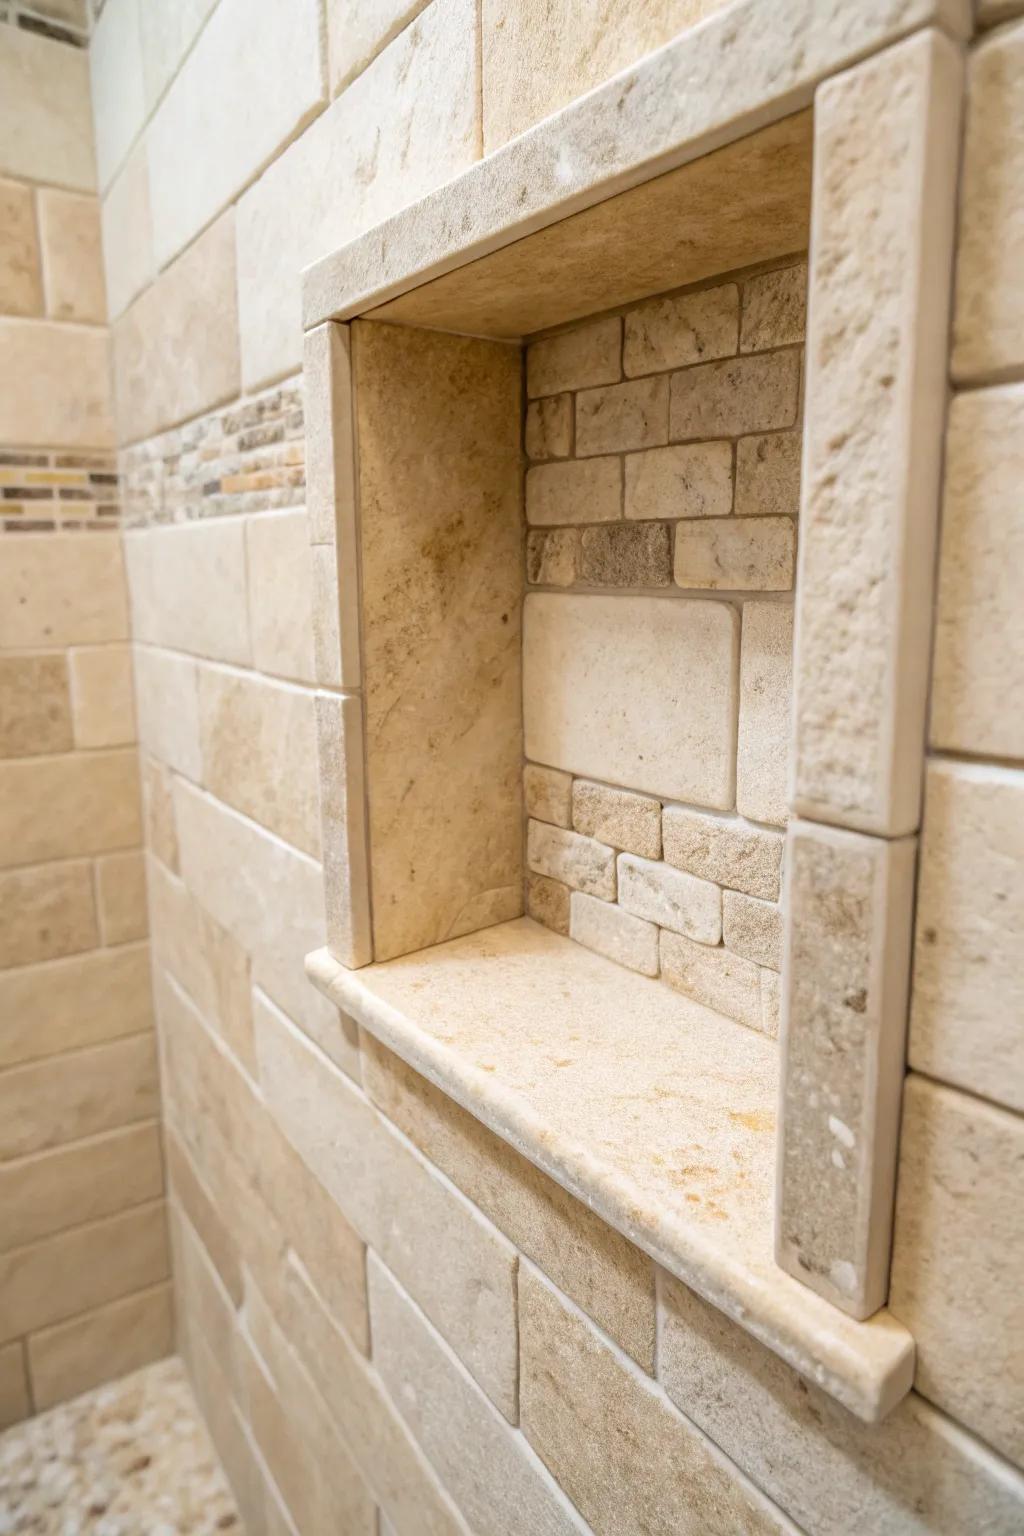
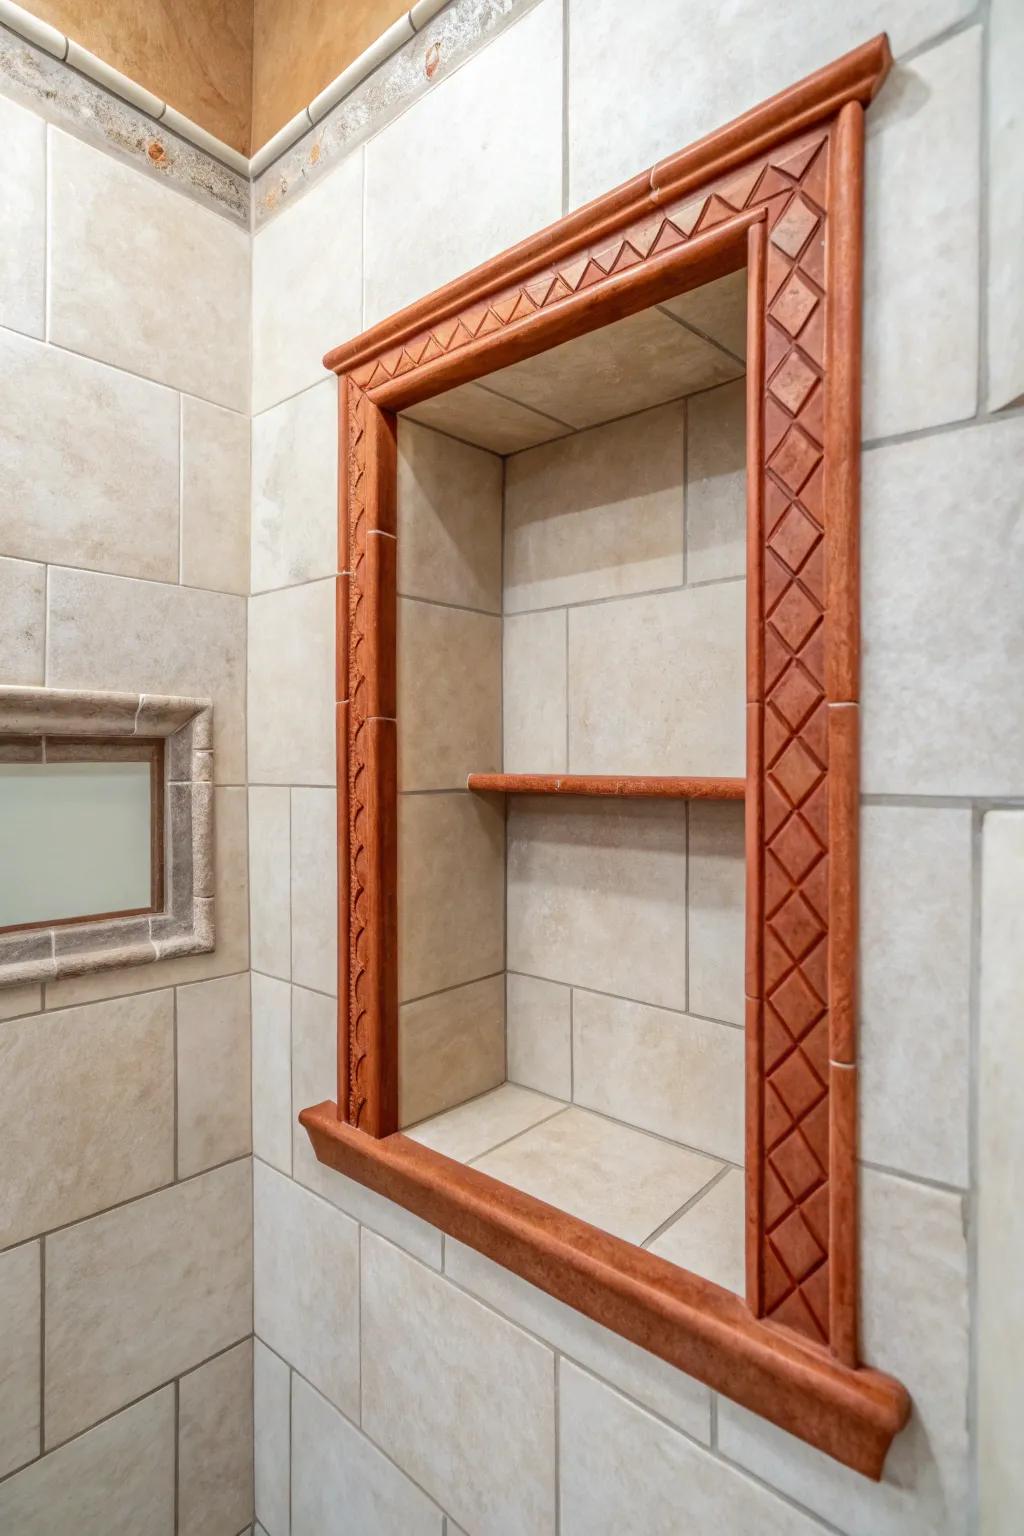
Thicker Frame Trim for a Bold Statement
One time I went with a chunkier niche frame and it turned the niche into a focal point—like art, but functional. I especially love this when the shower wall tile is super simple and needs a little personality.
A few suggestions:
- Travertine Stone Pencil Bullnose Tile: Create a substantial, textured border around your niche with these natural stone trim pieces for a bold finish.
- Wood-Look Porcelain Tile Planks: Line the interior frame of your niche with durable wood-look tile to add warmth without water damage concerns.
- Waterproof Shampoo Dispenser Bottles: Decant your products into these minimalist amber and white bottles to maintain the sleek, artistic look of your niche.
Trim That Continues as an Accent Stripe
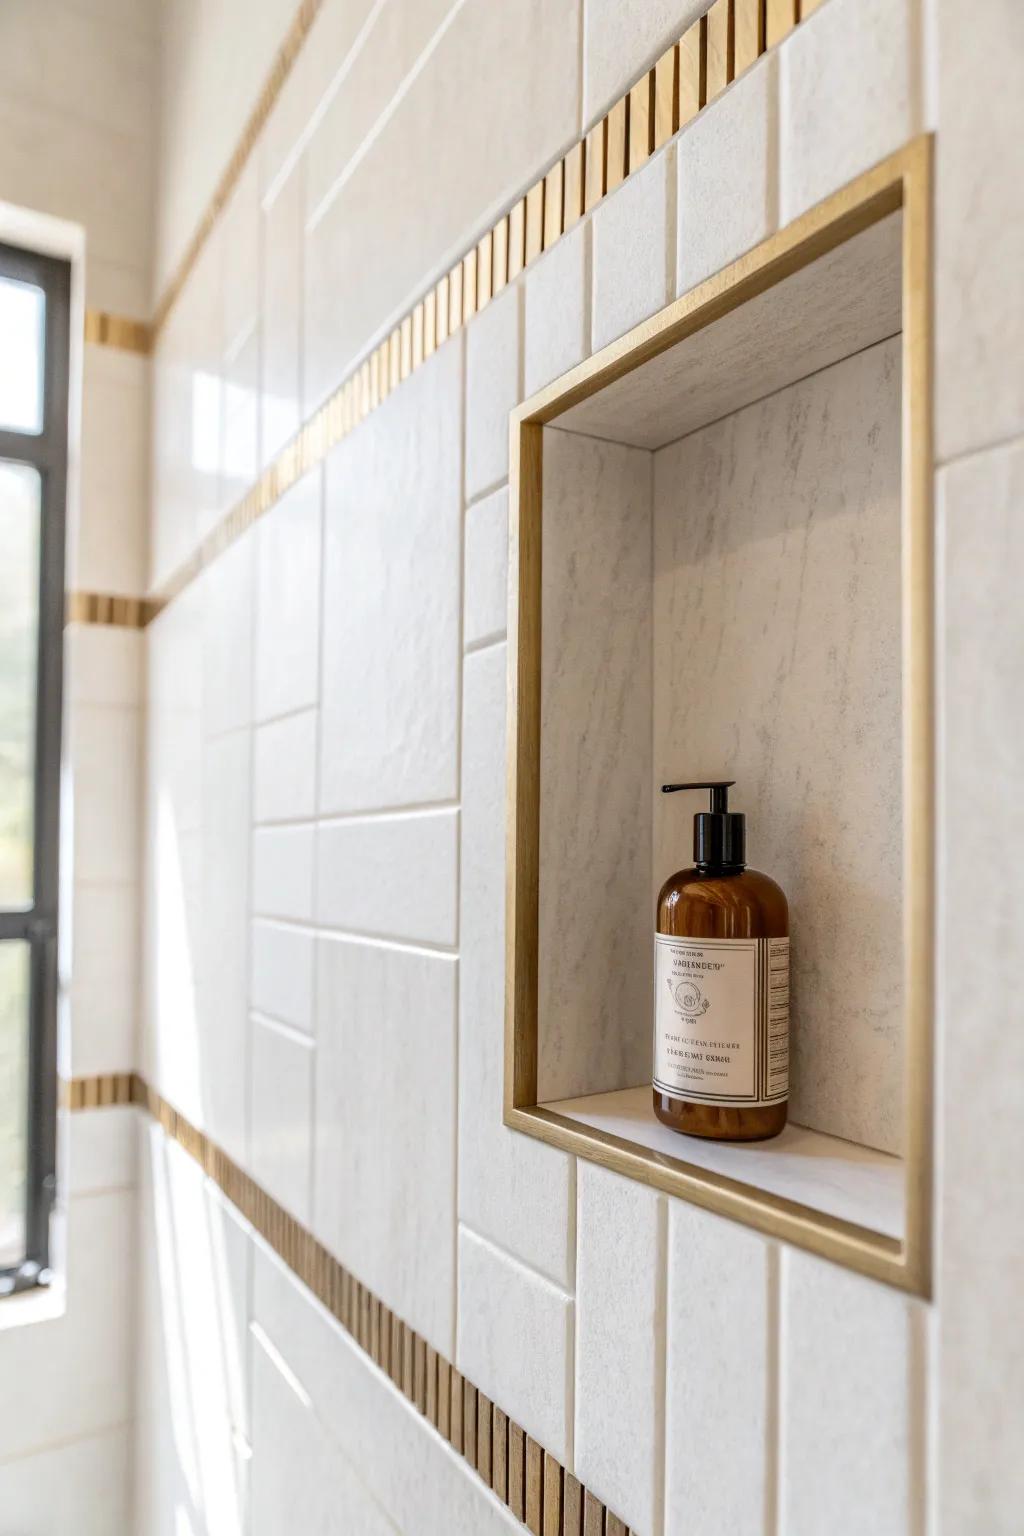
I’ve extended the niche’s trim line horizontally across the shower wall, and it made the whole layout feel intentional and designer-y. It’s a smart visual trick I use to “stretch” a small shower and make it feel wider.
Useful items to consider:
- Brushed Gold Metal Tile Trim: Create clean, continuous lines across your shower wall to dramatically stretch the space and define your niche.
- Gold Linear Mosaic Accent Tile: Add a horizontal stripe of texture using these metallic tiles to seamlessly extend your niche’s visual line.
- Brass Prefabricated Shower Niche: Start with a sturdy, ready-to-tile or finished metal niche that serves as the perfect centerpiece for your layout.
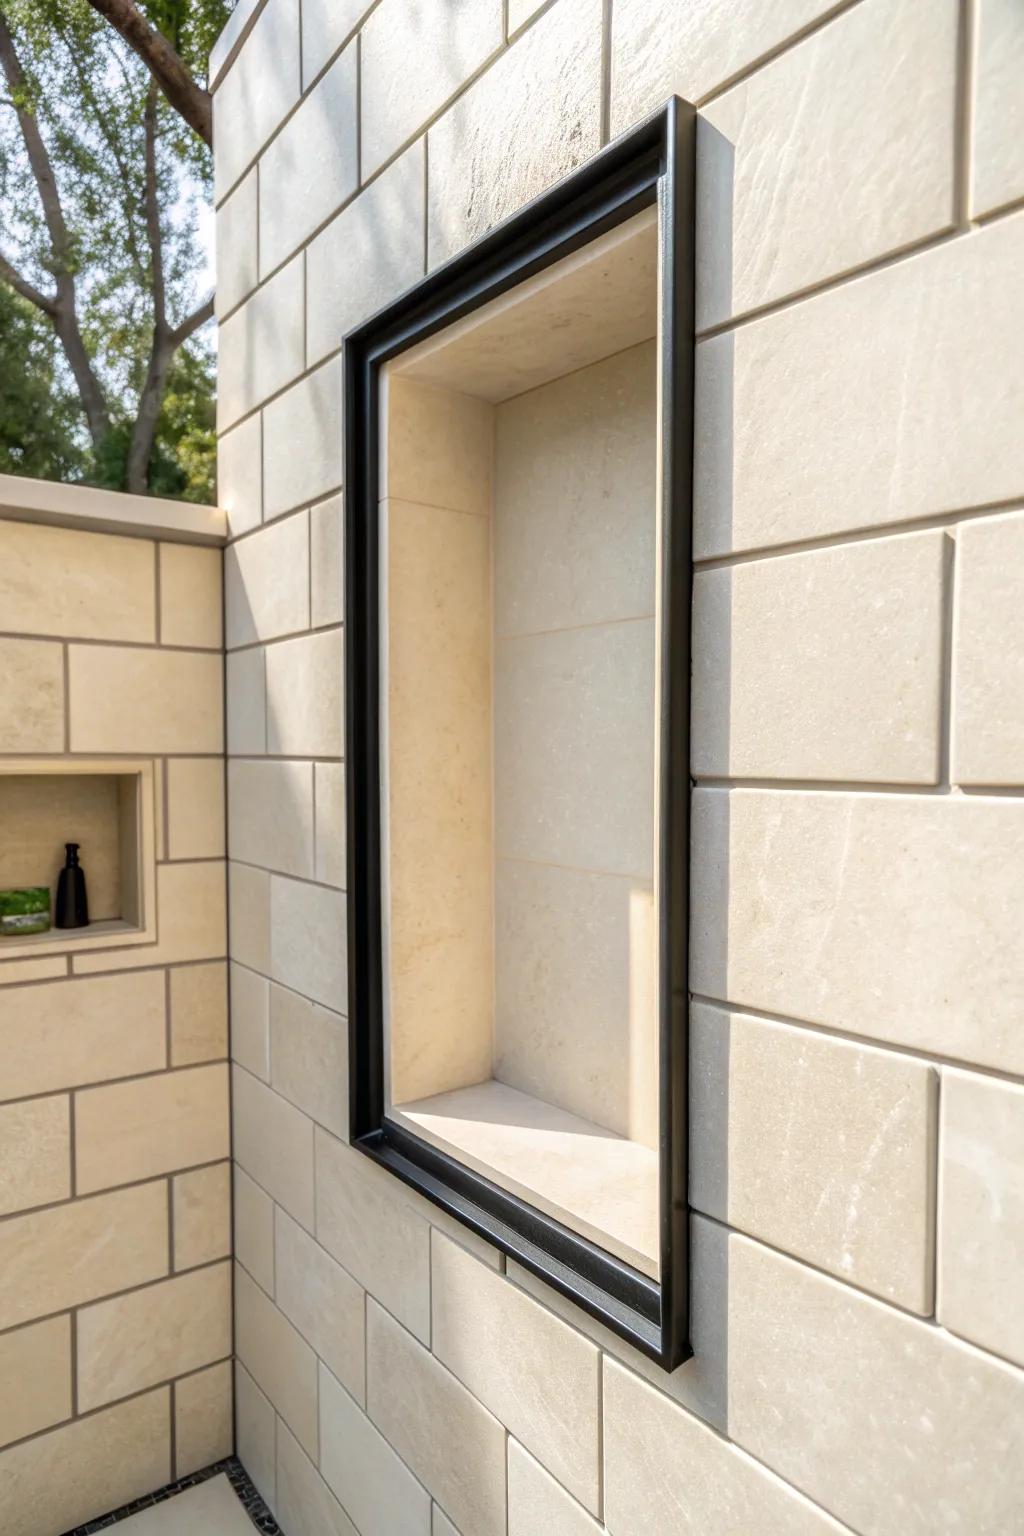
Shadow-Reveal Recessed Trim Look
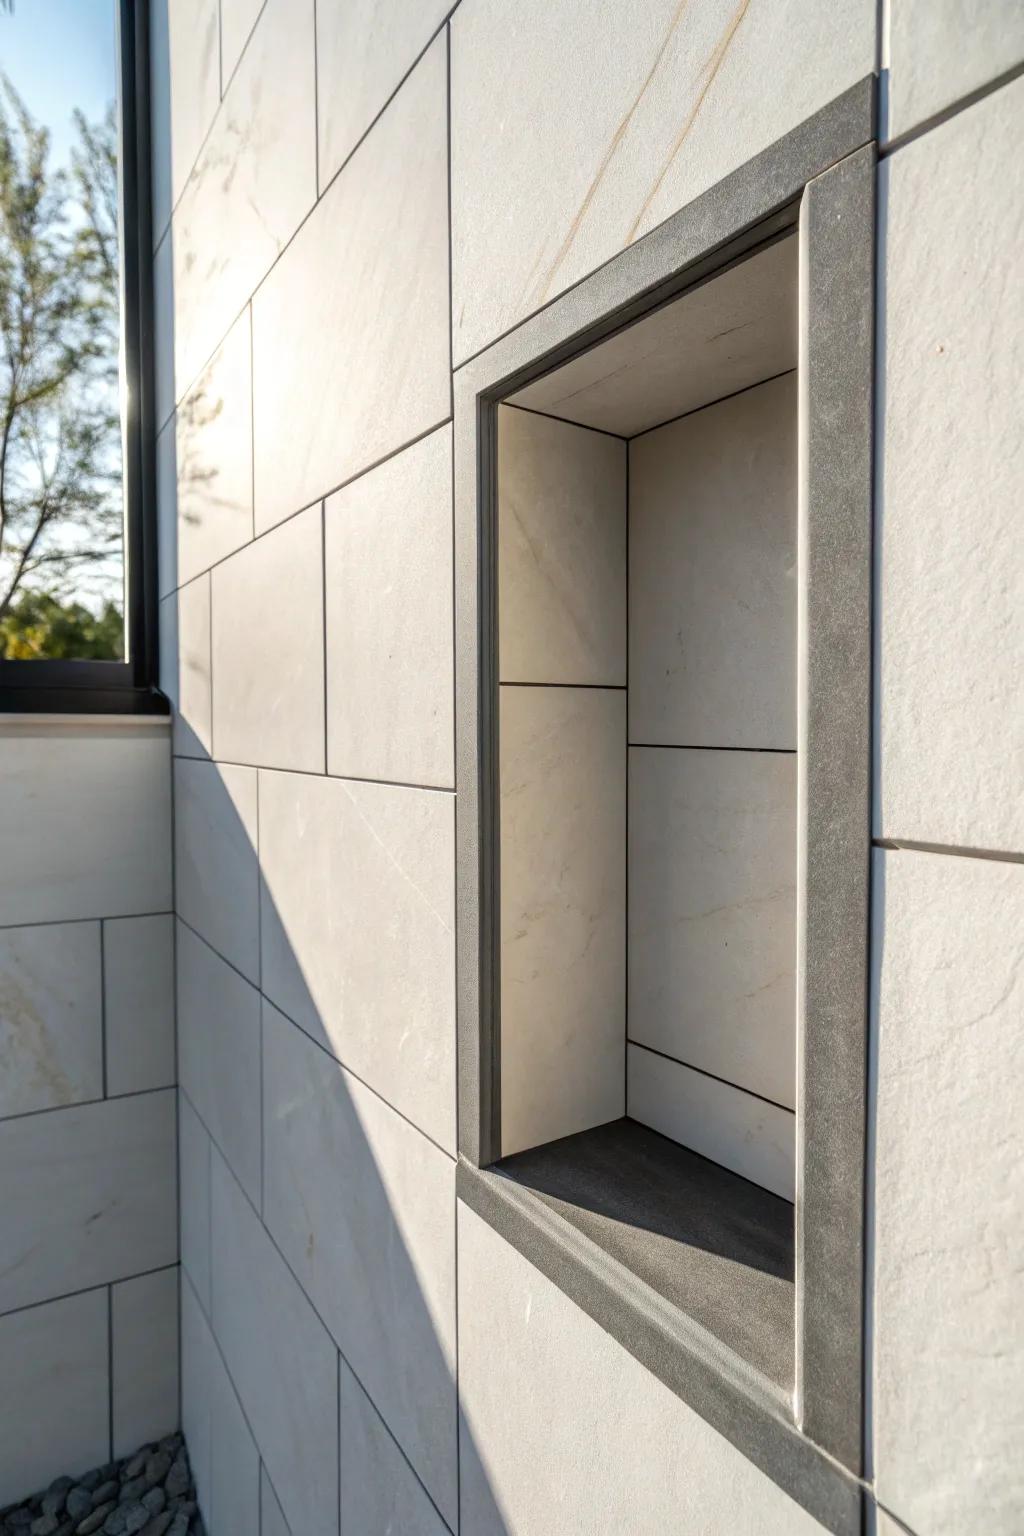
For a modern wow moment, I’ve planned a niche edge that creates a shadow reveal instead of a visible frame. It’s subtle, but in person it looks incredibly custom—like the niche is floating in the wall.
You might give these a try:
- Dark Gray Aluminum Tile Trim: Define your niche edges with dark aluminum profiles to create sharp, modern shadow lines and contrast.
- Matte Black Schluter-Style Edging: Use matte black metal edging strips to frame your niche and achieve that recessed, architectural look.
- Waterproof Shower Niche Insert: Start with a sturdy recessed niche shell as the base for building your custom shadow-reveal tile design.
Two-Tone Inlay Strip at the Edge
I once added a skinny inlay strip right at the niche opening, and it looked like a tailored little border. It’s a great way to tie the niche to another element (like the floor tile) without fully changing the niche interior.
Possibly handy products:
- Brushed Gold Metal Tile Edging Trim: Create a sophisticated border around your niche with this durable edging that adds a sleek finish.
- Decorative Mosaic Liner Tiles: Use these slender accent tiles to frame your shower niche and introduce a subtle textural contrast.
- Waterproof Grout Pen (for contrast): Define your niche border simply by coloring the grout line to create a distinct visual frame.


