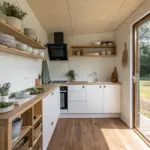
Air dry clay is my favorite way to add personality to a kitchen without taking up precious counter space. In my tiny apartment, these little handmade details made the whole room feel styled, cozy, and totally “me.”
Spoon Rest Shaped Like a Leaf
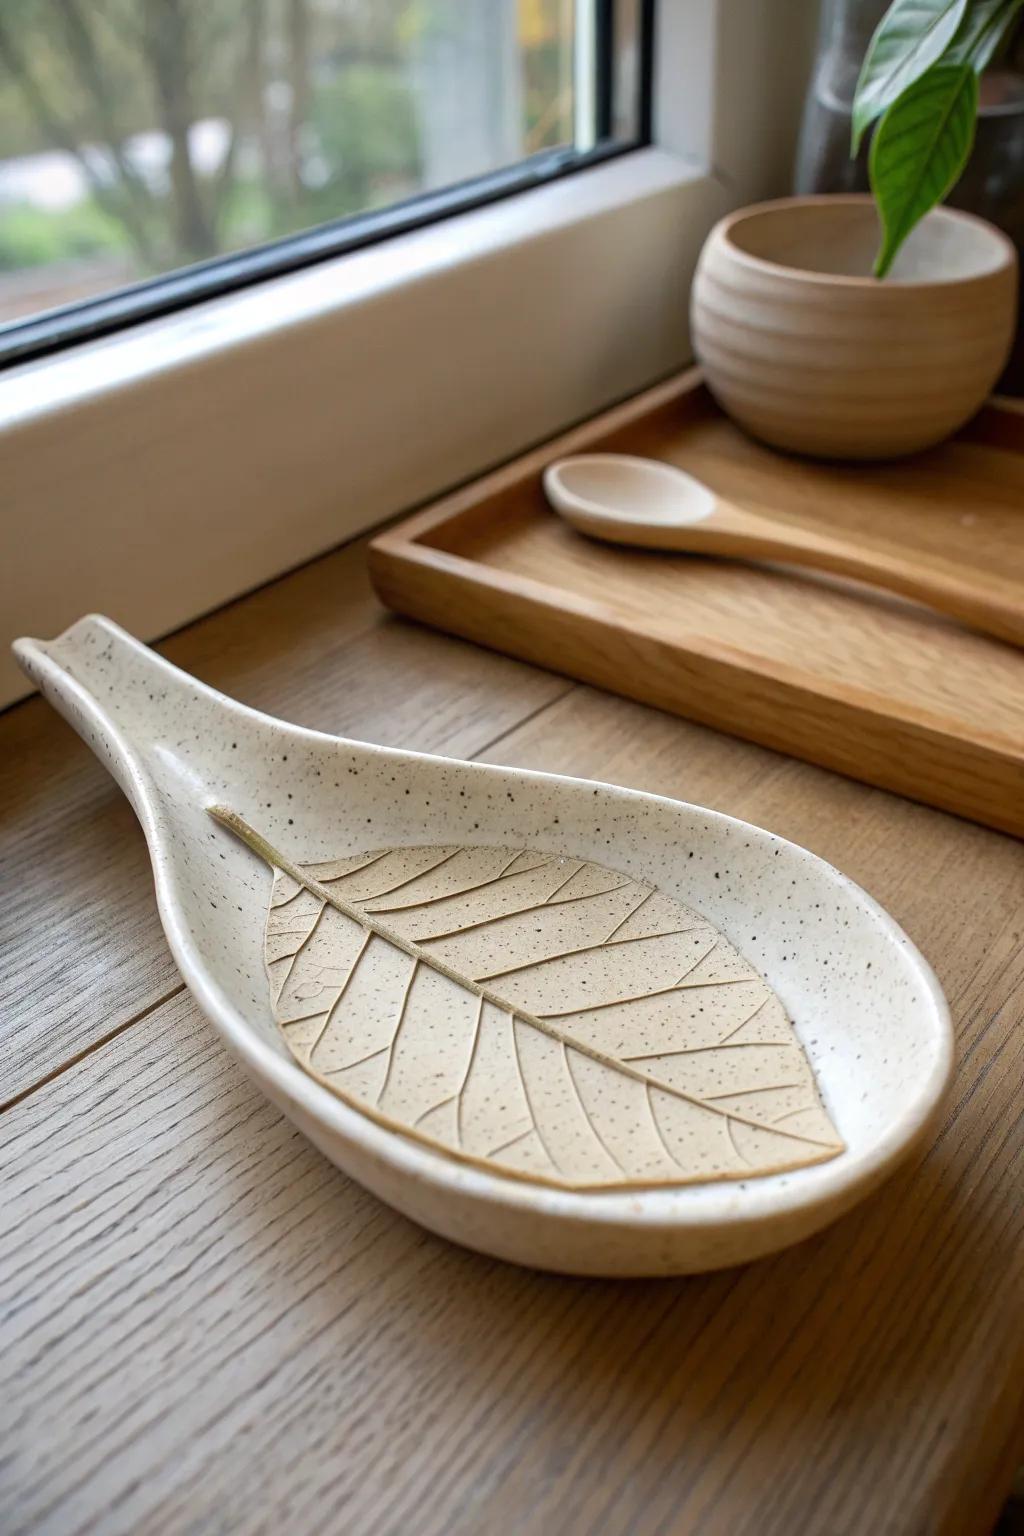
I’ve shaped a clay spoon rest using a real leaf for texture, and it looks so pretty next to the stove. I keep mine strictly for dry utensils and styling, and it still makes cooking feel more pulled together.
A few suggestions:
- Air Dry Clay: Start your project easily with versatile clay that hardens without a kiln, perfect for creating custom shapes.
- Pottery Tool Set: Use these essential sculpting tools to cut precise edges and smooth the surface of your handmade spoon rest.
- Acrylic Varnish / Sealant: Protect your finished piece from moisture and give it a polished look with a durable, clear sealant.
Kitchen Quote Mini Signs
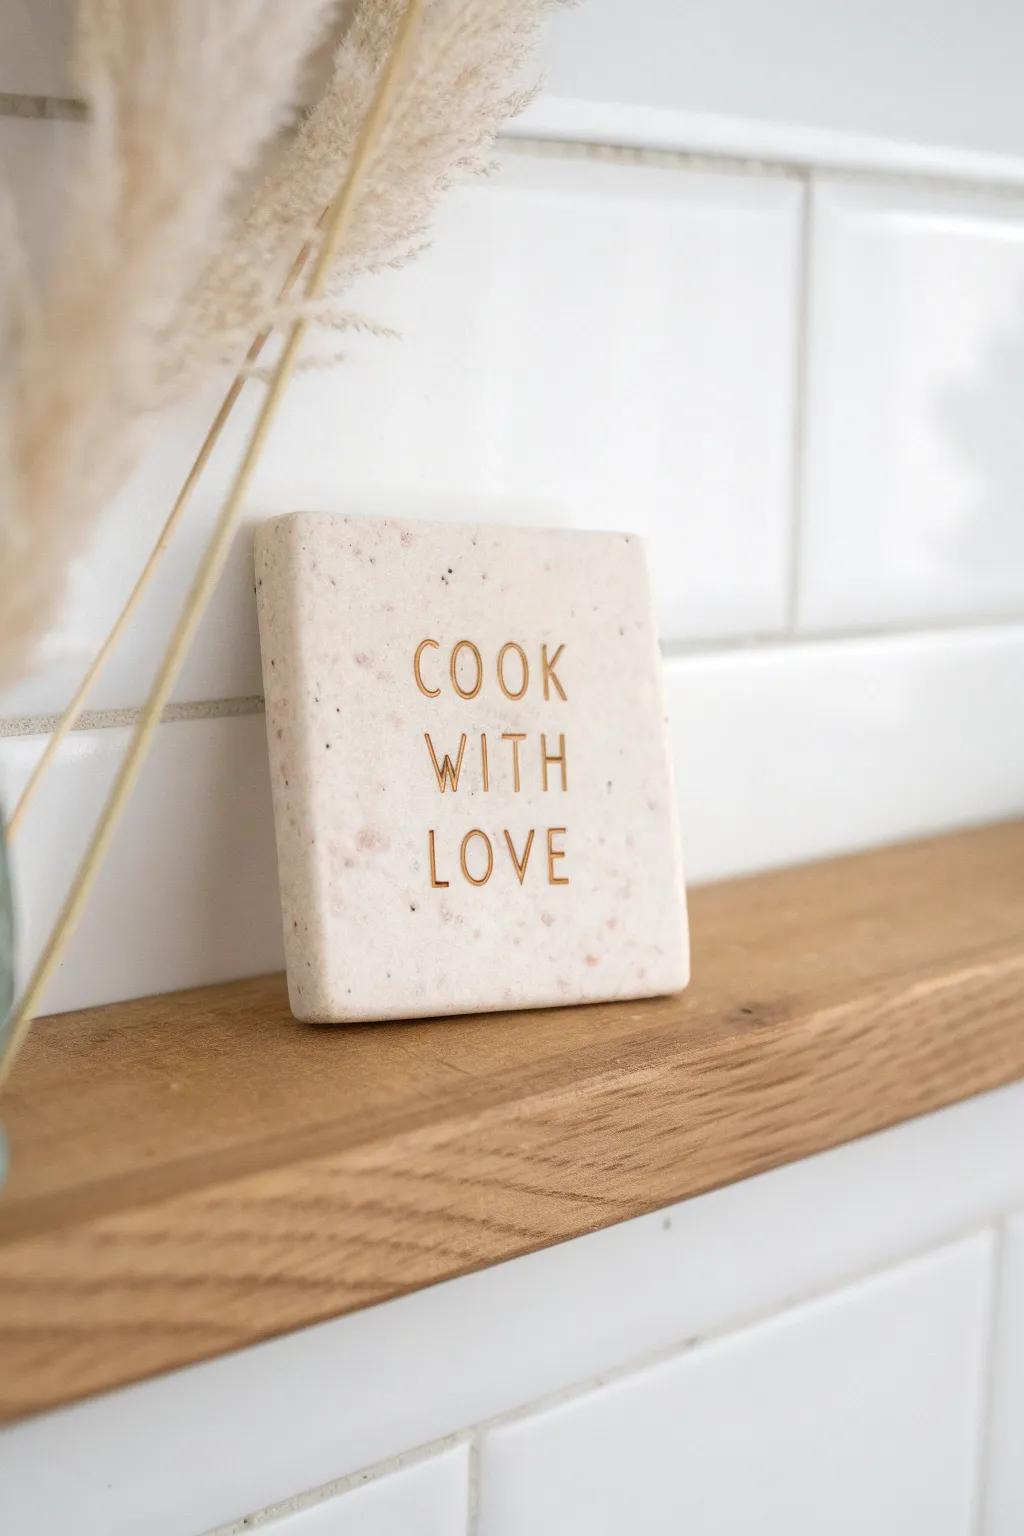
I like making air dry clay signs with short kitchen phrases and leaning them on a shelf like a tiny piece of art. In my last studio, one little sign filled that awkward empty spot above the microwave without adding bulk.
These products might help:
- Air Dry Clay: Start your project with easy-to-use modeling clay that dries firm without needing a kiln or oven.
- Alphabet Stamp Set: Create clear, professional-looking quotes on your clay signs by pressing these letters directly into the soft material.
- Acrylic Paint Set: Add a speckled effect or highlight your stamped letters with these versatile paints to match your kitchen decor.
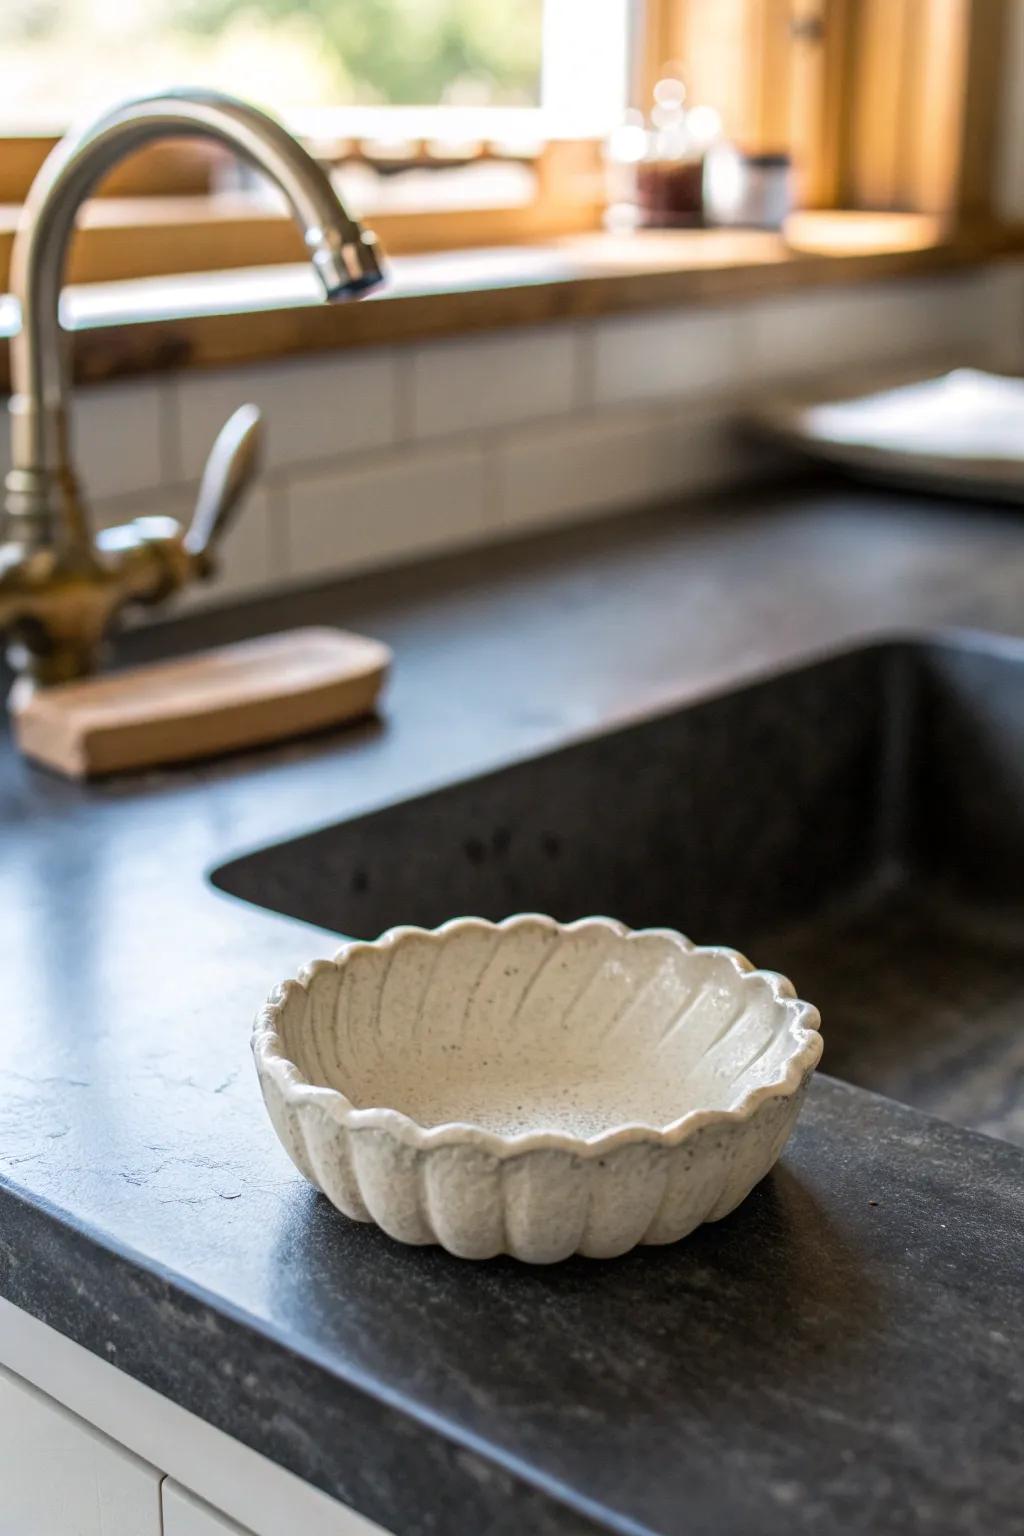
Salt Pinch Bowl for Styling
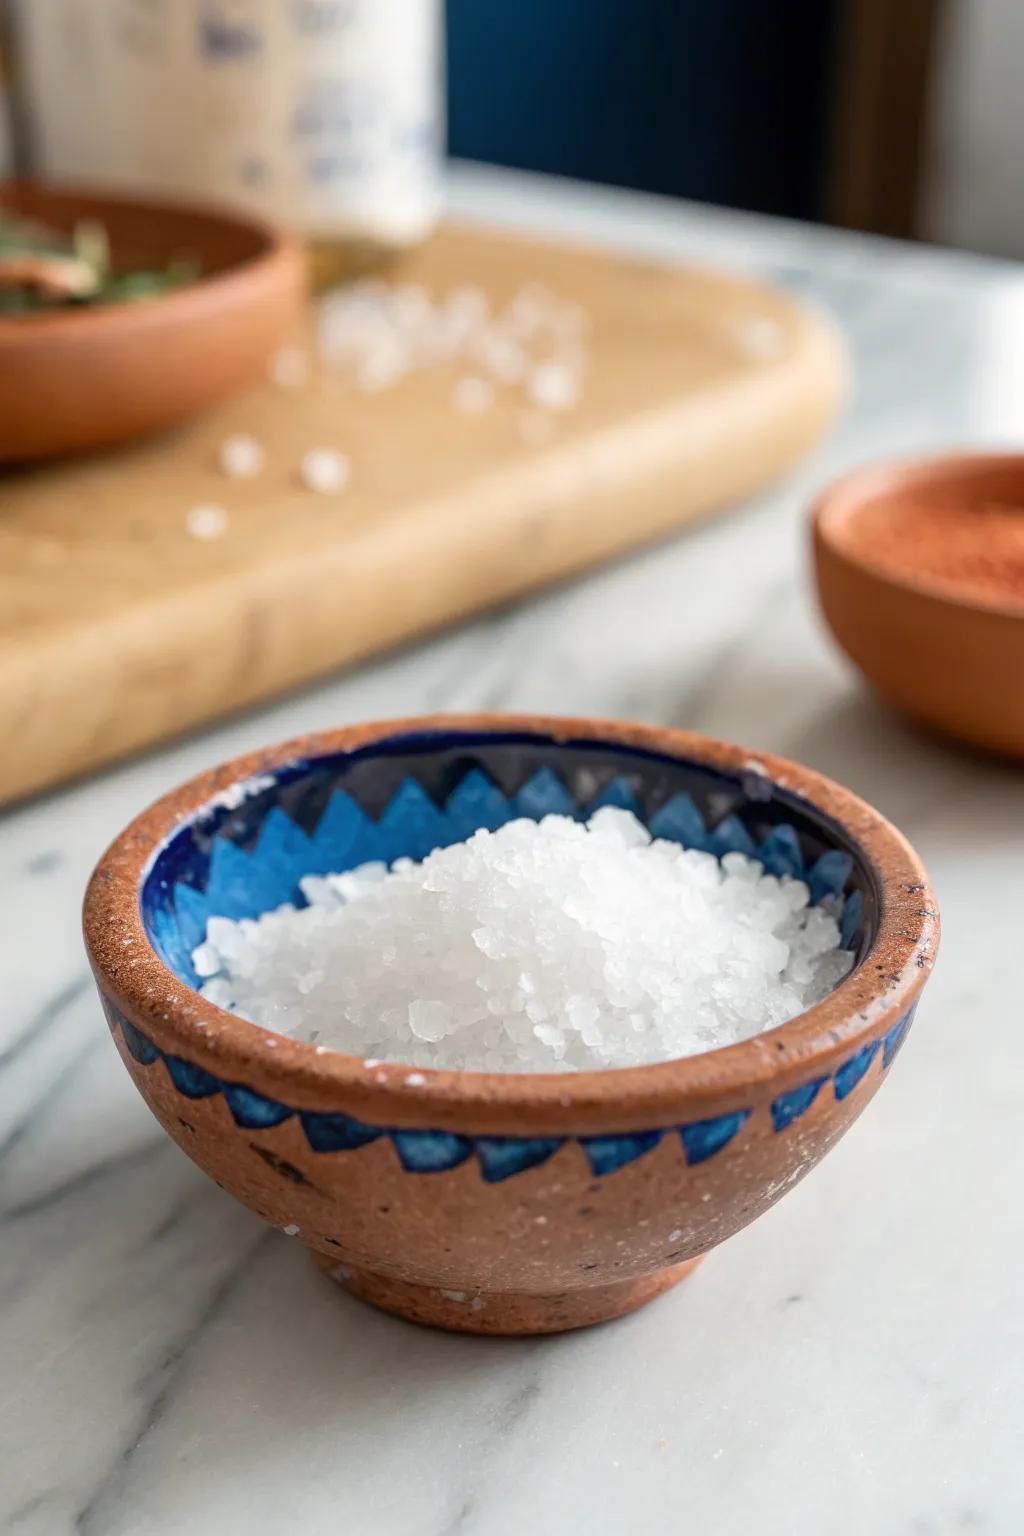
I made a tiny salt pinch bowl that lives by my stovetop and makes the area look like a cute cooking corner. In a small space, having one dedicated “pretty” spot for salt keeps me from leaving random containers out.
Maybe worth checking out:
- Non-Toxic Air Dry Clay: Start your project with easy-to-mold clay that air dries specifically for durable, beautiful home decor crafting.
- Pottery Tool Set: Shape your bowl perfectly and add unique textures or smooth edges with these essential sculpting instruments.
- Food-Safe Sealant/Varnish: Protect your finished clay bowl from moisture and salt damage by applying a clear, protective top coat.
Tea Bag Holder Dish
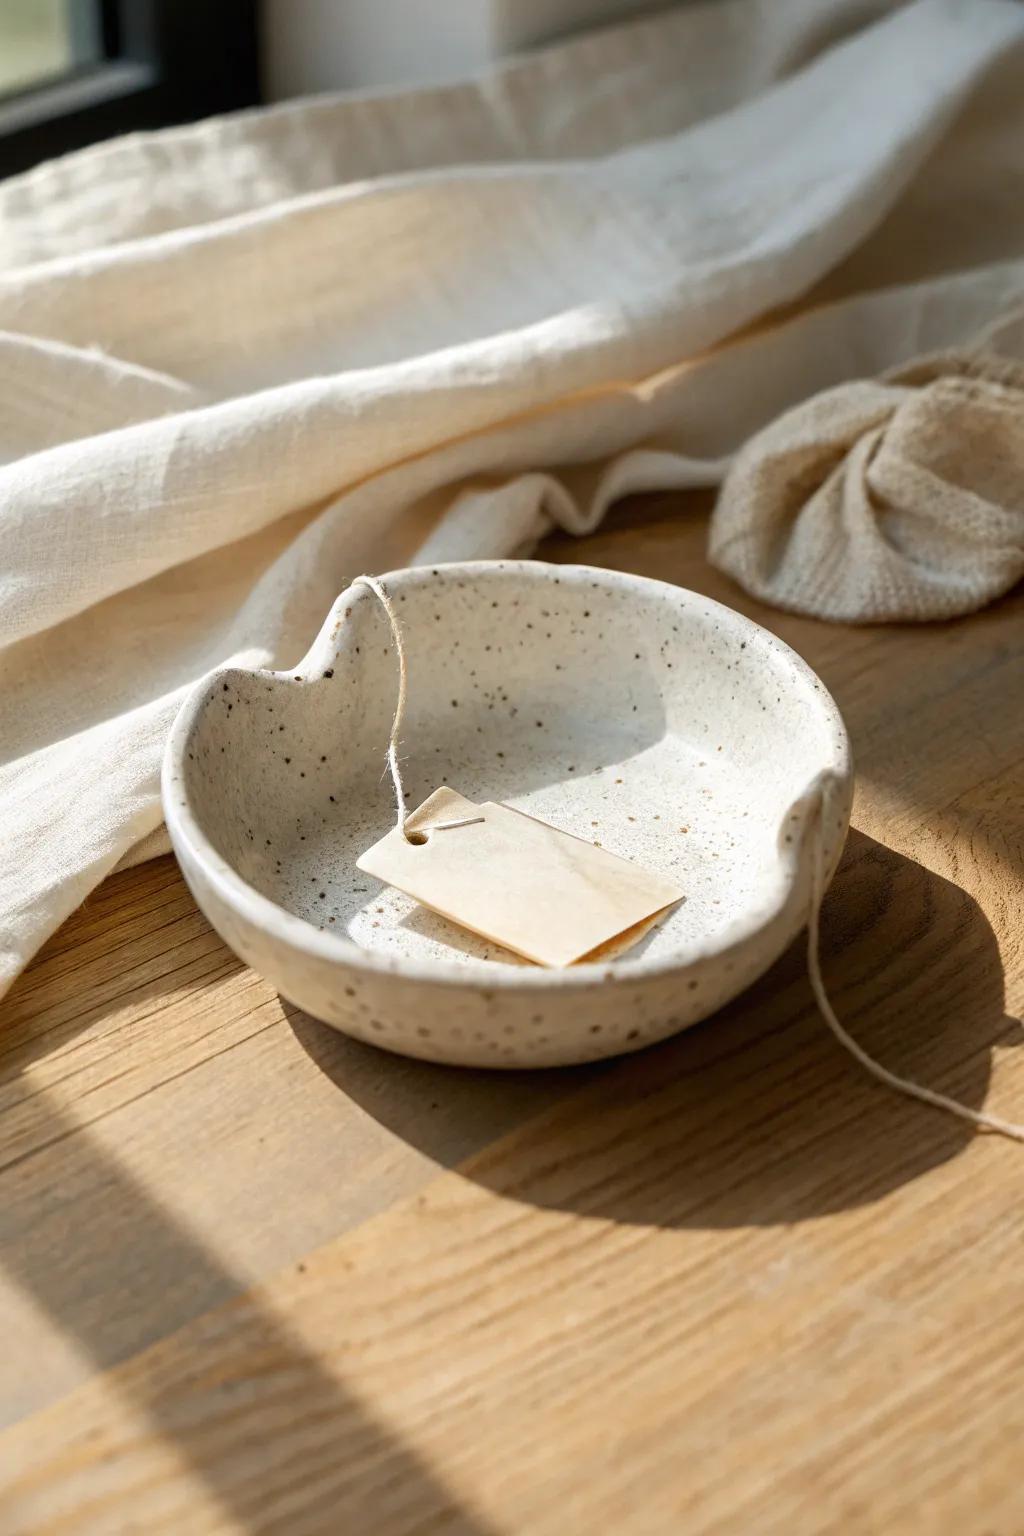
A little tea bag dish is one of those projects I didn’t know I needed until I made it, because it saves my counters from wet drips. I keep mine near the kettle and it makes my morning routine feel calmer.
Check these products out:
- White Air Dry Clay: Start your project with smooth, easy-to-mold clay that dries hard without needing a kiln firing.
- Pottery Tool Set: Use these essential sculpting tools to shape the dish and carve out the clever string notch.
- Speckled Glaze or Paint: Achieve that trendy ceramic look by finishing your dried piece with a speckled varnish or paint.
Ring Dish by the Sink
I always recommend a ring dish for the kitchen because I’ve lost track of my rings one too many times while washing dishes. Mine sits right by the sink, and it’s basically a tiny lifesaver in a cramped layout.
You might like:
- Air Dry Clay White: Create your own custom ring dish similar to this one easily with pliable, quick-drying modeling clay.
- Pottery Clay Sculpting Tools: Use these essential shaping tools to accidentally carve those perfect scalloped edges on your handmade trinket dish.
- Glossy Clay Varnish: Protect your finished dish from water splashes near the sink by sealing it with a waterproof gloss.
Little Tray for Dish Soap and Sponge

I made a sink caddy tray to corral my dish soap and sponge, and it instantly made the sink area look tidier. In my 450 sq ft apartment, anything that creates a “zone” without adding storage furniture is gold.
Explore these options:
- Speckled Air Dry Clay: Use this dotted clay to easily recreate that trendy, natural stone look for your custom sink tray.
- Acrylic Varnish for Clay: Protect your handmade creation from water damage near the sink with a durable, clear acrylic sealant.
- Pottery Tool Set: Shape your tray’s edges smoothly and carve neat details using these essential sculpting and smoothing tools.
Napkin Rings With Simple Shapes
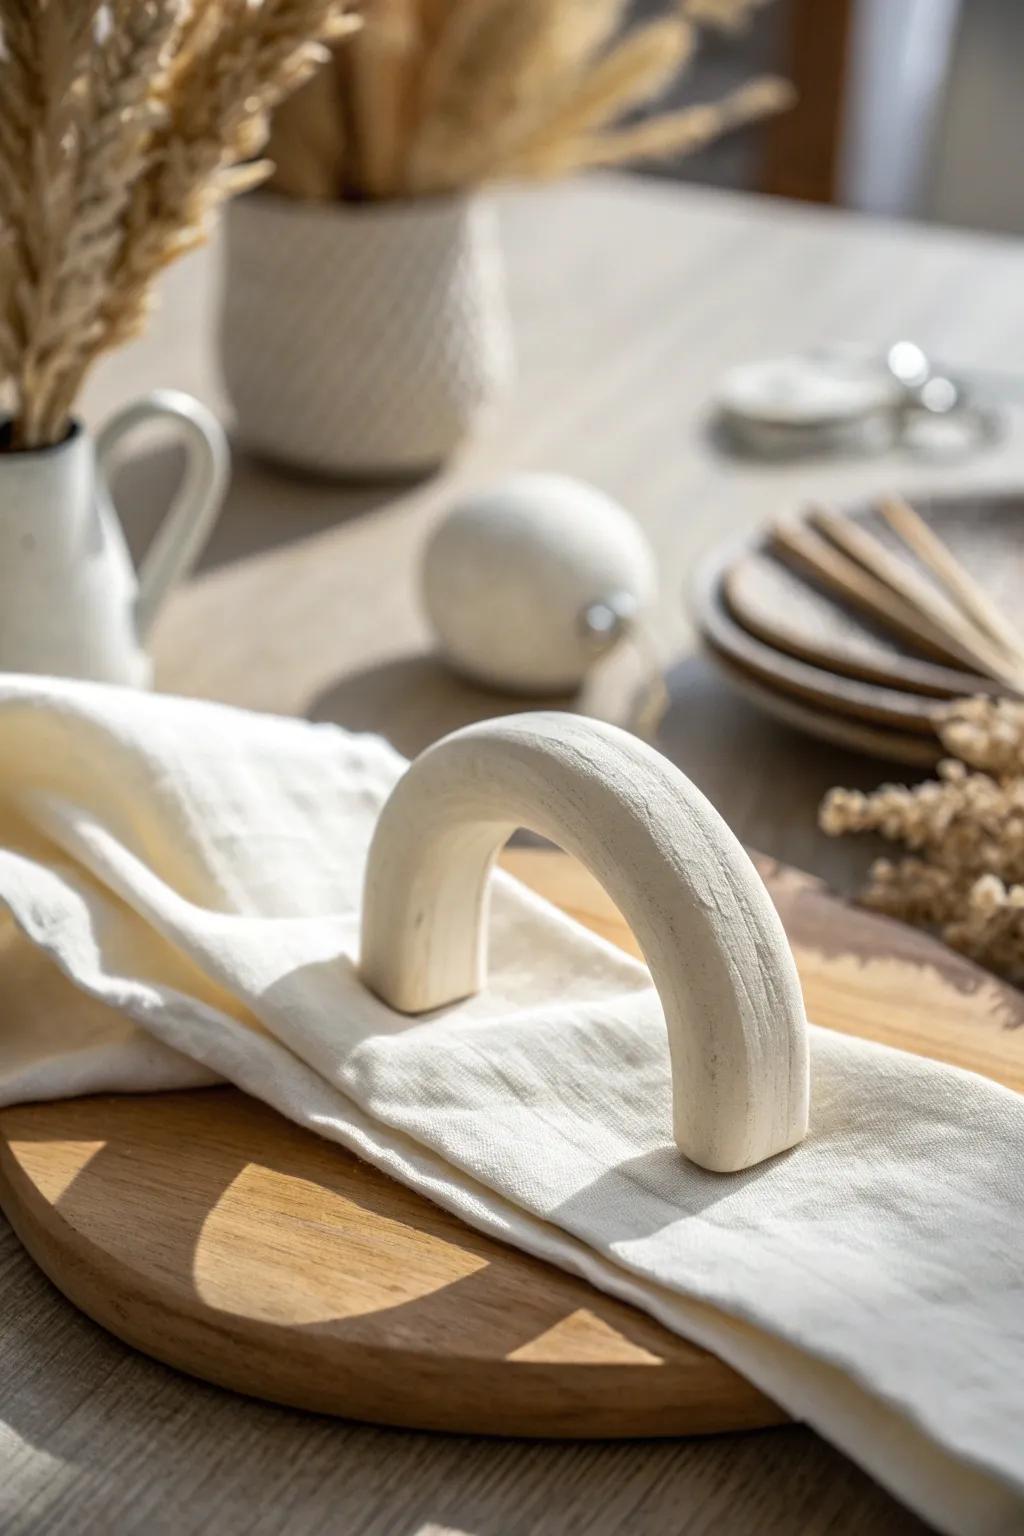
I’ve made air dry clay napkin rings in clean arches and beads, and they make even takeout night feel styled. In a small kitchen, I store them in a shallow drawer so they don’t become countertop decor that collects clutter.
Consider these options:
- Air Dry Clay White: Start your project with smooth, easy-to-mold white clay that dries hard without needing a kiln firing.
- Sculpting Tool Set: Carve precise shapes and smooth out edges on your arches using these essential wooden and metal tools.
- Matte Acrylic Varnish: Protect your finished napkin rings from moisture and stains while keeping a natural, non-glossy look.
Wall Hanging Made From Clay Utensils
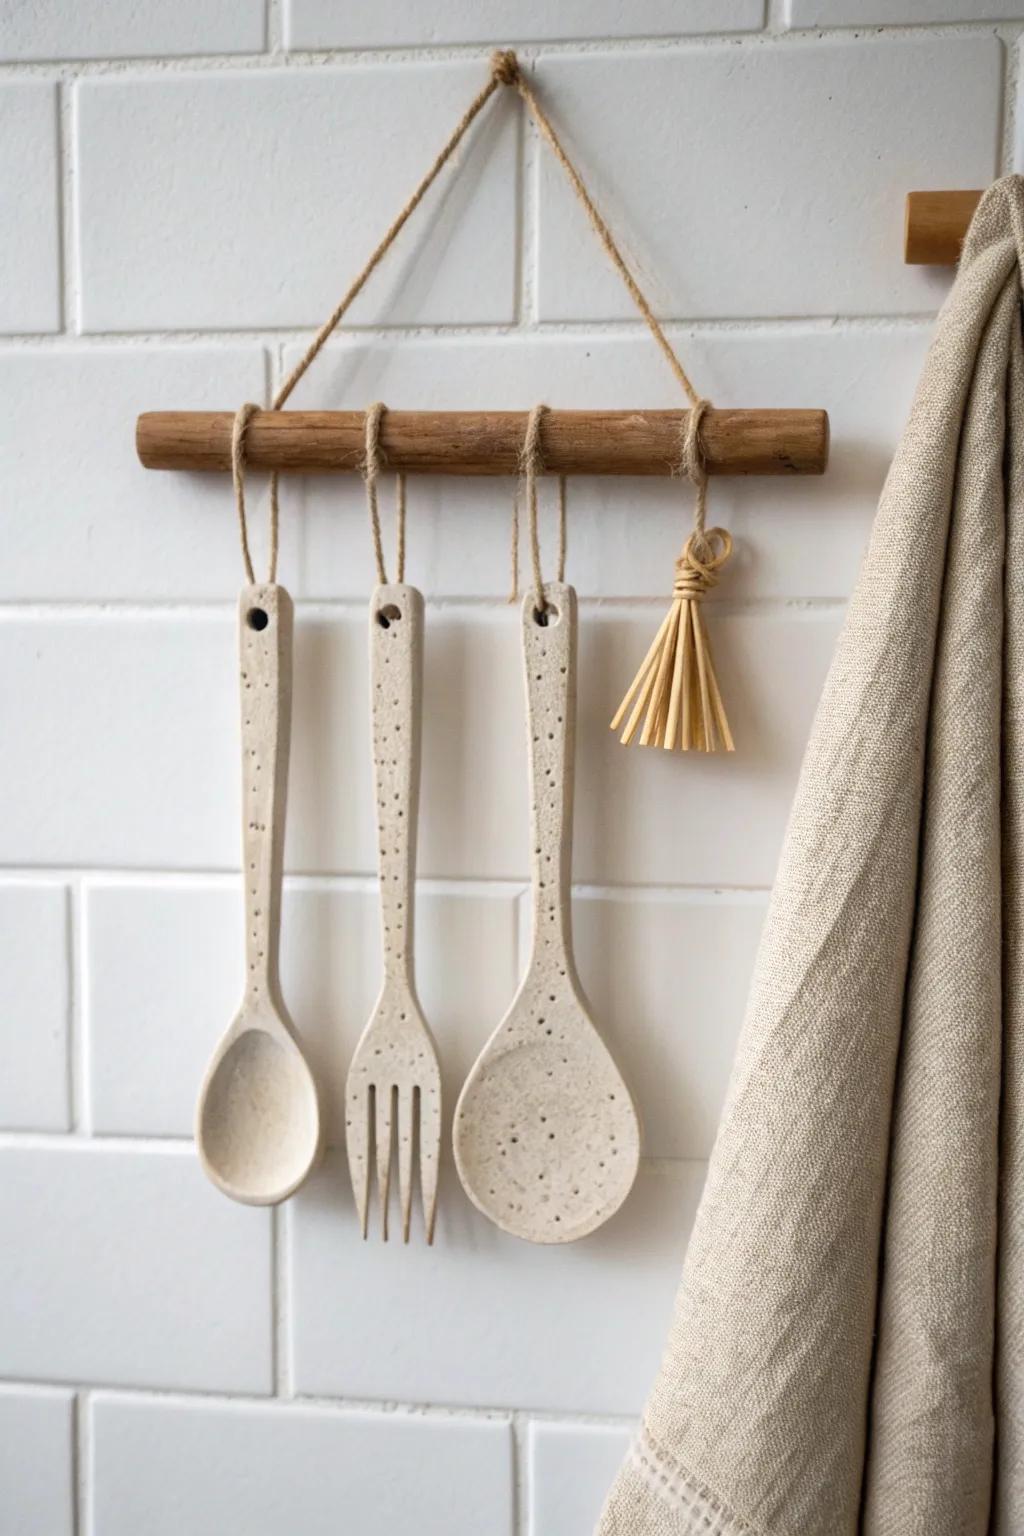
I’ve made flat clay utensil wall decor—like little spoons and forks—and hung them as a mini gallery. It’s perfect when your kitchen is short on backsplash space but you still want something cute to look at.
Try these:
- Air Dry Clay: Shape your own custom utensil decor easily with this pliable clay that requires no kiln firing.
- Jute Twine or Rope: Use strong, rustic twine to securely hang your clay creations from a dowel or wall hooks.
- Wooden Dowel Rods: Create a sturdy base for your gallery wall by suspending your clay art from this simple wood rod.


