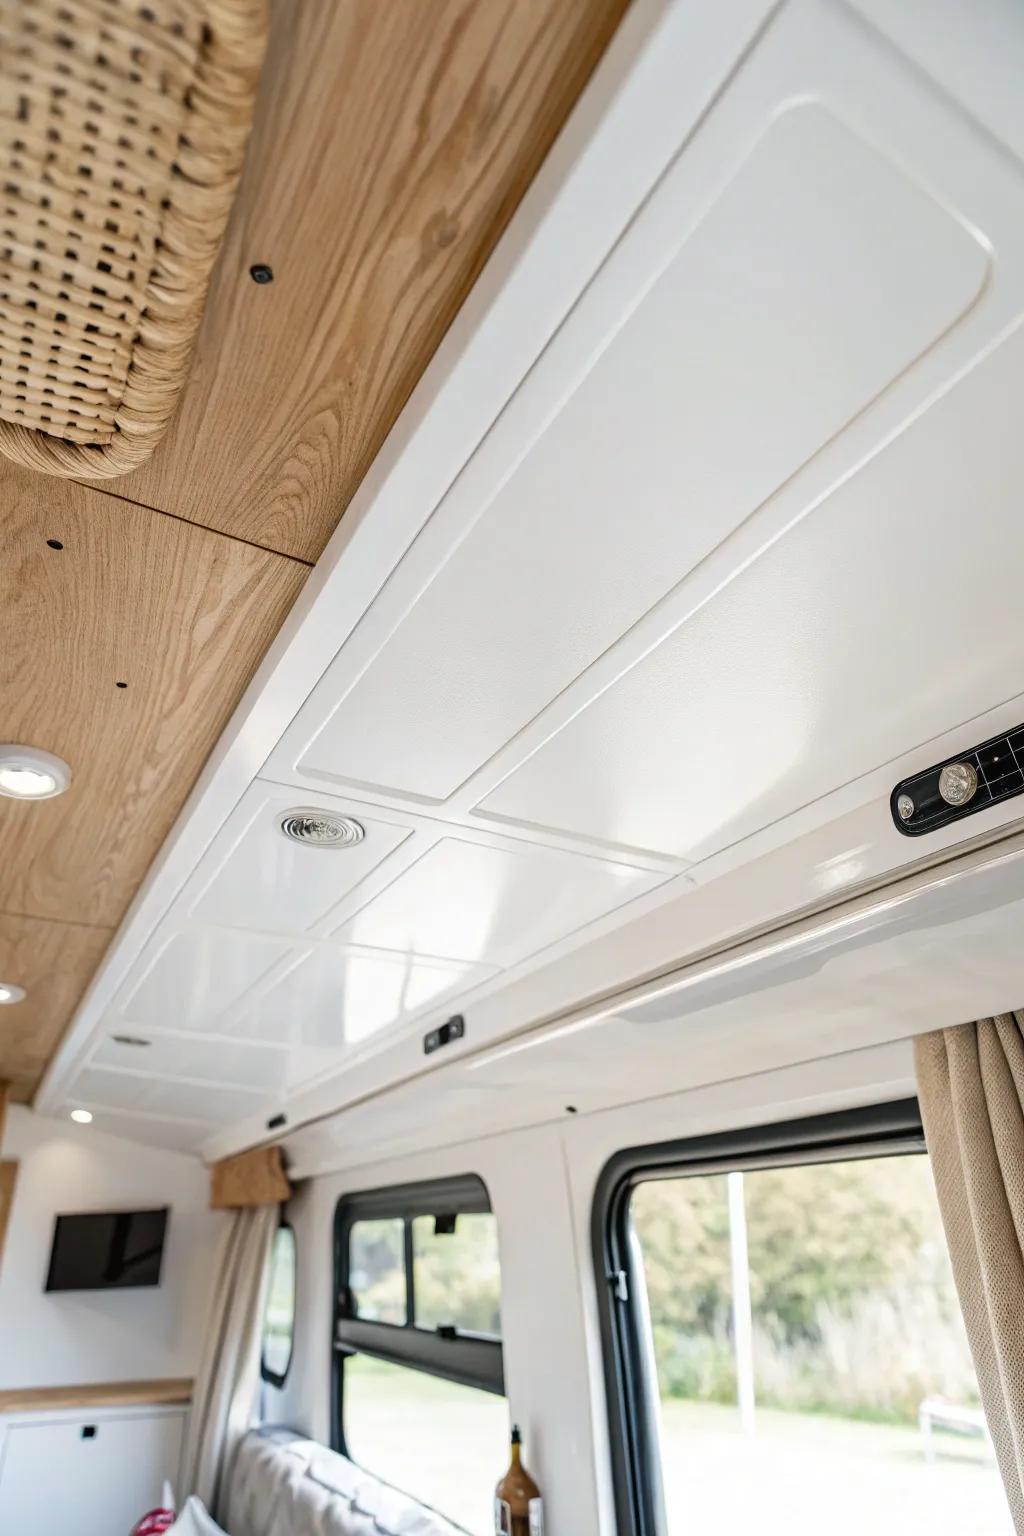
An RV ceiling takes up a huge chunk of your sightline, so when it’s dated or stained, the whole space feels tired. I’ve found that a few smart, lightweight upgrades can make your rig feel instantly more custom, cozy, and “you.”
LED Strip Lighting Glow Perimeter
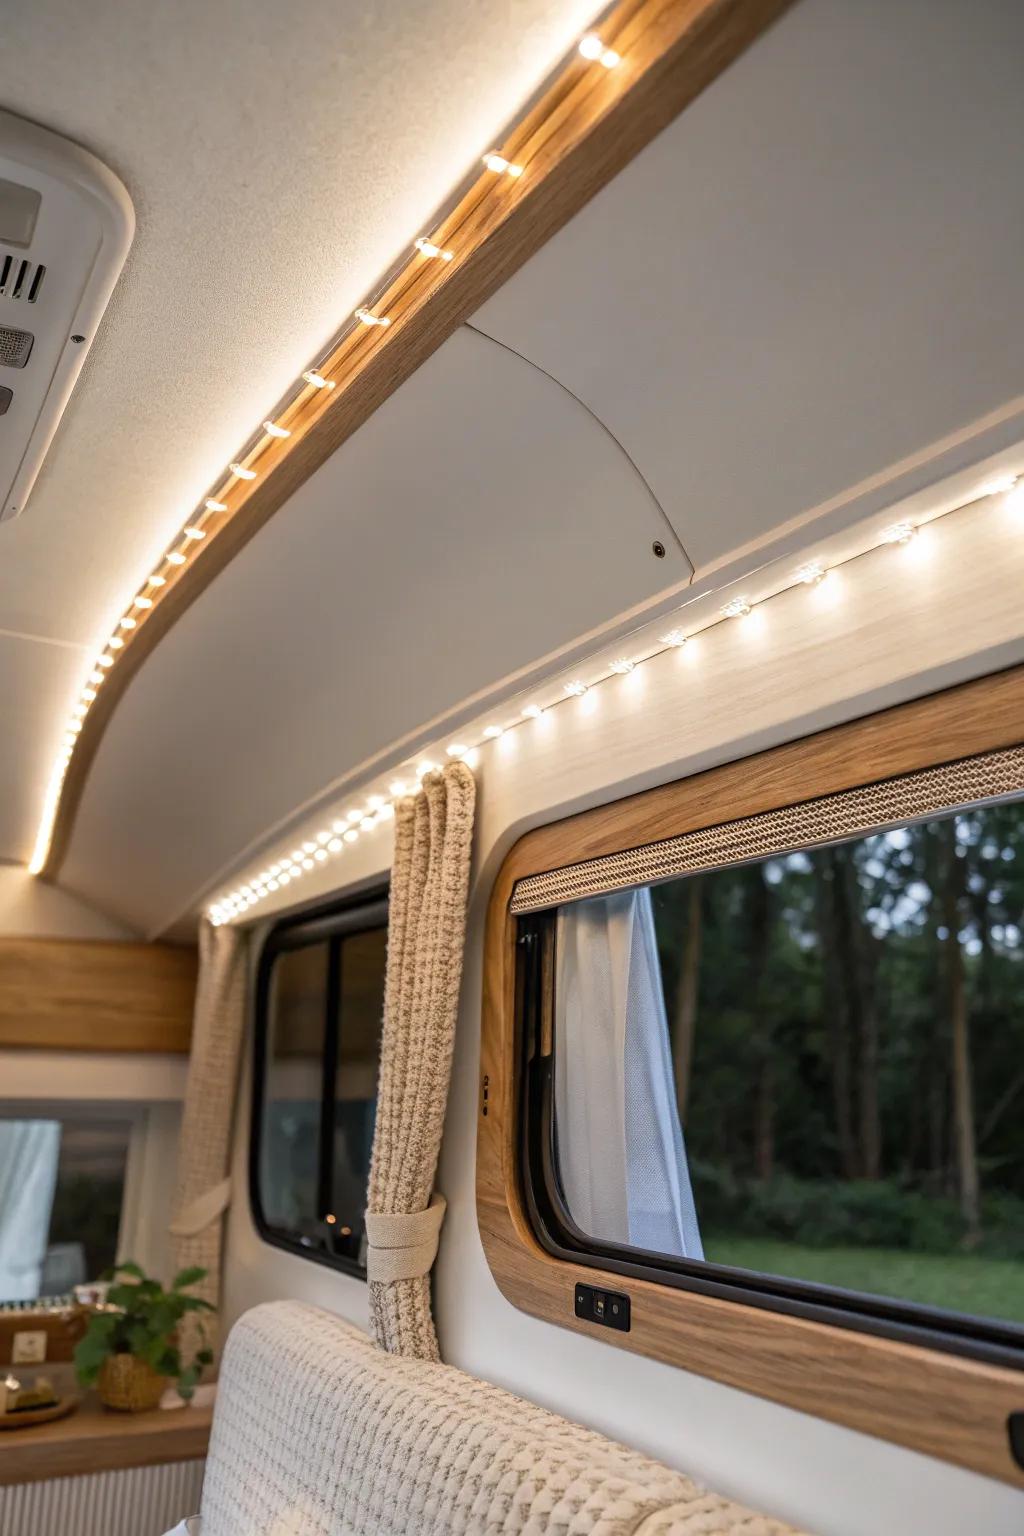
For cozy evenings, I love LED strip lighting hidden along the ceiling edge so you get a soft halo instead of harsh overhead light. I’ve used this trick in tight rooms, and it’s the easiest way to make an RV feel relaxing at night.
Consider these options:
- Warm White LED Strip Lights: Create a cozy ambiance easily by installing flexible, warm-toned lighting along your RV’s ceiling trim.
- Adhesive Cable Management Clips: Keep your lighting setup neat and secure by using these small, discreet clips for wire organization.
- 12V LED Dimmer Switch: Control brightness levels perfectly for movie nights or reading by adding a simple manual dimmer switch.
Bright White Ceiling Paint Refresh
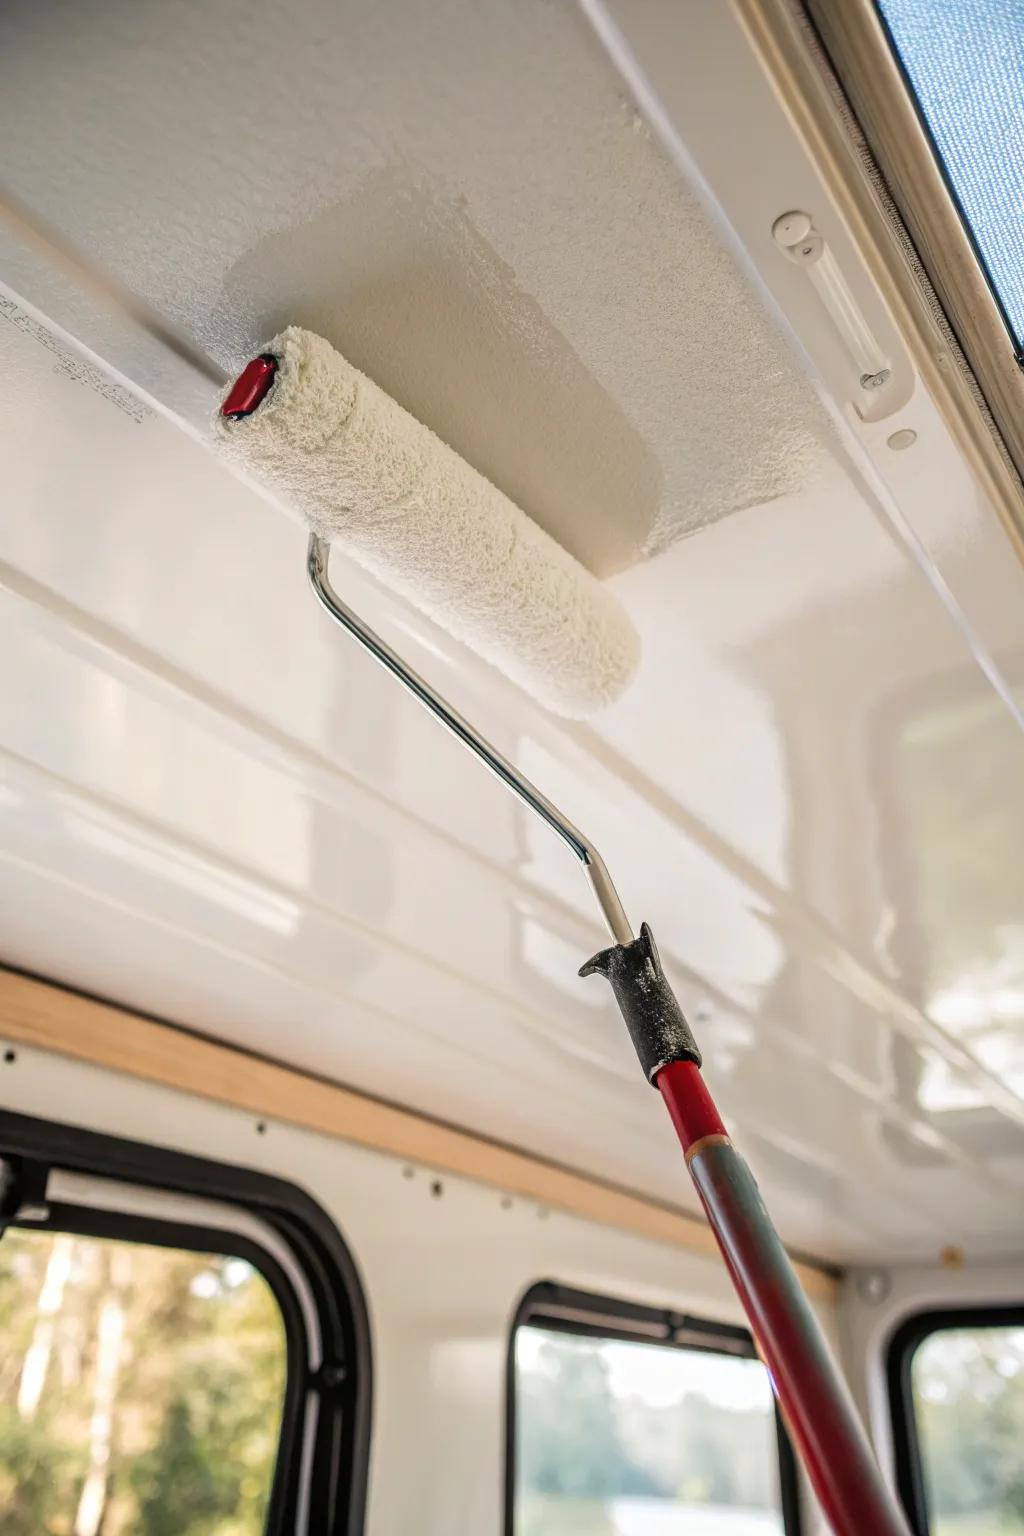
When I painted an RV ceiling crisp white, the space looked taller overnight and the light bounced around so much better. I always use a roller for the big areas and a brush around fixtures so it doesn’t look patchy.
Check if these fit your needs:
- High-Quality Paint Roller Kit: Cover large ceiling areas smoothly with a comprehensive roller set designed for even application and minimal splatter.
- Telescoping Extension Pole: Reach overhead comfortably without a ladder by attaching your roller to a sturdy, adjustable extension pole.
- Angled Sash Paint Brush: Achieve clean lines around light fixtures and vents using a precise angled brush for detailed trim work.
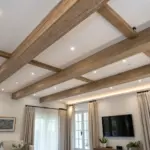
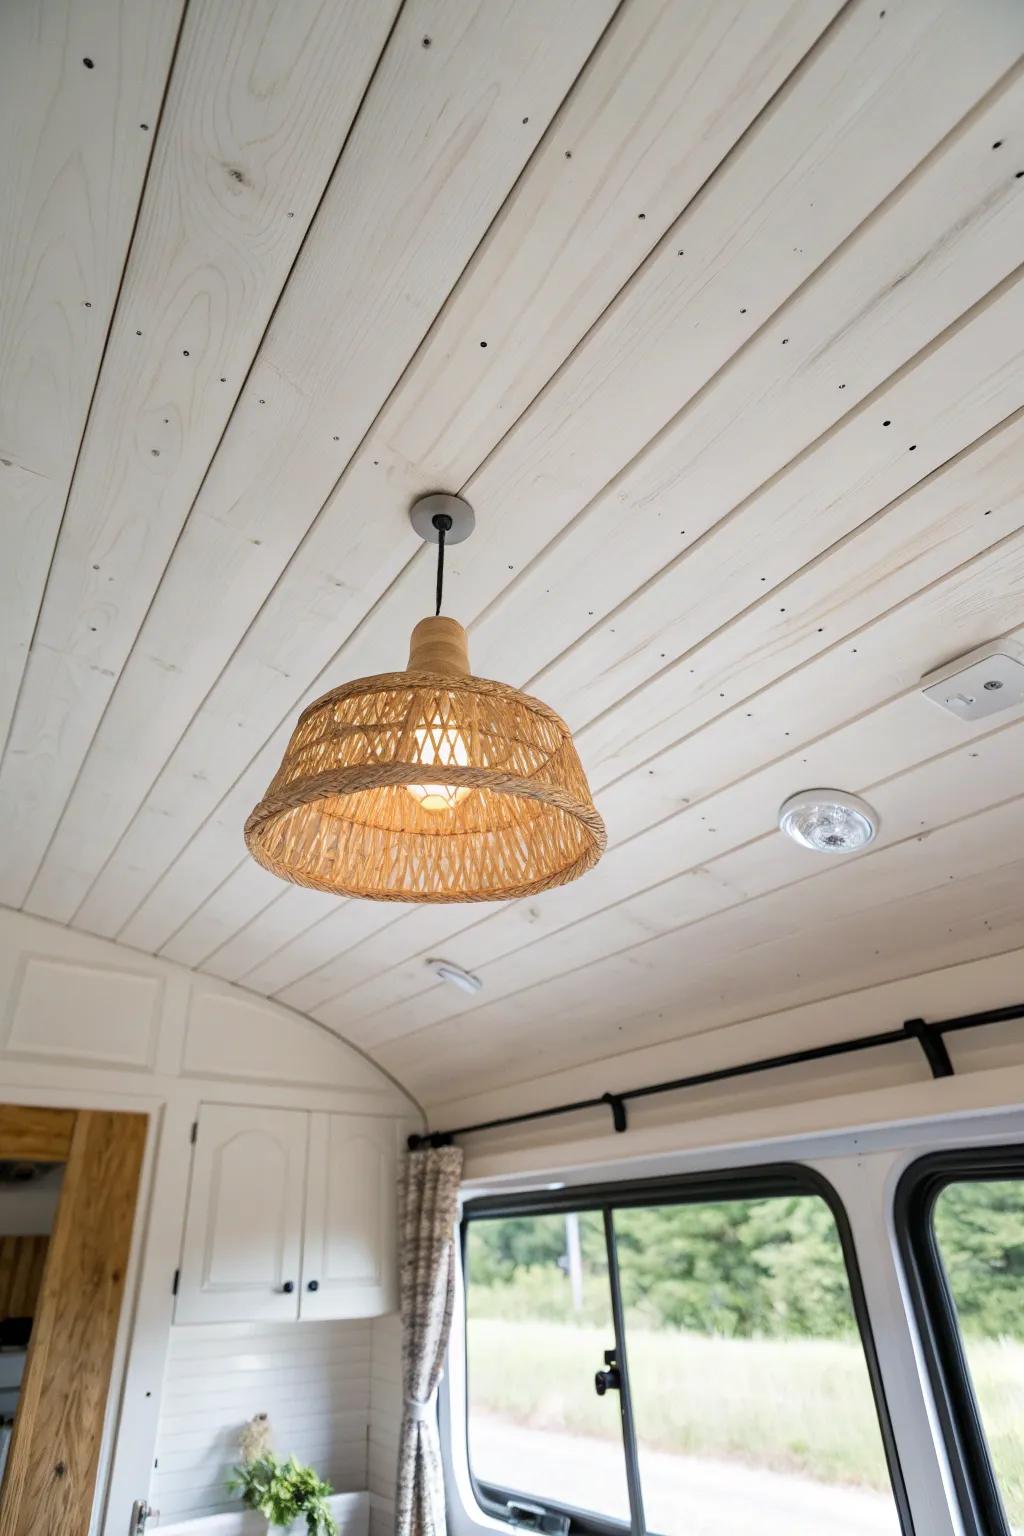
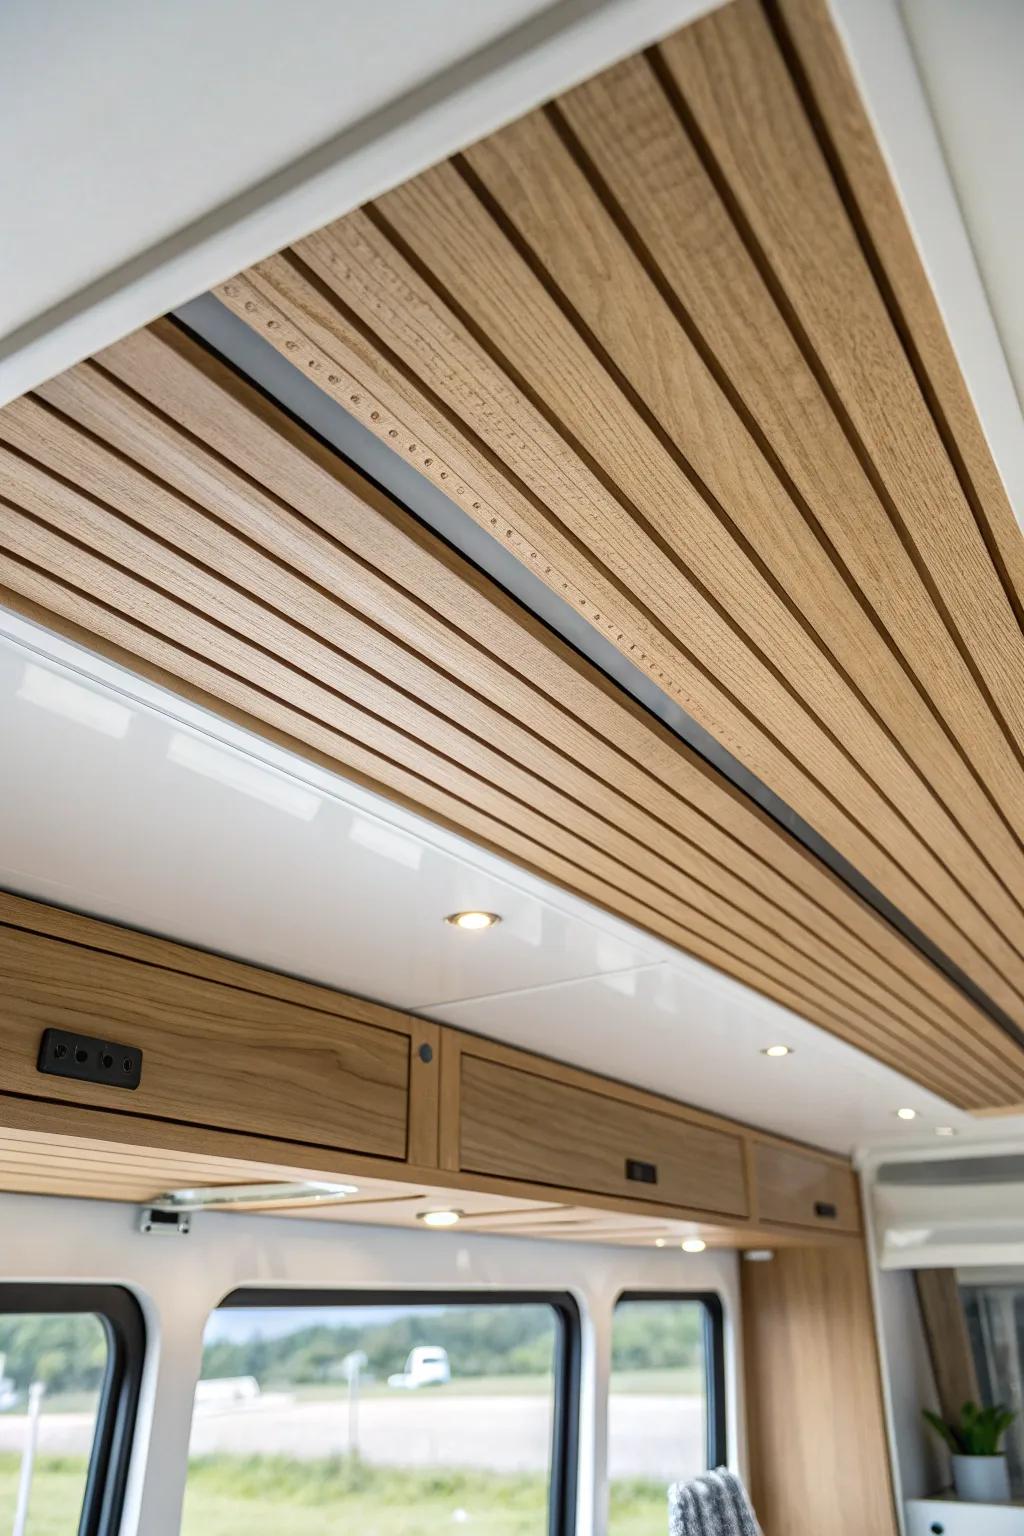
Light Wood Plank Ceiling
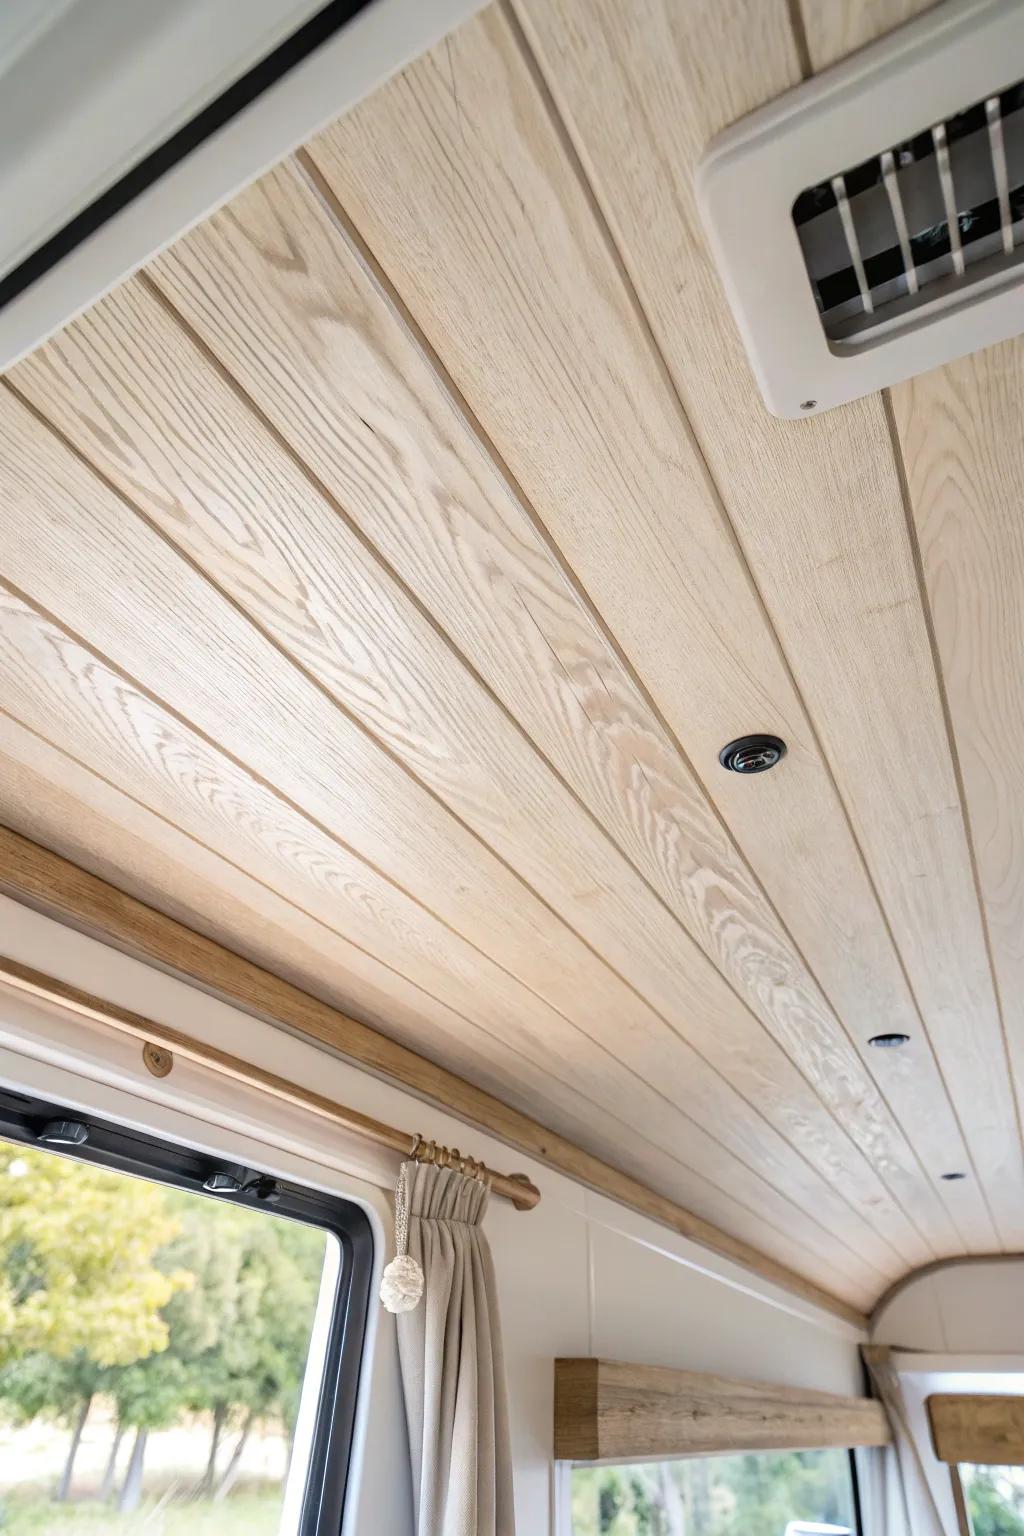
A light wood plank ceiling is my go-to for making an RV feel like a tiny cabin without the gloom. I’ve installed thin planks overhead before, and the warmth they add is honestly unmatched.
These products might be useful:
- Peel and Stick Wood Plank Paneling: Transform your camper’s interior quickly with lightweight, self-adhesive planks that offer a real wood look.
- Recessed 12V RV Ceiling Puck Lights: Illuminate your new wooden ceiling seamlessly with these thin, energy-efficient LED lights designed for RV power systems.
- Wooden Curtain Rod and Rings Set: Complete the natural cabin aesthetic by hanging curtains with sturdy, matching wooden hardware for a cohesive look.

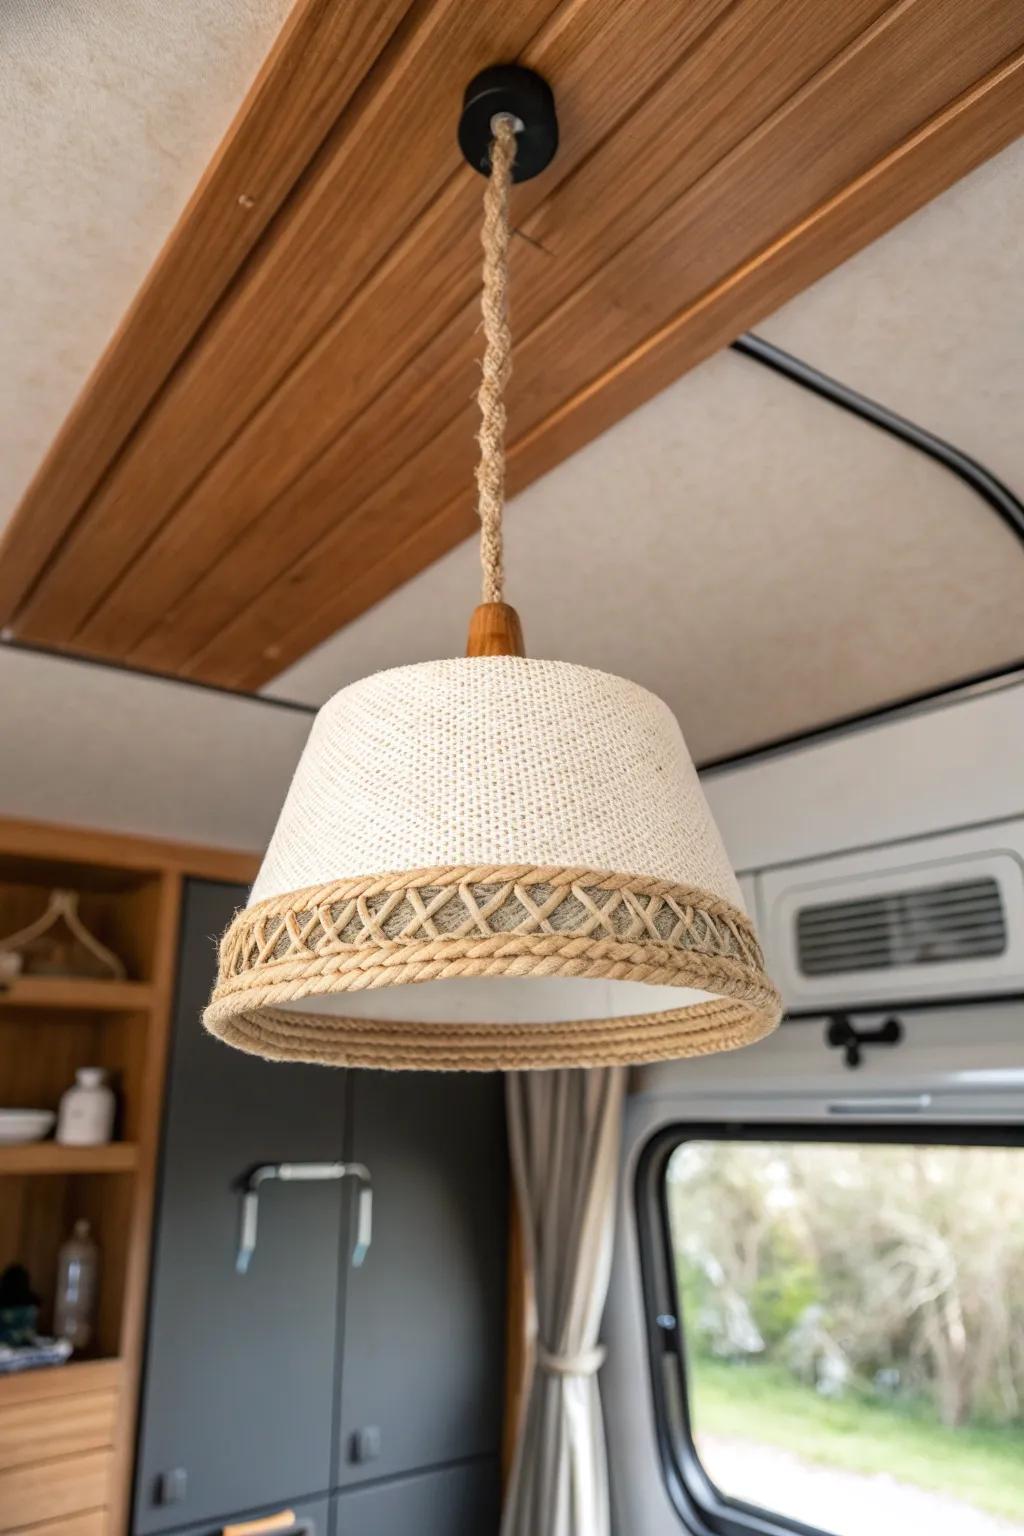
Shiplap-Style Plank Look
If you love that cozy cottage vibe, a shiplap-style ceiling gives you instant character with clean lines. I’ve used a plank pattern overhead to distract from old seams, and it made the whole interior feel intentionally designed.
Give these a look:
- Lightweight White Wood Planks: Transform your RV ceiling with lightweight planks that offer that bright, airy shiplap aesthetic without adding excessive weight.
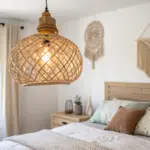
- Woven Rattan Pendant Light: Add warmth and texture against your new white ceiling with a boho-style woven light fixture similar to this one.
- Nail Gun Kit for Paneling: Secure your ceiling planks efficiently with a reliable brad nailer, ensuring a professional and long-lasting installation overhead.
Peel-and-Stick Wallpaper Accent Ceiling
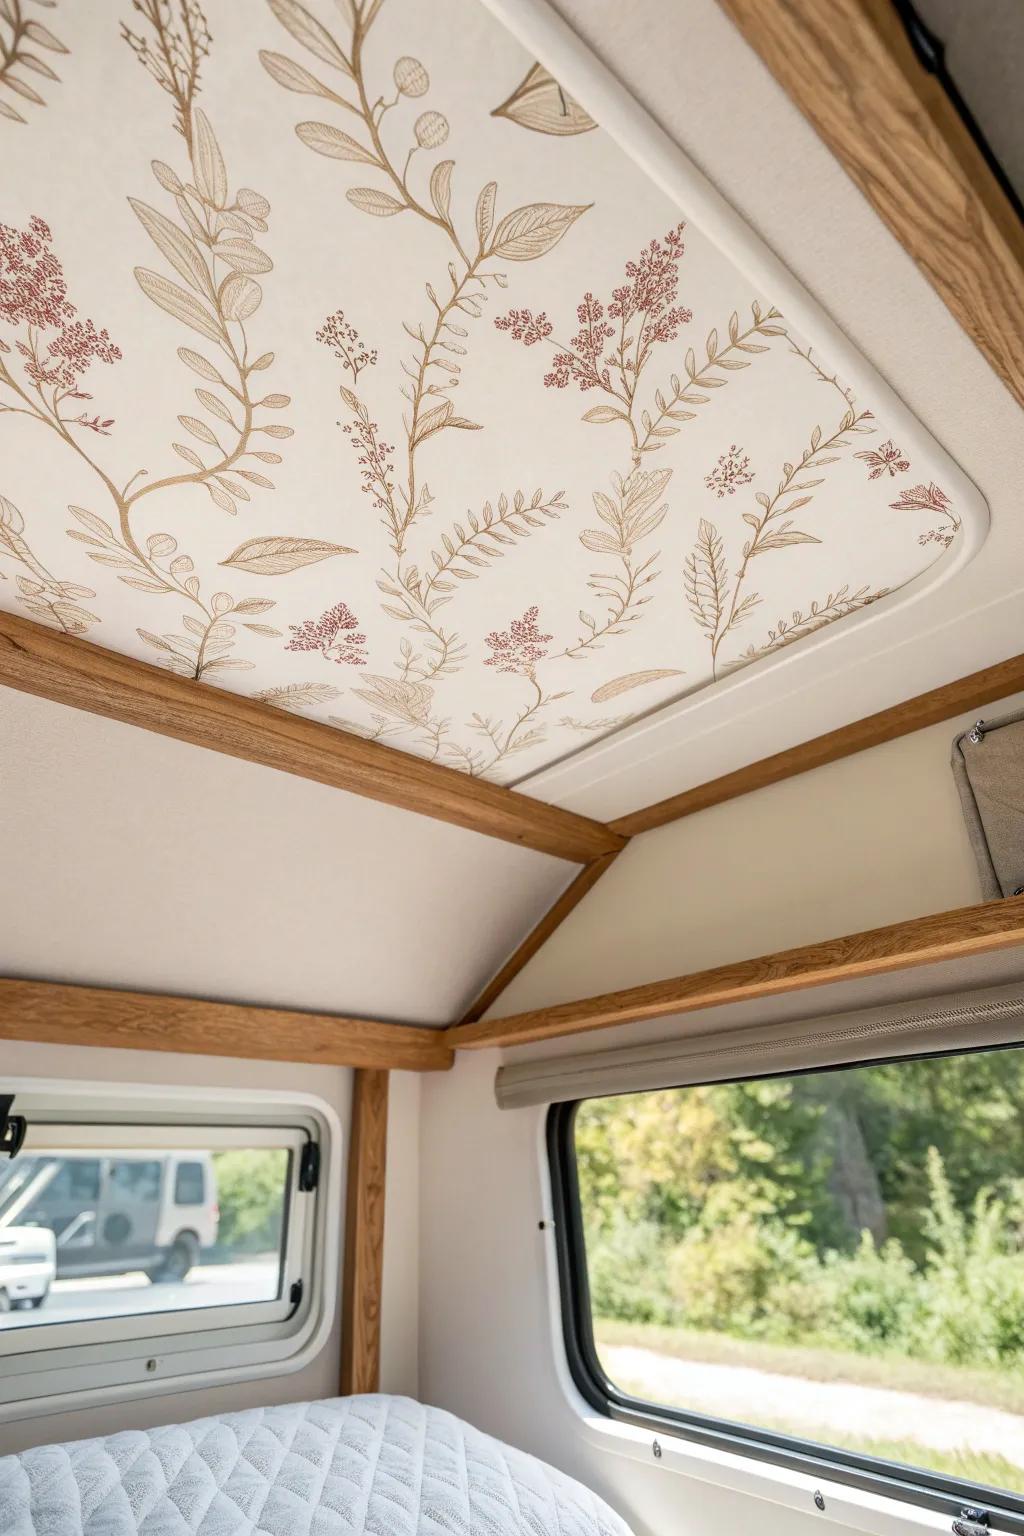
A peel-and-stick wallpaper ceiling is my favorite “weekend wow” project when you want pattern without commitment. I’ve done a small ceiling section over a bed area, and it made that zone feel like a boutique nook.
A few helpful options:
- Botanical floral peel and stick wallpaper: Add a touch of nature to your ceiling quickly with this easy-to-apply adhesive design pattern.
- Wallpaper smoothing tool kit: Ensure a flawless, bubble-free application on your ceiling using these essential smoothing and cutting tools.
- Decorative wood trim molding: Frame your new wallpaper accent perfectly to create a clean, finished look along the ceiling edges.
Two-Tone Ceiling and Cabinets Contrast
Pairing a warm ceiling finish with darker cabinetry creates a two-tone contrast that feels designer in an RV. I tested this combo in a tiny space, and it gave the whole interior more depth without adding clutter.
Explore these options:
- Self-Adhesive Wood Plank Vinyl Film: Refresh your RV ceiling with this easy-to-apply vinyl film, adding warmth and texture without heavy remodeling.
- Matte Charcoal Furniture Paint: Transform dated cabinets with this durable paint to create a sophisticated, modern contrast against lighter ceilings.
- Boho Woven Pendant Light Shade: Add a natural focal point that bridges the gap between warm ceilings and sleek dark cabinetry.
Satin Finish for Easy Cleaning
In an RV, ceilings collect cooking and road dust faster than you’d think, so I like a wipeable satin finish. I’ve used it in small spaces and appreciated how it cleaned up with a gentle wipe instead of constant repainting.
Try these:
- Satin Finish Interior Paint: Refresh your RV ceiling with a durable satin paint that allows for easy cleaning and resists moisture buildup.
- PVC Ceiling Panels: Install lightweight, water-resistant panels to create a smooth, wipeable surface that brightens your mobile living space.
- Microfiber Cleaning Mop: Easily reach and wipe down your new satin ceiling regularly to remove dust and cooking residue quickly.
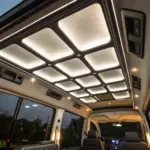
Puck Lights Set Into Planks
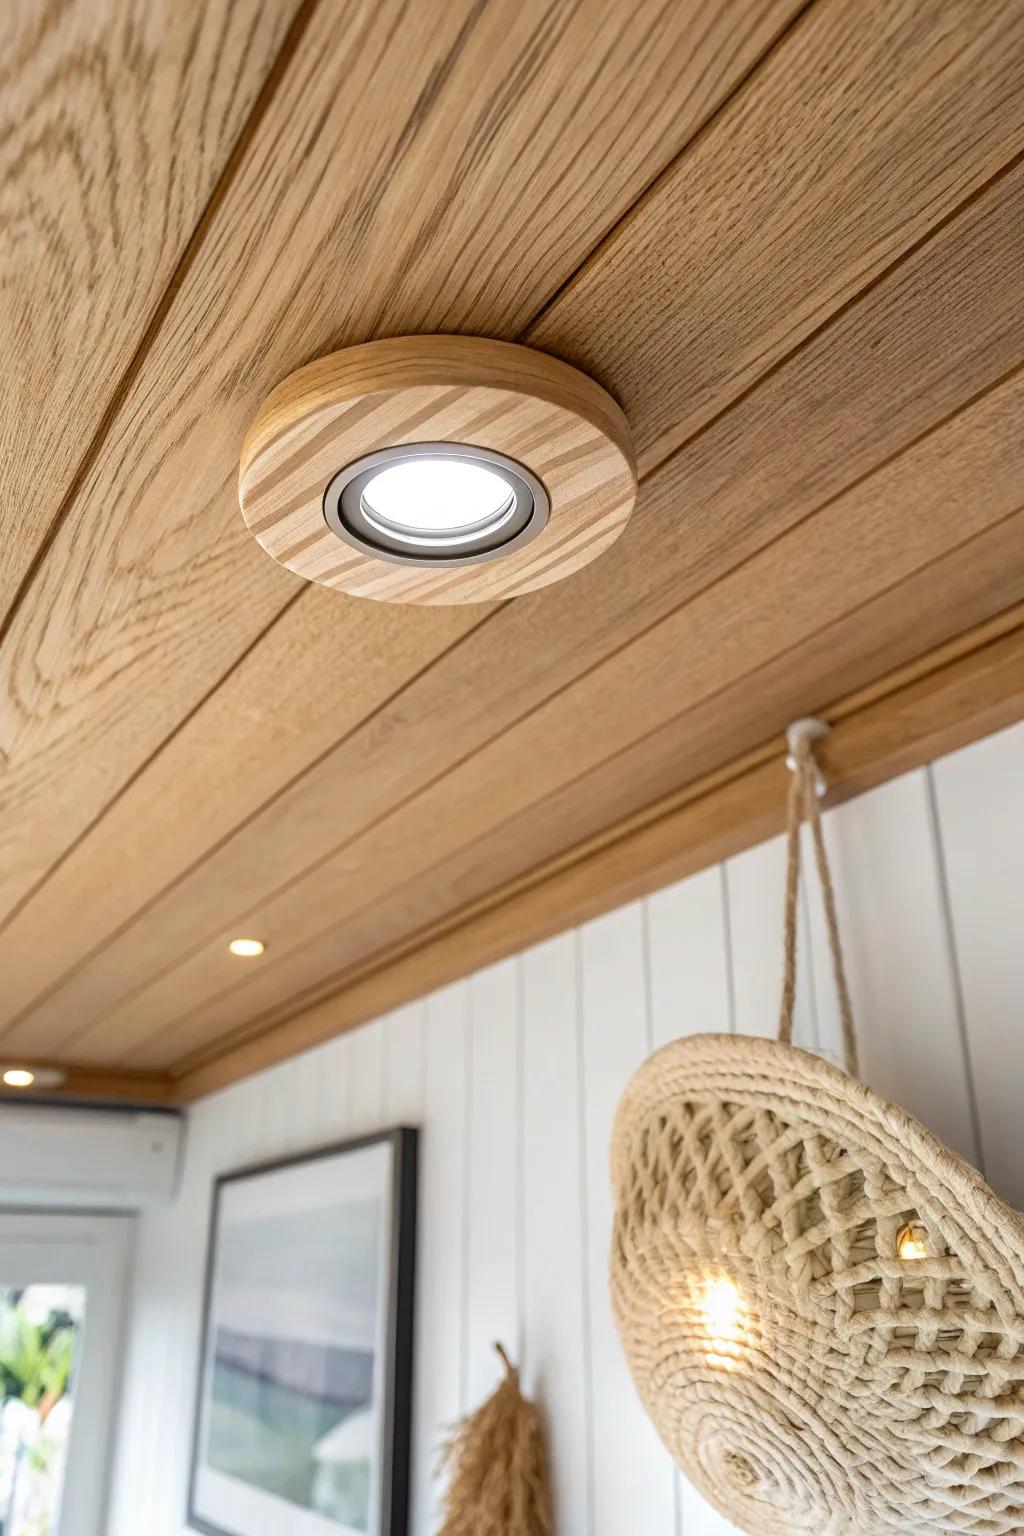
Nothing modernizes an RV ceiling faster than puck lights tucked neatly into wood or panels. I added small recessed-style lights in a low ceiling once, and the even glow made the whole space feel bigger.
May just do the trick:
- Recessed 12V LED Puck Lights: Upgrade your camper lighting efficiency with slim, low-voltage recessed LEDs perfect for panel installation.
- Interlocking Wood Ceiling Planks: Get that professional finish with tongue-and-groove planks that make installing ceiling lights look seamless.
- Adjustable Hole Saw Kit: Ensure a perfect fit for every light fixture by creating precise, clean circular cuts easily.
Trim Out Roof Vents and Skylights
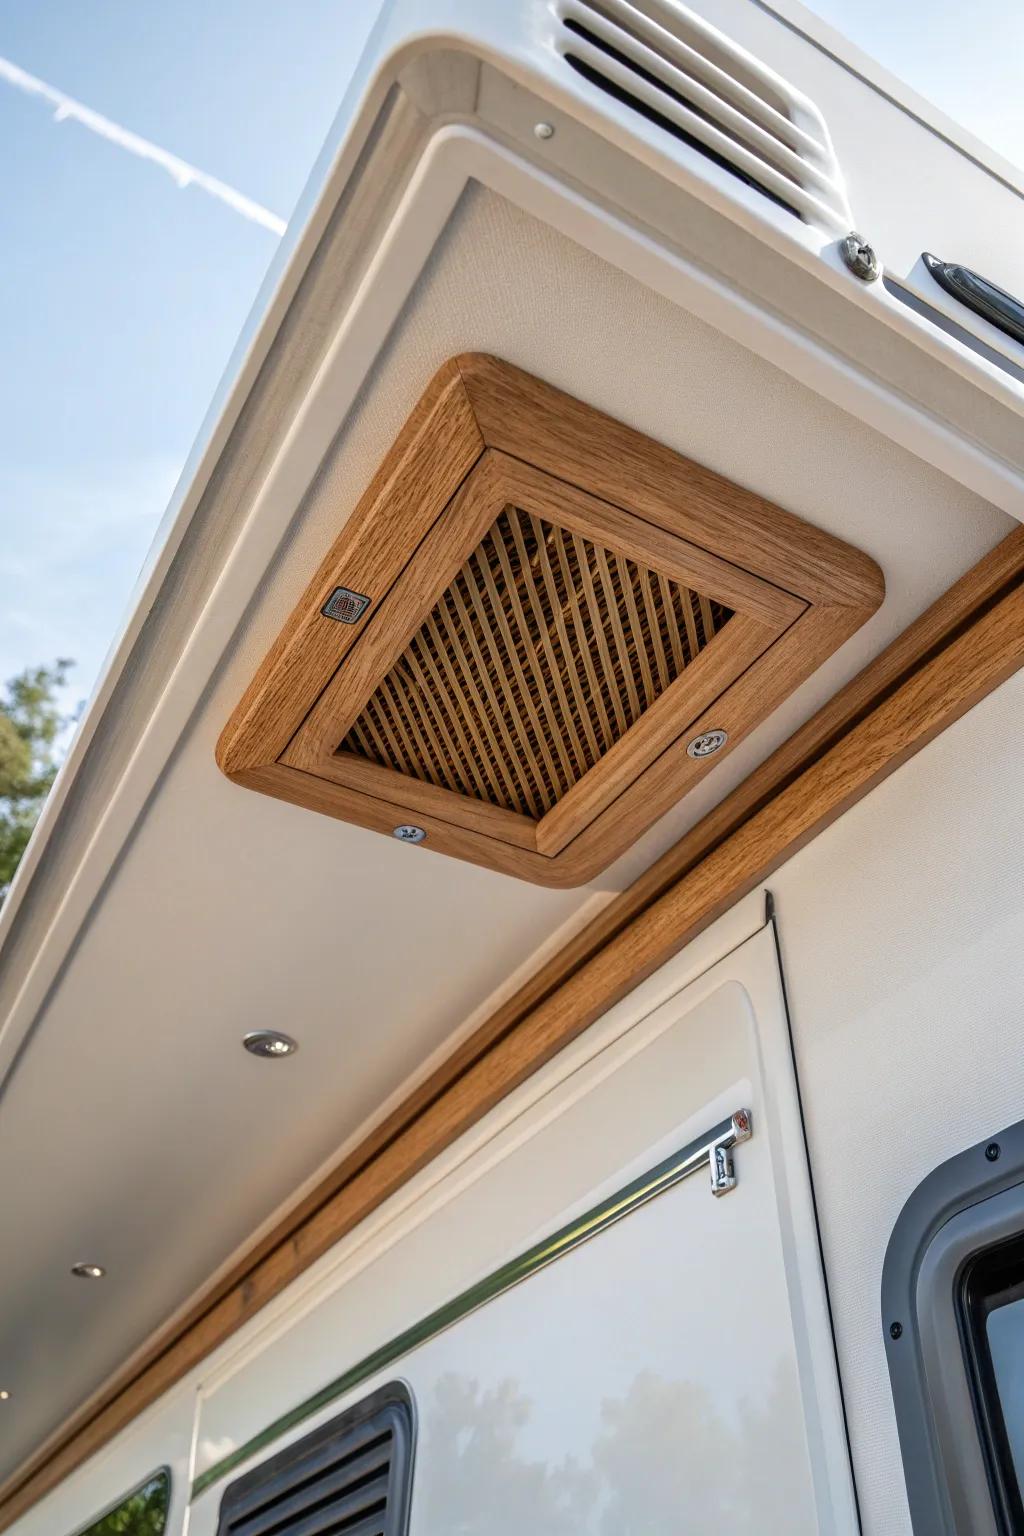
A clean roof vent trim makes your ceiling look custom instead of “factory cutout.” I’ve framed vents with simple trim before, and it instantly made the ceiling lines look finished and intentional.
Some handy options:
- Hardwood Trim Molding: Frame your existing vents with real wood trim to replicate the custom, premium look shown here.
- Decorative Wood Vent Grille: Replace standard plastic covers with a wooden return grille to instantly upgrade your RV’s interior aesthetic.
- Flush Mount LED Puck Lights: Install sleek recessed lighting nearby to highlight your new custom trim work and brighten the ceiling.
Flexible Slats for Curved Ceilings
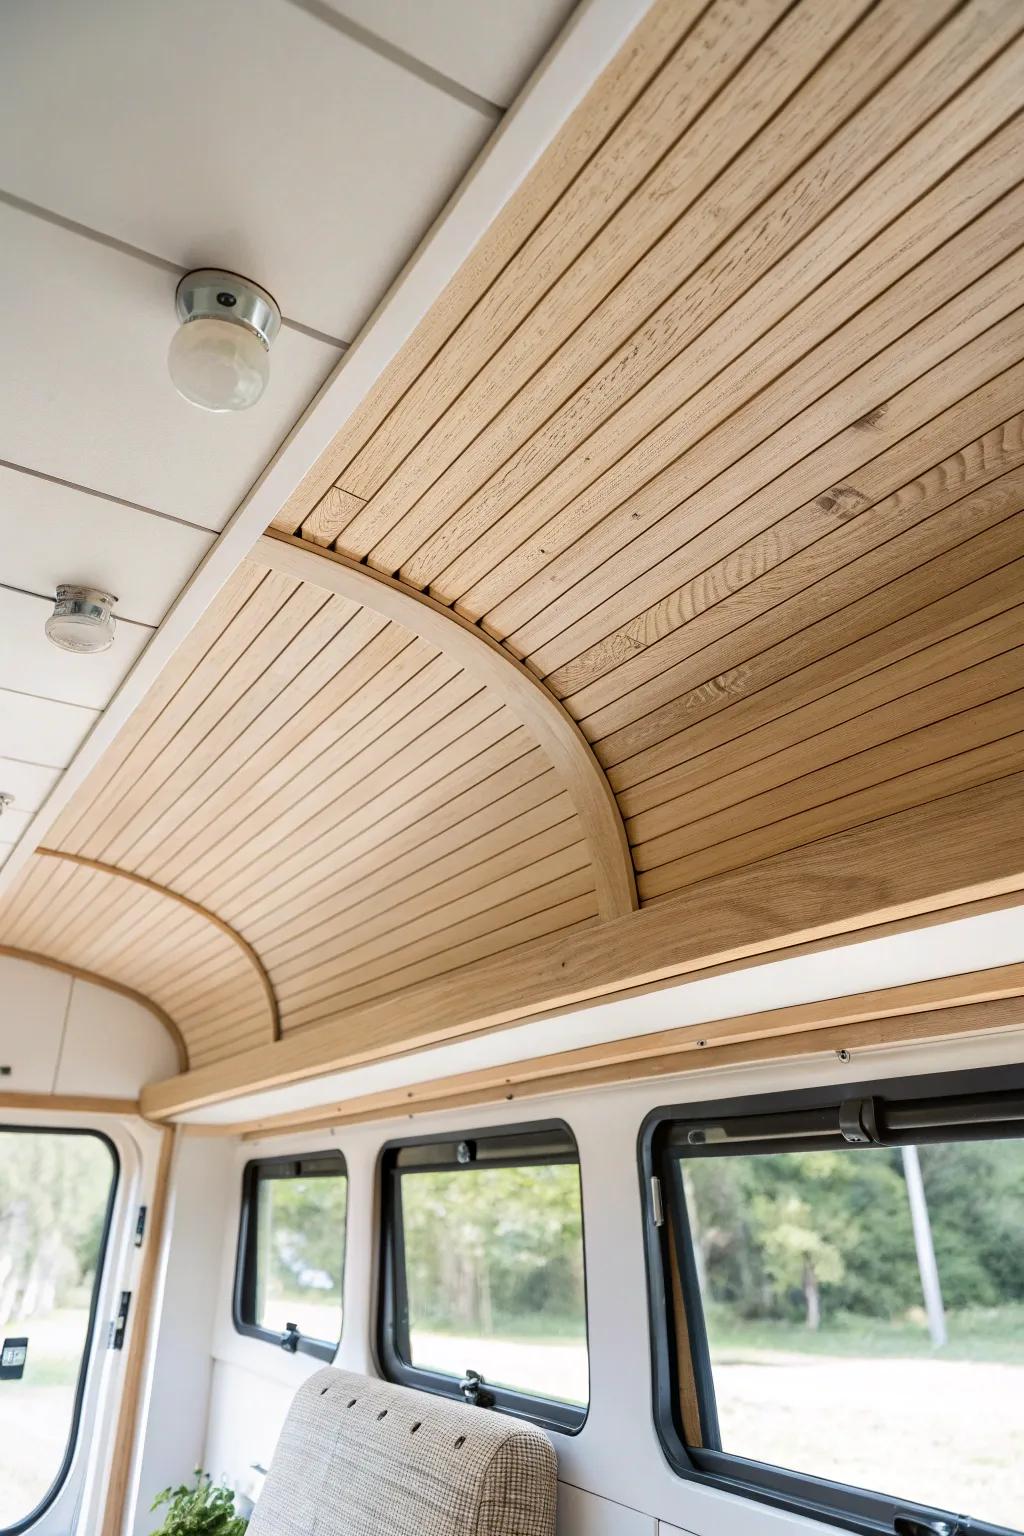
If your RV has a rounded top, thin slats are amazing for a curved ceiling because they follow the shape without fighting you. I’ve worked with bend-friendly materials overhead, and the end result looks so much smoother than chunky panels.
These products might help:
- Thin Wood Paneling Planks: Choose lightweight, flexible timber strips to easily line curved ceilings for a warm, custom camper finish.
- Flexible Tambour Wood Sheets: Apply these pre-slatted, bendable wood sheets to instantly achieve curves without cutting individual pieces yourself.
- Brad Nailer Kit: Secure your ceiling slats cleanly and quickly overhead with a reliable brad nailer for professional results.
Furring Strips for Subtle Dimension
Adding slim ceiling furring strips gives you that custom “ribbed” look and can visually stretch the RV lengthwise. I’ve used strips to hide uneven spots, and it’s such a smart way to add detail without busy decor.
A few relevant products:
- Wood Slats or Trim Molding: Create that custom ribbed effect easily by installing these slats; simply measure, cut to size, and secure.
- Construction Adhesive or Mounting Tape: Secure your ceiling strips firmly without excessive drilling; check compatibility with your specific ceiling material first.
- Brad Nailer Kit: Speed up your installation considerably with this tool, ensuring your new ceiling slats stay perfectly aligned overhead.
Painted Ceiling Mural Over the Bed
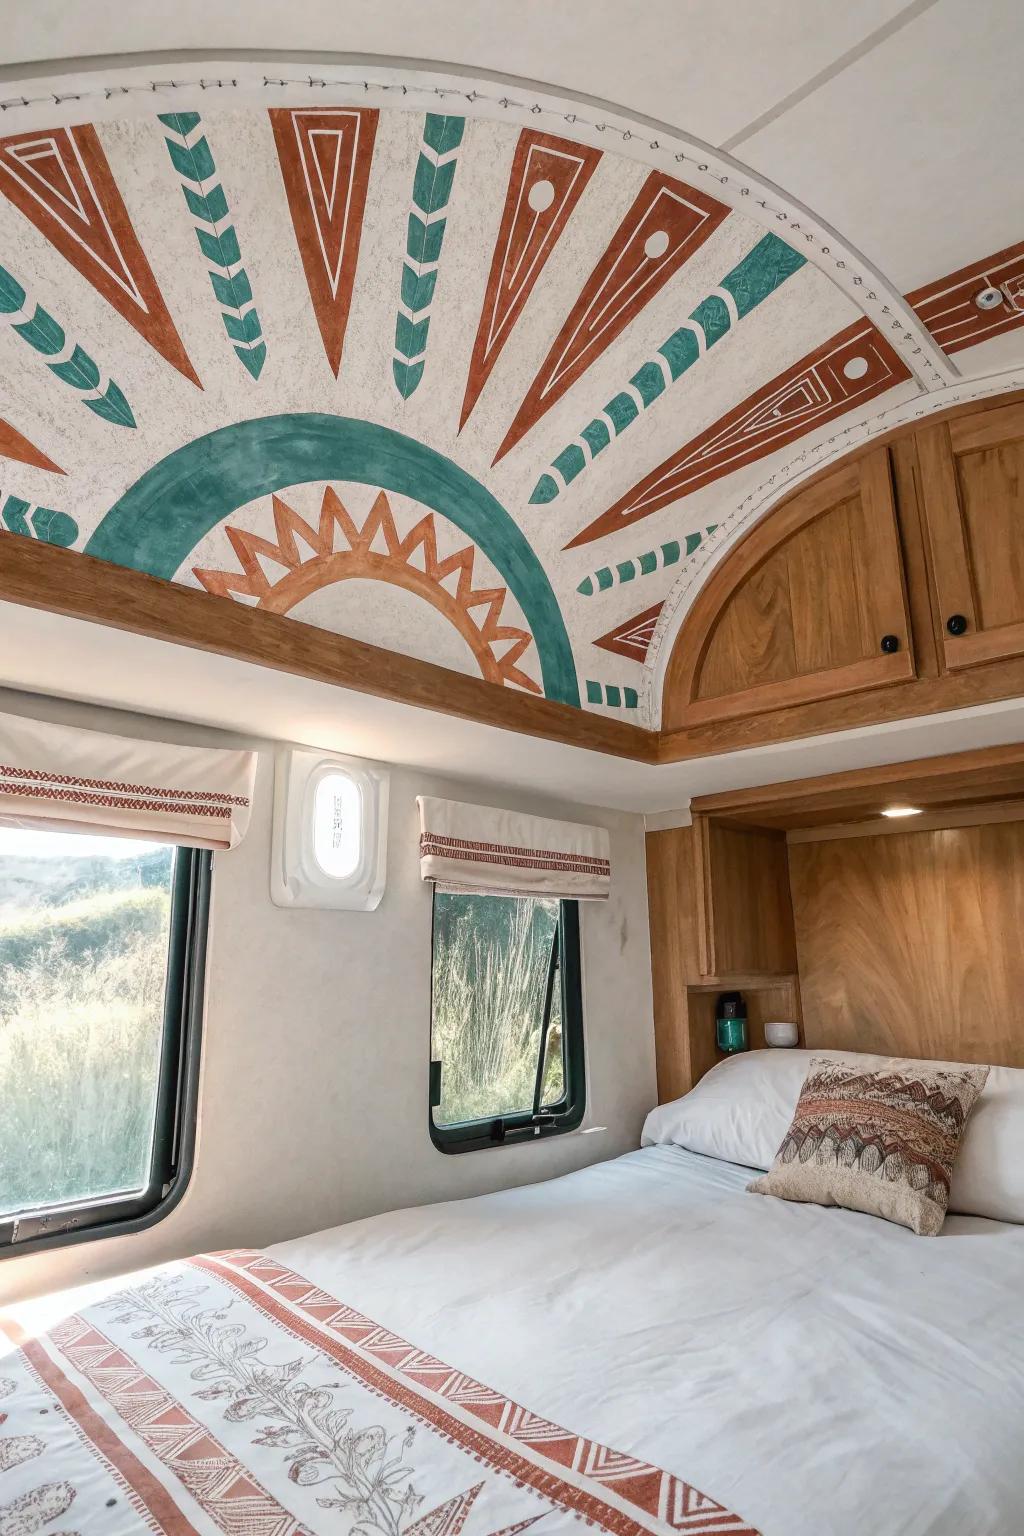
A ceiling mural is such a brave move, but in a small RV it creates a real focal moment—especially above the bed. I once painted a simple, soft-toned design overhead, and it felt like waking up in a tiny art hotel.
A few choices to try:
- Acrylic Paint Set (Earth Tones): Capture the desert vibe using earthy colors; start painting your custom sunburst mural on the ceiling today.
- Painter’s Tape for Curves: Use flexible masking tape to easily create clean, curved lines or geometric shapes on uneven surfaces.
- Round Paint Brush Set: Grab a variety of round brushes to handle detailed line work and filling in smaller colorful shapes.
Glow-in-the-Dark Constellation Ceiling
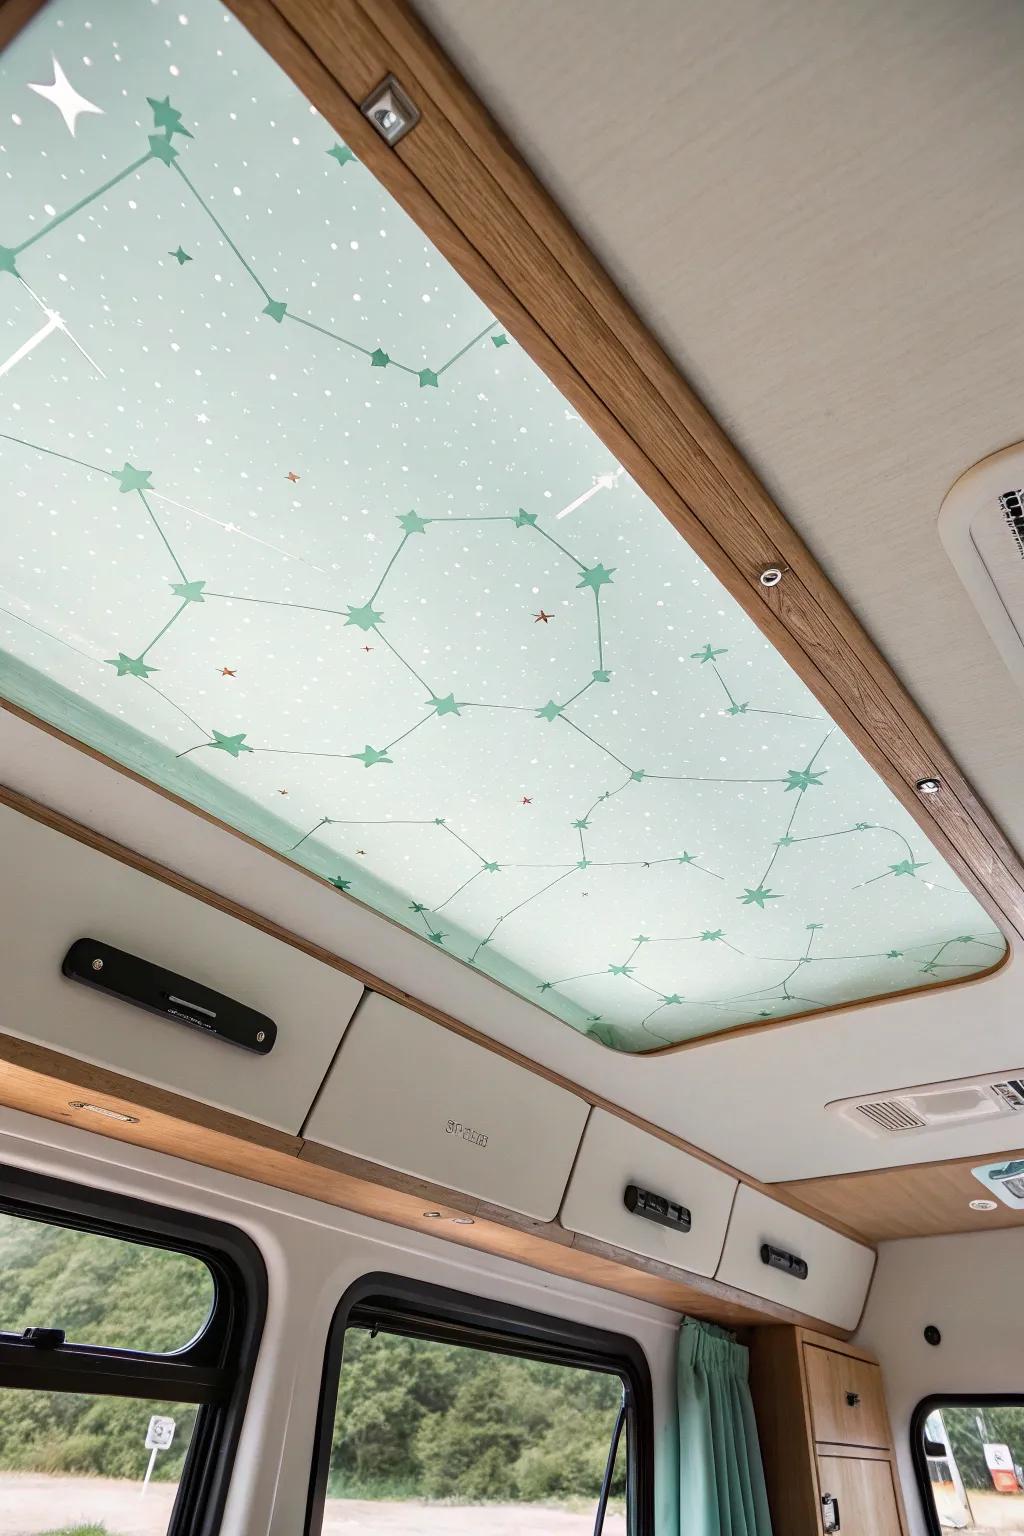
For a total wow factor, try a glow-in-the-dark constellation ceiling with tiny painted dots or decals that appear when the lights go out. I did this in a small sleeping nook once, and it made nighttime in the RV feel genuinely magical without adding any bulk.
Possibly handy products:
- Glow-in-the-Dark Star Stickers Set: Create your own custom night sky easily by arranging these adhesive stars and dots on your ceiling.
- Constellation Wall Decal Sheet: Apply a larger, pre-designed constellation mural to cover a ceiling panel for an instant decorative upgrade.
- Glow-in-the-Dark Acrylic Paint: Paint precise, invisible stars that only appear at night for a subtle and truly custom magical effect.


