Small sheds get chaotic fast, especially when they’re doing the job of a garage, closet, and workshop all at once.
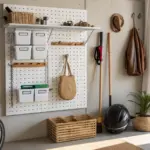
Hang Long-Handle Tools on a Rail
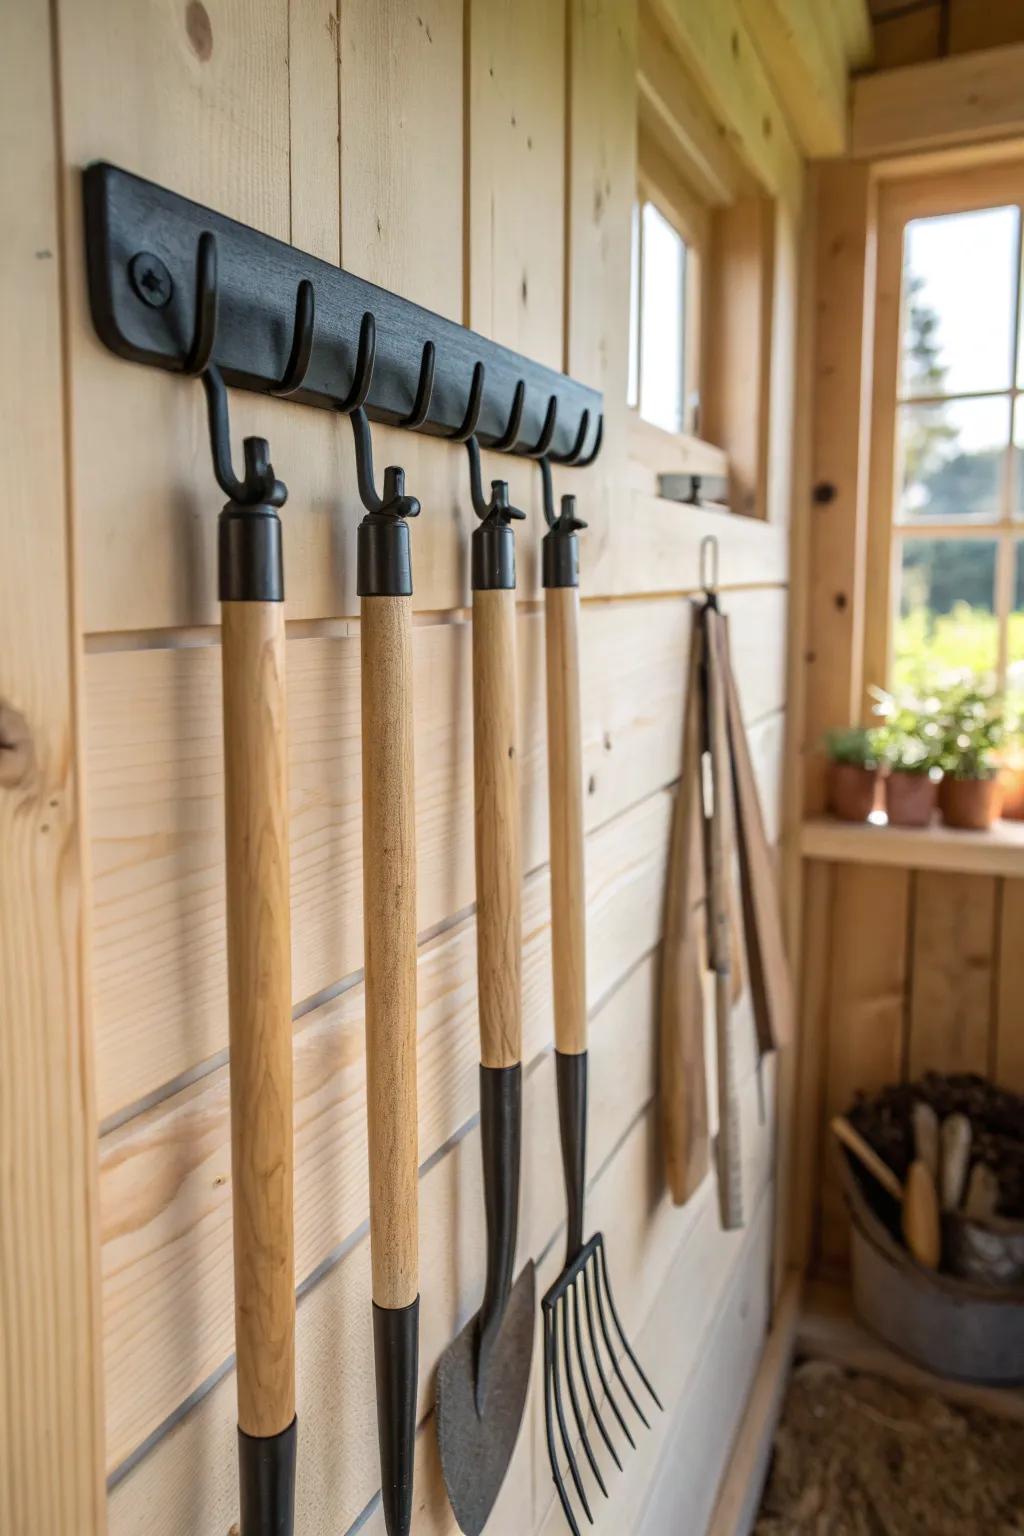
I stopped tripping over rakes the day I mounted a long-handle tool rack in my small shed. Keeping them flat against the wall makes the center aisle feel twice as wide.
Give these a look:
- Wall-Mounted Tool Organizer Rack: Keep your rakes and shovels organized with a sturdy rack system that easily installs on shed walls.
- Wooden Handle Garden Tool Set: Upgrade your shed’s aesthetic with classic digging forks and spades featuring durable ash wood handles.
- Heavy Duty Steel S-Hooks: Add versatility to existing rails or racks with these simple hooks for hanging various shed essentials.
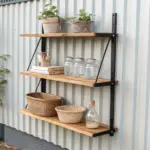

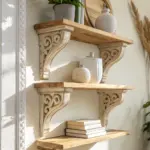
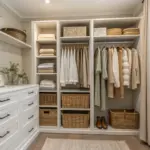
Add Wall Shelves Everywhere You Can
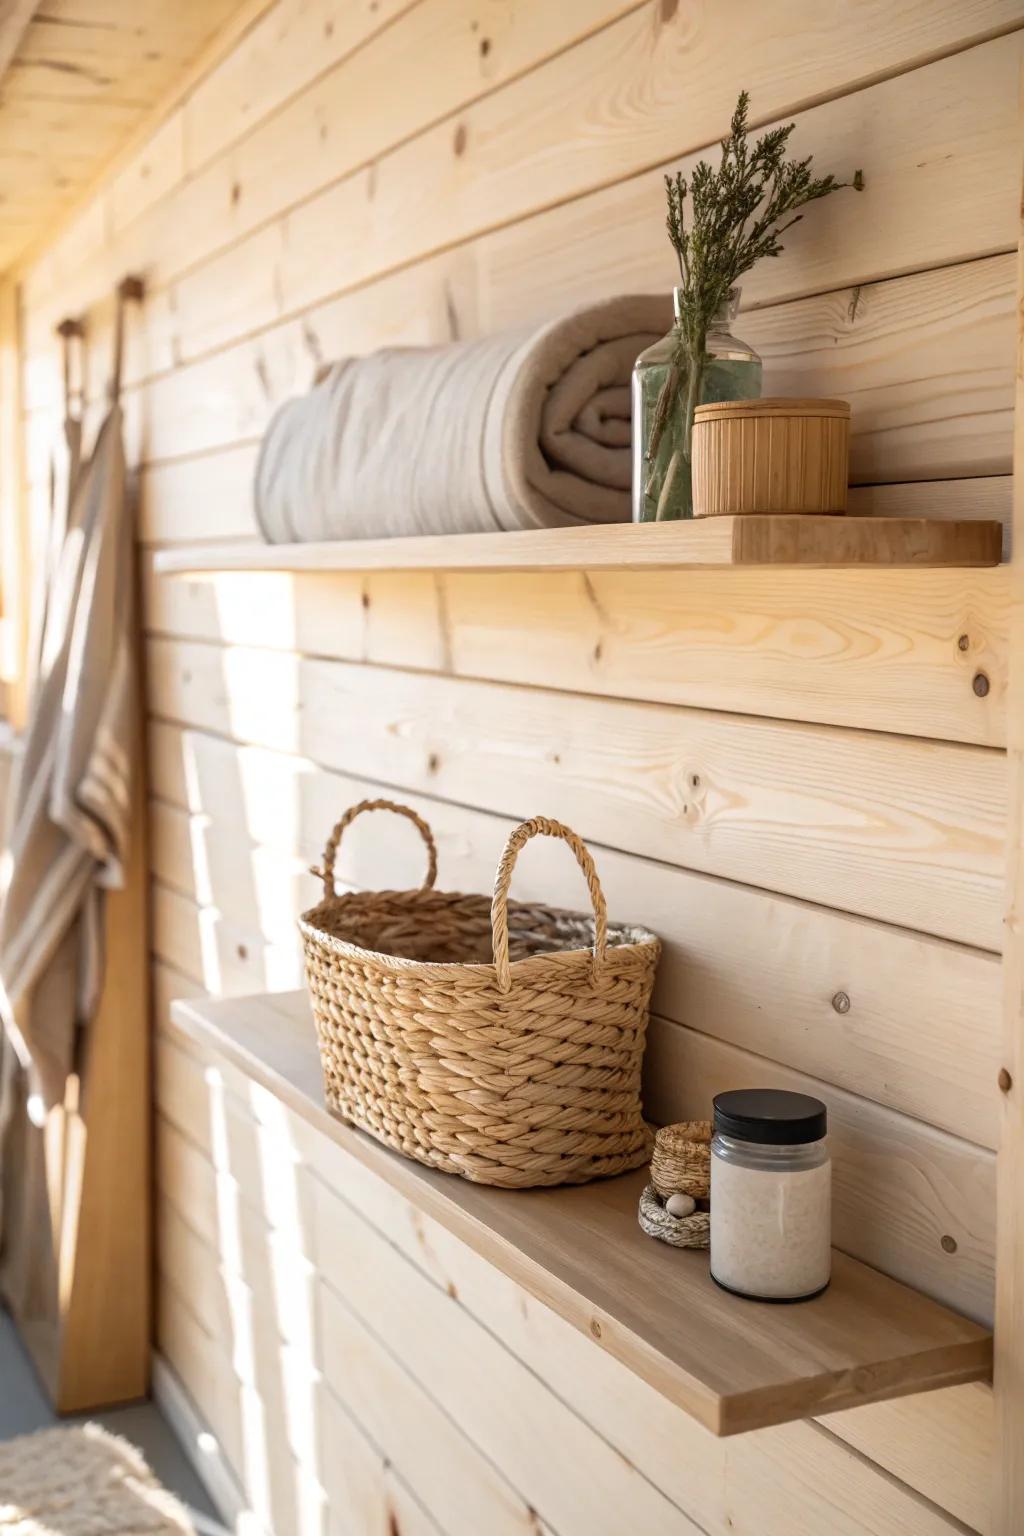
When I added basic wall shelves in a client’s tiny shed, the whole place felt bigger because the floor finally cleared. I keep the most-used items at chest height and stash backups up high.
A few suggestions:
- Floating Wood Shelf Set: Install these simple ledges to instantly lift clutter off the floor and display your shed essentials neatly.
- Woven Storage Baskets: Corral loose items like tools or gardening supplies in these textured bins to keep shelves looking tidy.
- Glass Storage Jars: Store seeds, screws, or small hardware in clear containers to easily see what you have in stock.
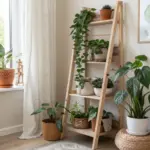
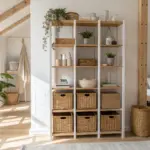
Use Adjustable Shelving for Flexibility
I swear by adjustable shelves in small sheds because your storage needs change with every season and project. In my last setup, I moved one shelf up two notches and suddenly my tall sprayer and fertilizer fit perfectly.
Try these:
- Industrial Style Wall Leaning Ladder Shelf: Upgrade your shed storage with this sleek, space-saving unit that keeps organizing simple and stylish.
- Woven Seagrass Storage Baskets: Tidy up loose items and add rustic charm to your shelves with these durable organizers.
- Large Wicker Storage Hamper: Store bulky items easily on the floor with a spacious, sturdy basket that complements natural decor.
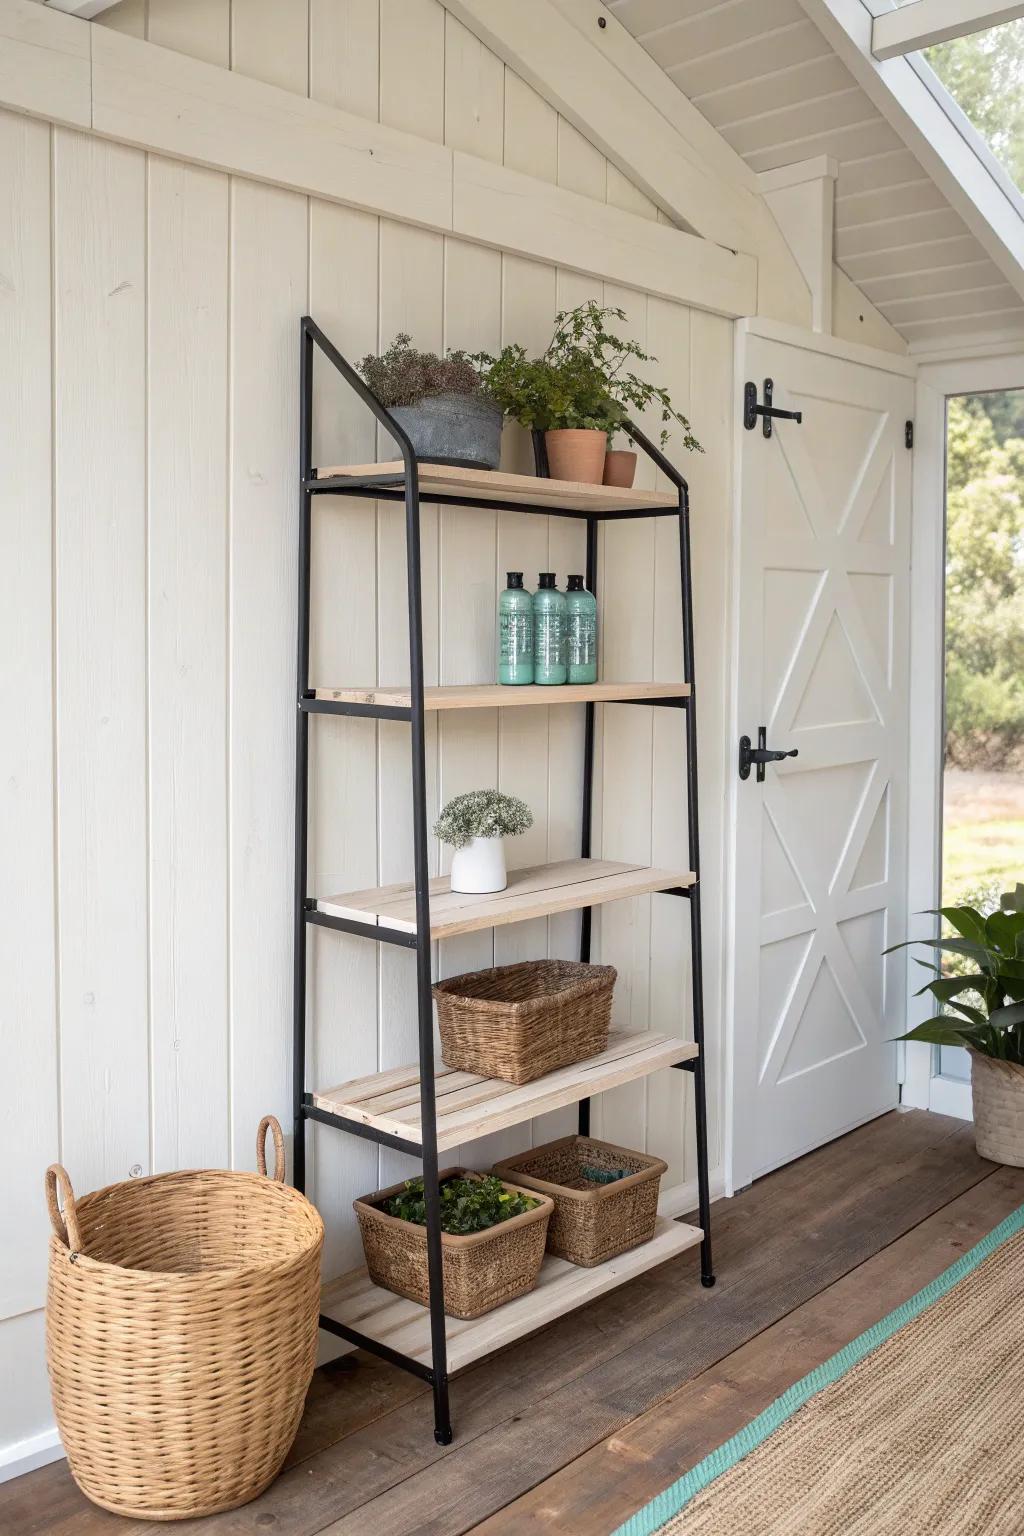
Bring In a Slim Freestanding Shelf Unit
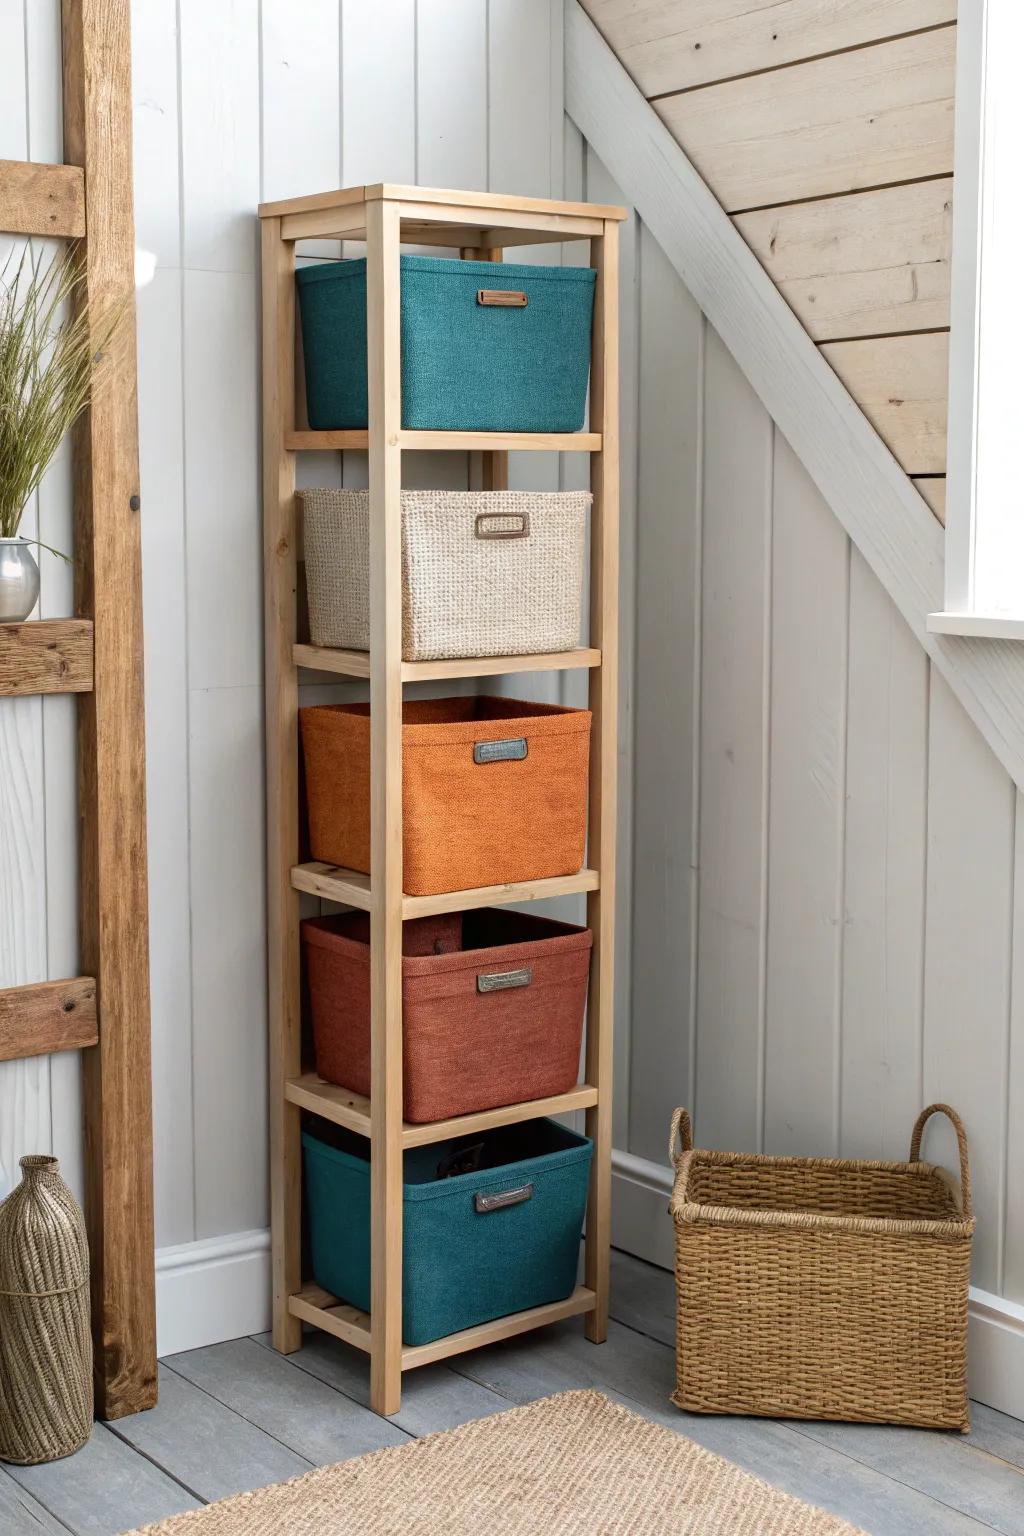
In one narrow shed I organized, a skinny freestanding shelf along the back wall held bins without blocking the walkway. I love that I can shift it later if I decide the shed layout needs a refresh.
Consider these options:
- Narrow Vertical Shelving Tower: Maximize vertical space in tight corners with a slim tower to keep essentials organized without crowding your shed.
- Fabric Storage Cubes: Sort varied supplies into handled bins to reduce visual clutter and make grabbing items from shelves much easier.
- Woven Floor Basket: Toss bulky or frequently used items into a sturdy floor basket for quick access near your shelving unit.
Try a Cleat or Slat System
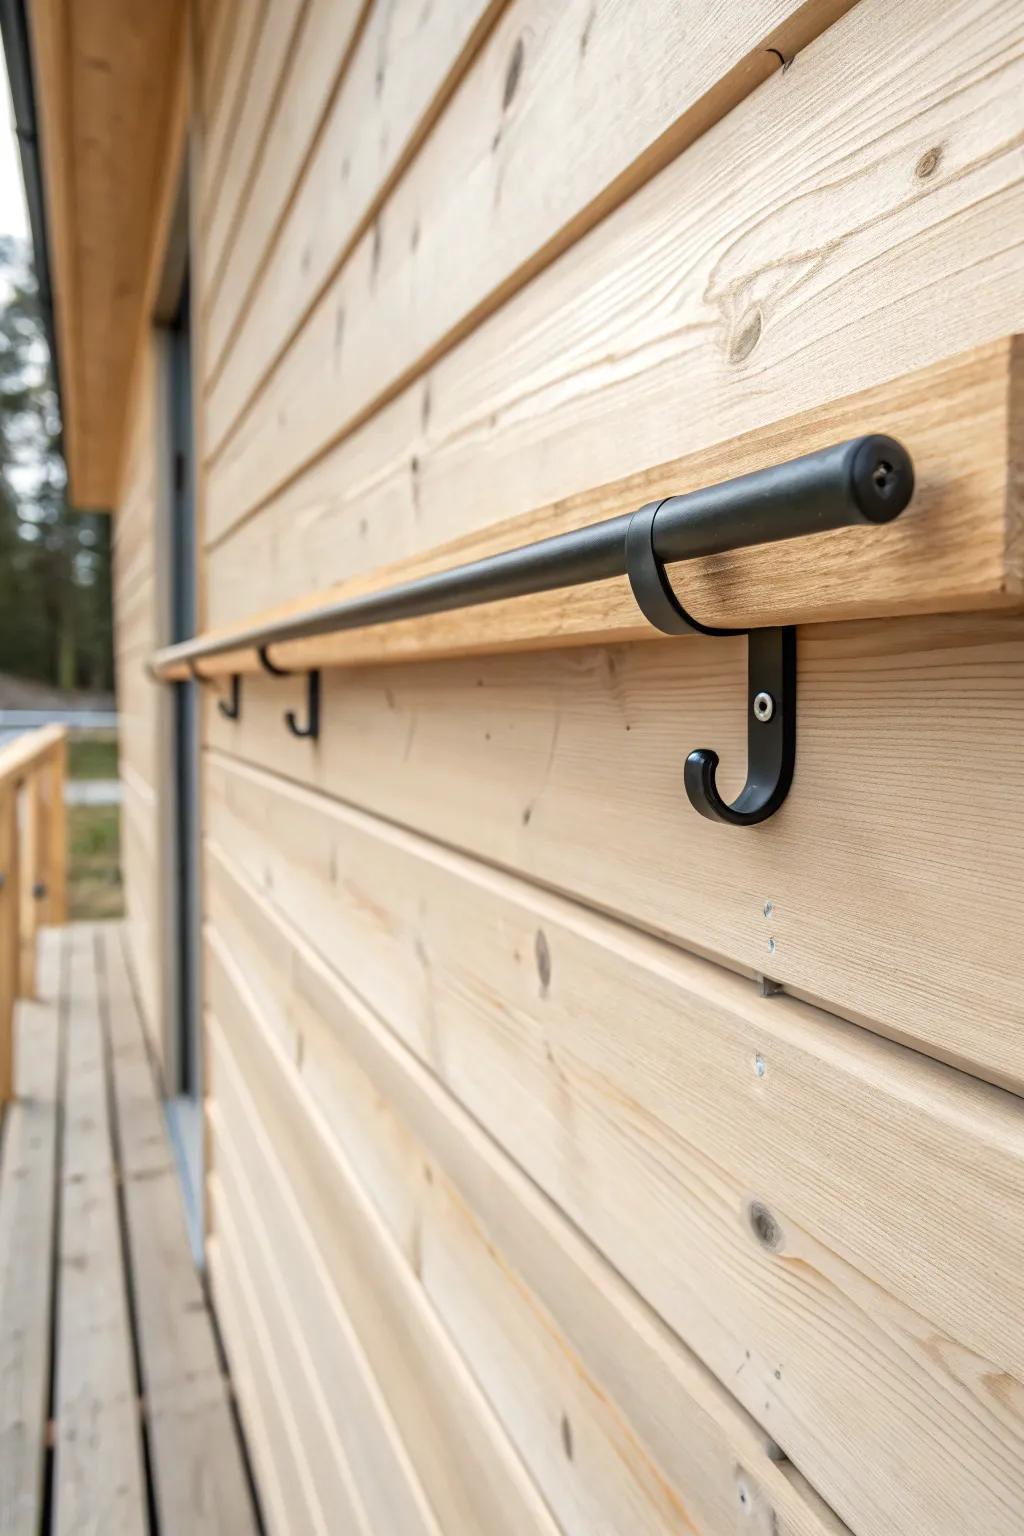
In my shed, a cleat wall made it ridiculously easy to move hooks and holders around as my projects changed. It feels like “custom storage” without committing to one layout forever.
Check these products out:
- Wall-Mounted Storage Rail: Install a sturdy rail system to keep your long tools organized and easily accessible in your shed.
- Utility Steel S-Hooks: Use durable steel hooks to hang hoses, cords, or handled tools securely from your main storage rail.
- French Cleat Hangers: Create a fully customizable layout by attaching these interlocking metal brackets to your favorite shed tool holders.
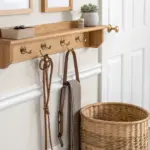
Use Heavy Hooks for Bulky Gear
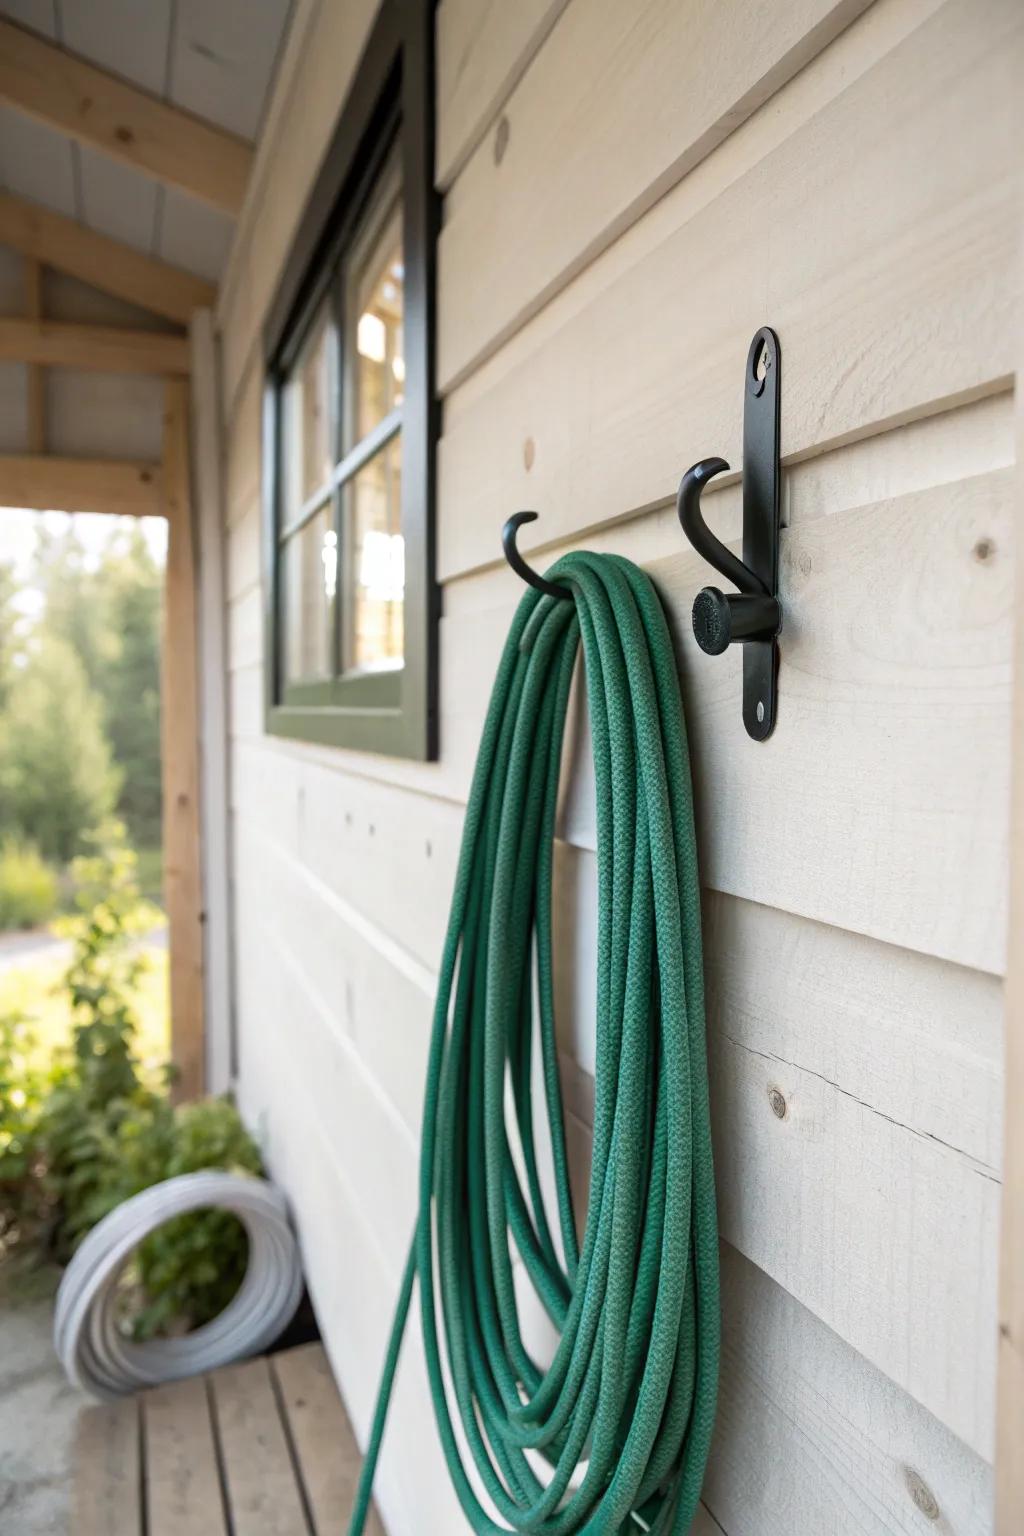
In a small shed, utility hooks are magic for things like folding chairs, trimmers, or hoses that don’t sit nicely on shelves. I like to cluster hooks by “activity” so camping gear isn’t mixed with garden stuff.
These products might be useful:
- Heavy Duty Garden Hose Holder: Keep your garden hose kink-free and neatly coiled against the wall with a sturdy, rust-resistant metal hanger.
- Multi-Purpose Utility Double Hooks: Maximize vertical space by hanging bulky items like shovels, chairs, or electrical cords on these robust double-pronged hooks.
- Expandable Wall Storage Tracks: Create a flexible organization system for various tools by installing adjustable rails that let you space hooks as needed.
Use Narrow Ledges for Paint and Sprays
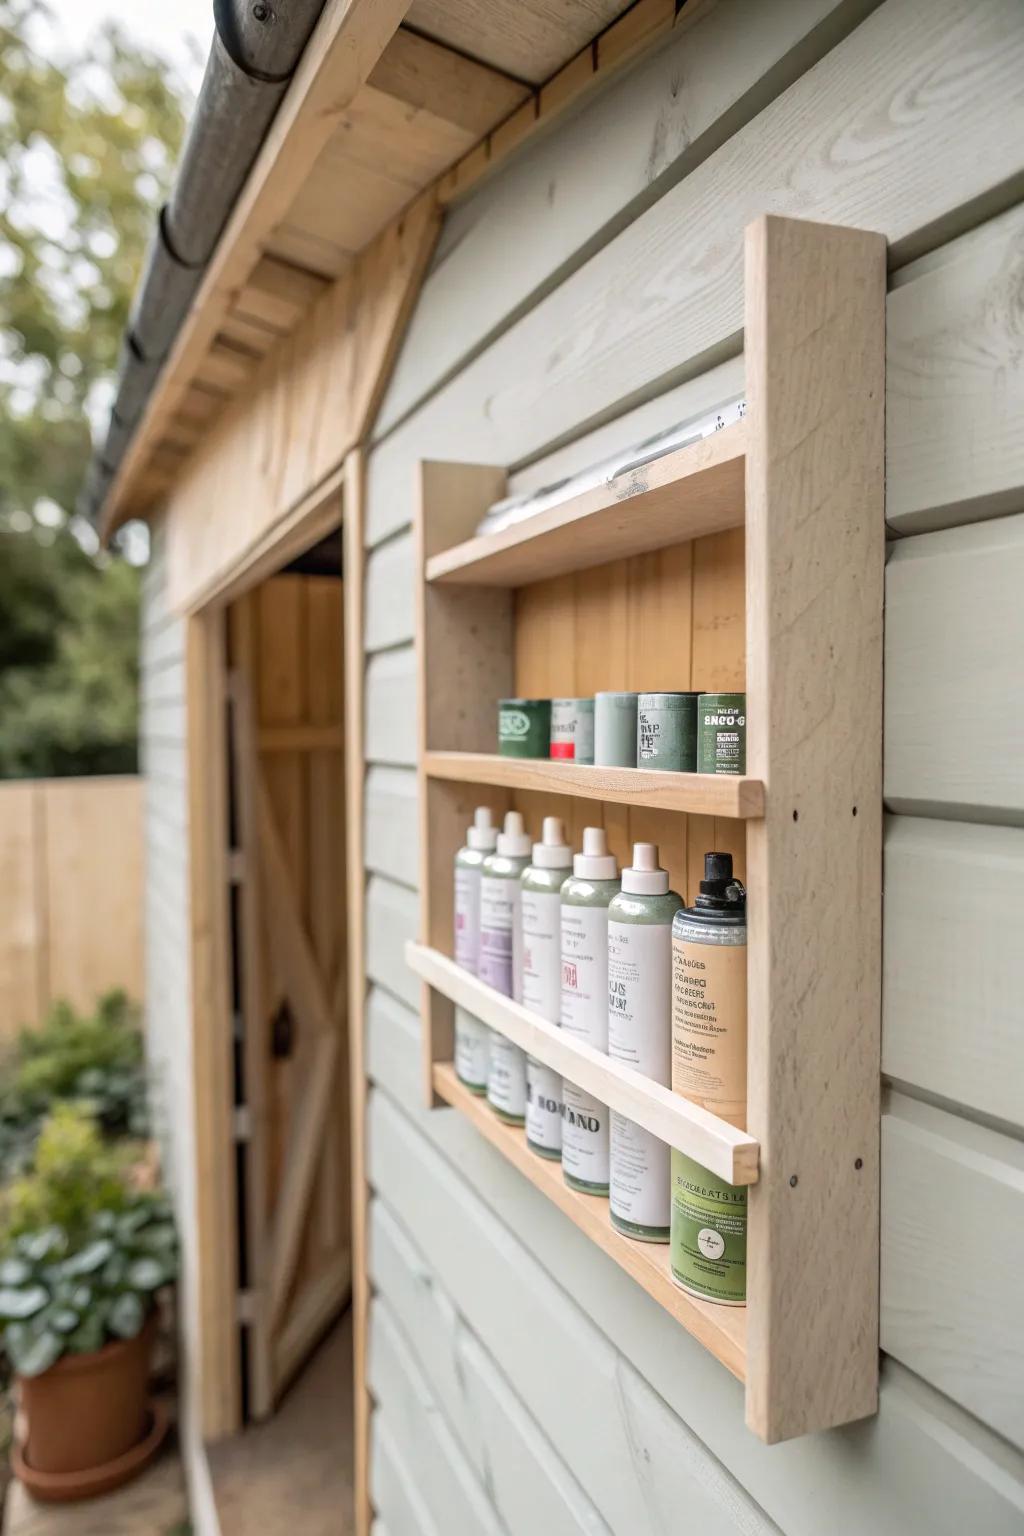
In my small shed, I added skinny paint can shelves (just deep enough for cans) so everything is visible and nothing gets buried. I also like keeping caulk and spray bottles together so they don’t topple over.
Some ideas to consider:
- Wall-Mounted Spray Can Holder: Organize your aerosols efficiently with a dedicated rack that keeps cans visible and securely in place.
- Narrow Floating Ledge Shelves: Install these slim shelves to store paint cans without taking up valuable floor or proper shelf space.
- Adjustable Shelf Guard Rails: Add simple rails to your existing shallow ledges to prevent taller bottles or cans from accidentally falling.
Park a Rolling Cart Under a Worktop
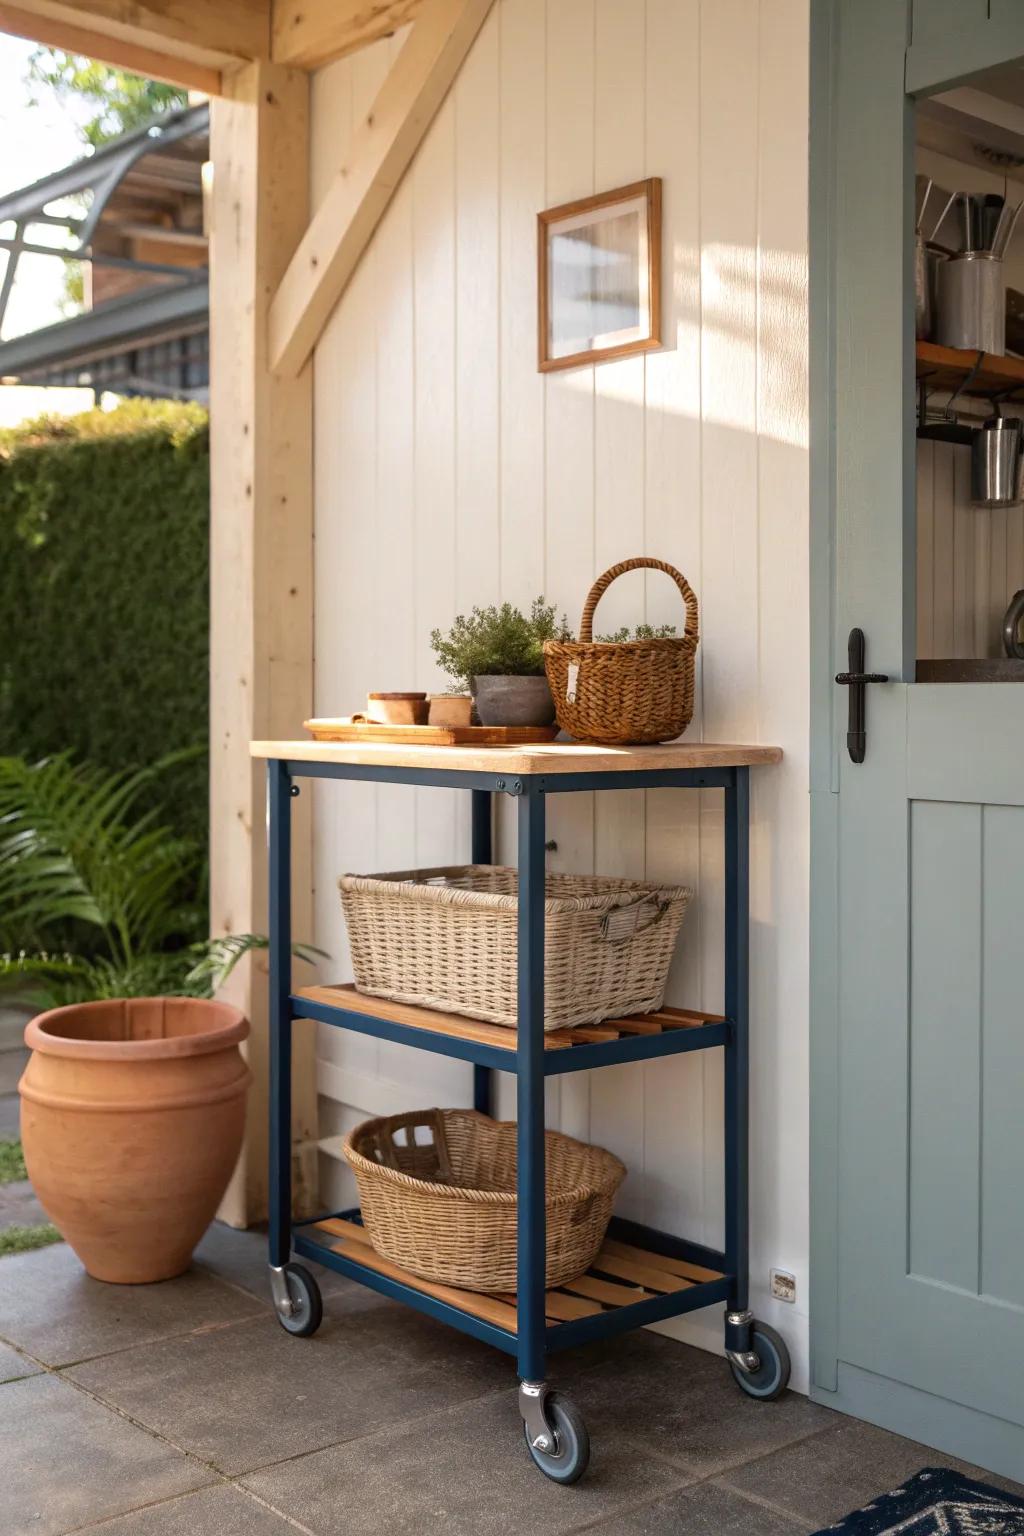
A rolling cart is my secret weapon in a small shed because it stores supplies and slides out only when I need it. I’ve even used one as a mini potting station and tucked it away when guests were coming over.
You might give these a try:
- Metal Rolling Utility Cart with Wood Top: Maximize your shed’s flexibility with this mobile station, perfect for storing tools or serving as a potting surface.
- Woven Wicker Storage Baskets: Keep loose items organized and add rustic charm by sliding these durable baskets onto your open cart shelves.
- Large Terracotta Planter Pot: Enhance your shed’s entryway aesthetic with a classic planter, ideal for housing larger decorative plants or herbs.
Hang Items From the Ceiling Joists
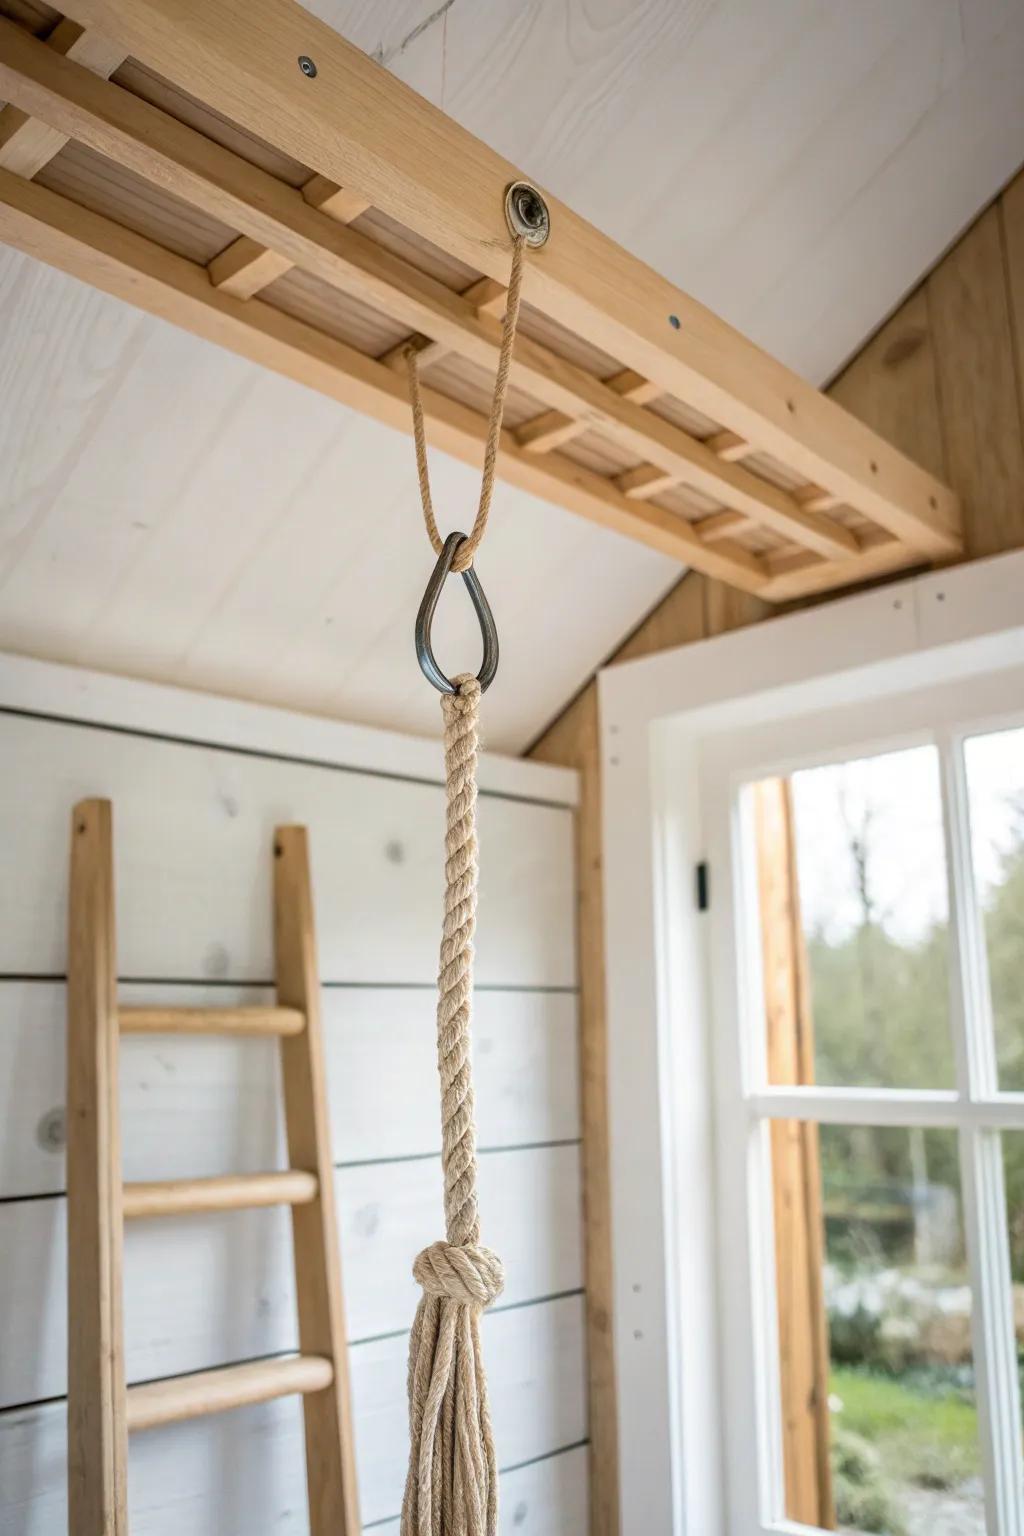
In one super-tight shed I worked on, ceiling storage hooks held ladders and long boards that were impossible to store neatly elsewhere. I just make sure anything overhead is secure and easy to lift down safely.
A few helpful options:
- Heavy Duty Ceiling Storage Hooks: Maximize your vertical space by screwing these sturdy hooks into joists to hang ladders, bikes, or tools securely.
- Overhead Pulley Hoist System: Easily lift and store heavy or awkward items like bikes and ladders overhead with a simple rope pulley mechanism.
- Ceiling Mounted Storage Rack: Install a permanent overhead rack system to keep lumber, pipes, and seasonal bins completely off your shed floor.
Build Between-Stud Micro Shelves
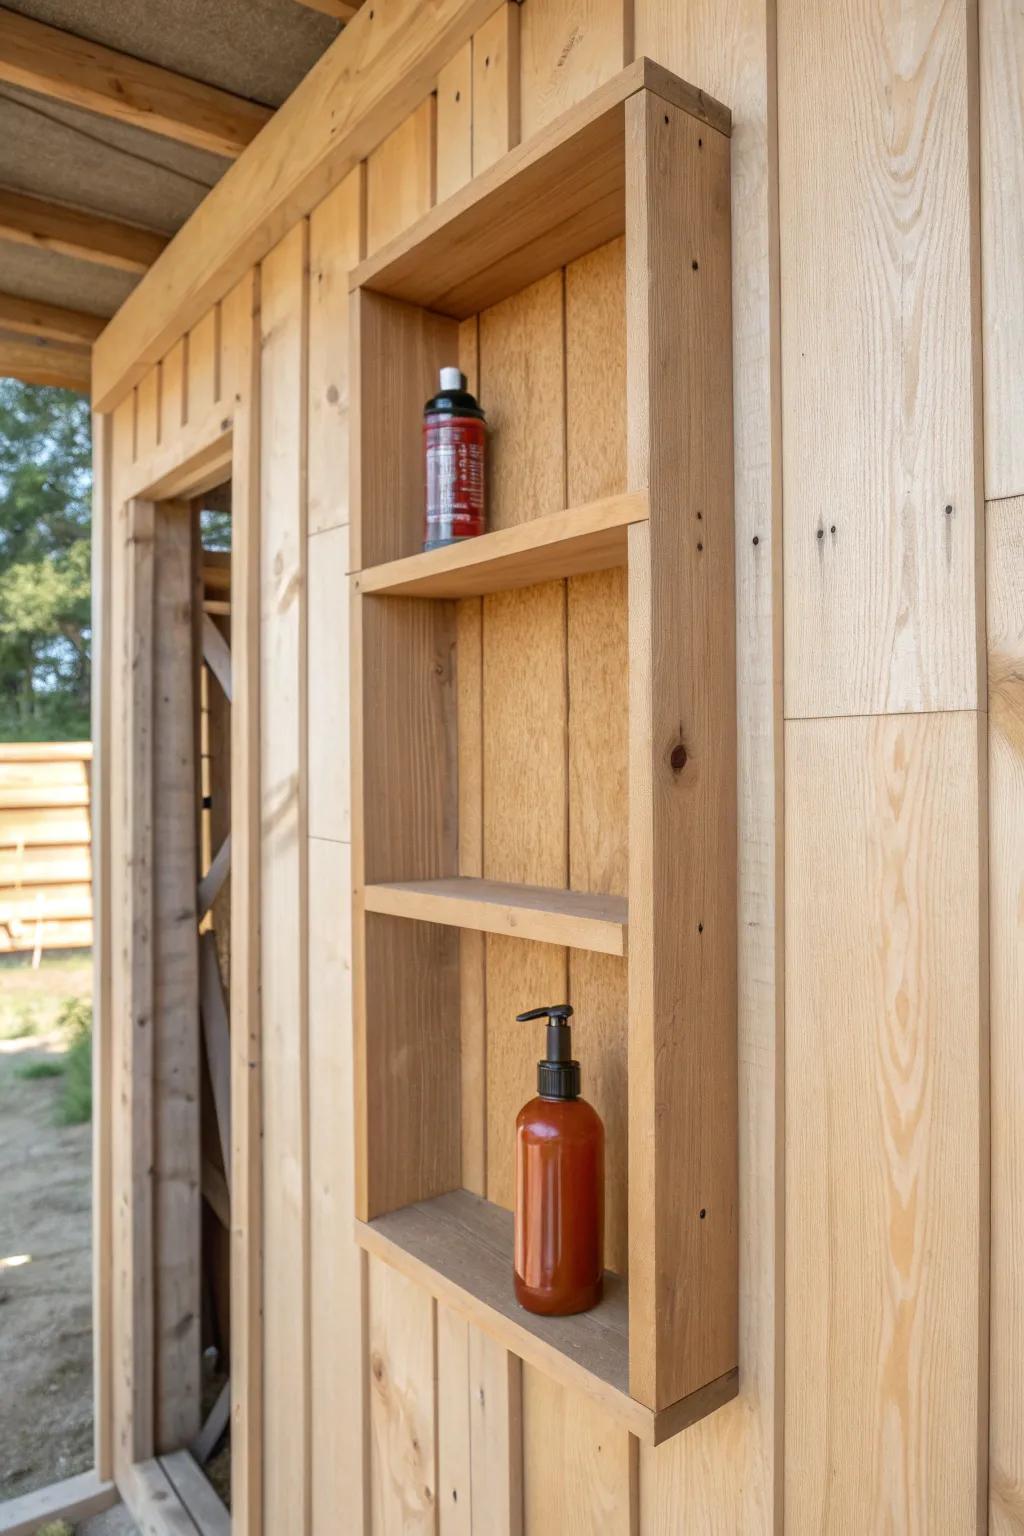
If your shed has exposed framing, I love using the stud bays as built-in cubbies for sprays, oils, and small boxes. I did this in my own shed with scrap wood, and it turned “dead wall space” into real storage.
Check if these fit your needs:
- 1×4 or 1×6 Pine Lumber Boards: Use these versatile wood planks to create custom-sized shelves that fit perfectly between your specific wall studs.
- Right Angle Corner Braces: Secure your new shelves firmly to the studs with these simple brackets for added stability and support.
- Wood Screws Assorthment Kit: Ensure you have the right length fasteners on hand to attach shelves securely without splitting your wood.


