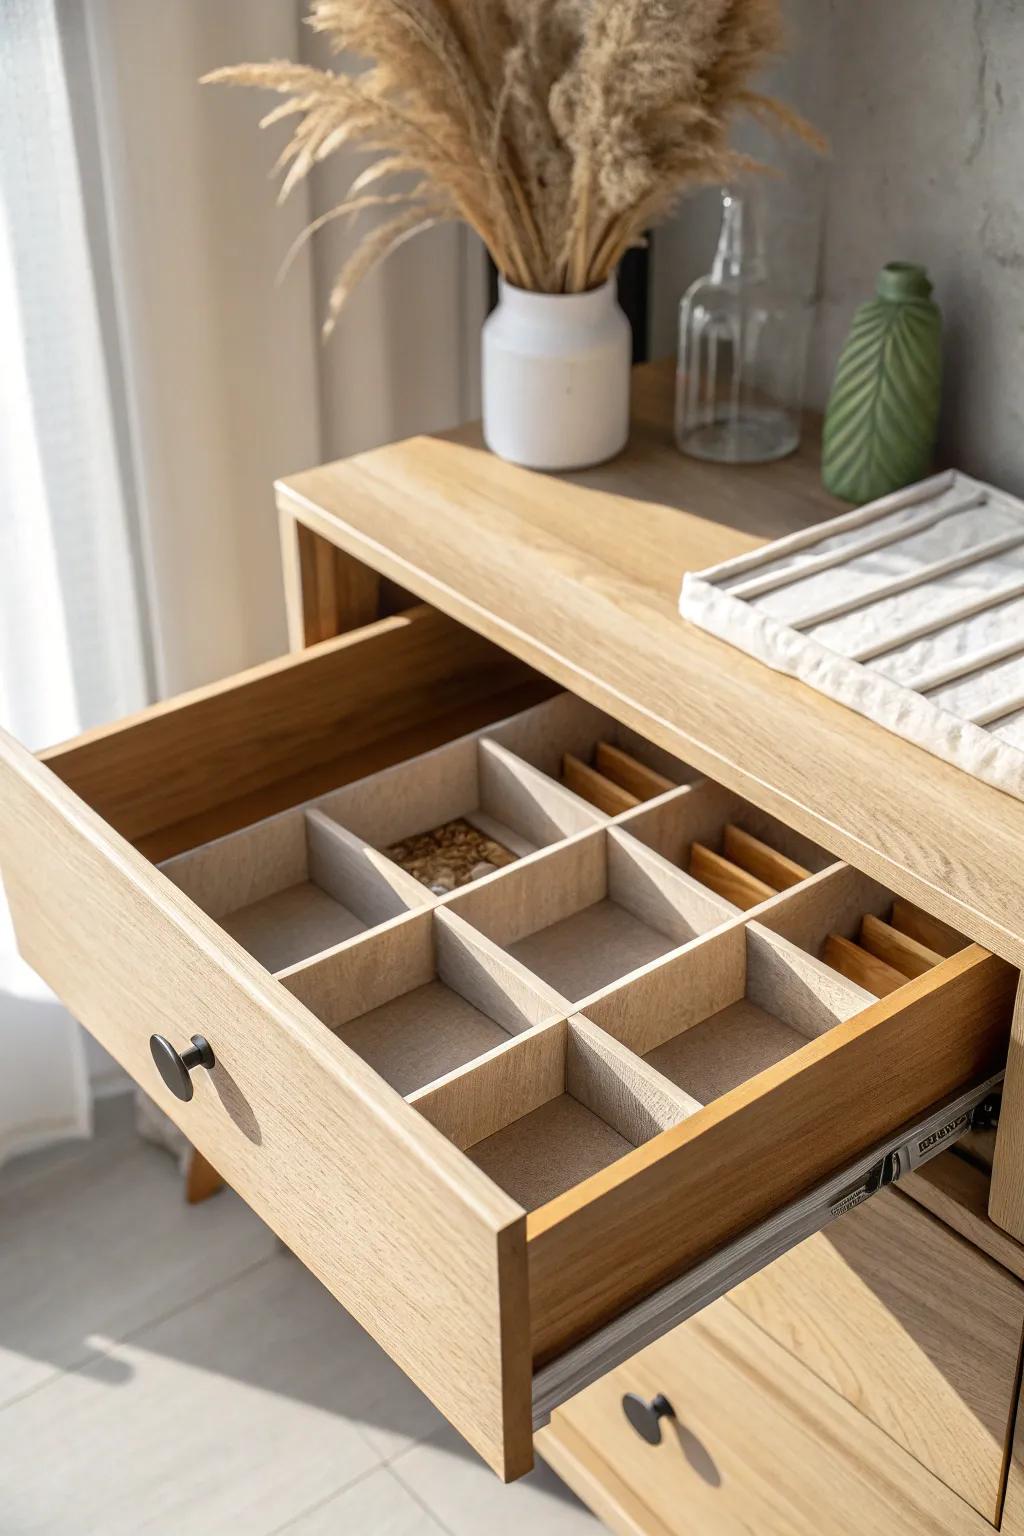
A messy drawer can make even a tiny home feel chaotic, especially when everything turns into one big pile. These DIY drawer dividers are my go-to fix because you can customize every inch without spending much at all.
Clear Packaging Dividers
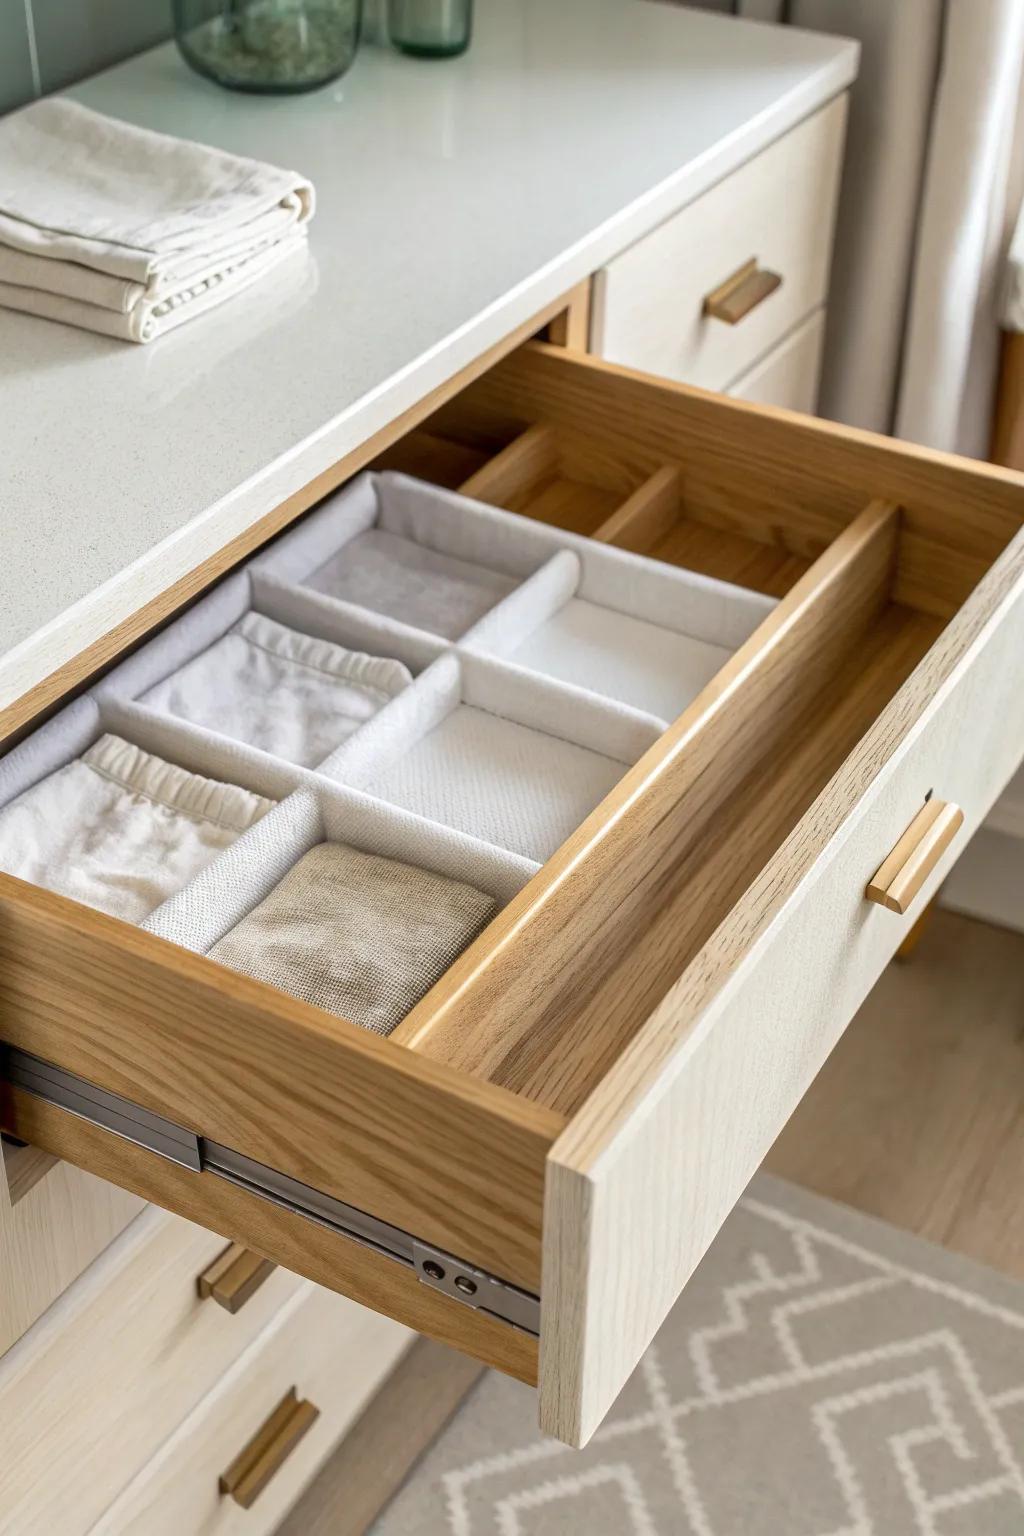
I’ve reused sturdy clear packaging by scoring and folding it into divider walls for a barely-there look. These DIY drawer dividers were perfect in a vanity drawer because I could see everything without pulling bins out.
Might be a good match:
- Clear Plastic Drawer Organizer Bins: Achieve that instant ‘barely-there’ look effortlessly by organizing small vanity items with these ready-to-use clear storage bins.
- Heavy Duty Scissors or Utility Knife: Cut through sturdy packaging materials like plastic or cardboard cleanly and safely to craft your own custom dividers.
- Adjustable Drawer Dividers: Skip the DIY cutting and simply slide these adjustable expanders into place for immediate, sturdy organization in any drawer.


Wrapped Dividers for a Polished Look
I’ve wrapped plain cardboard dividers in contact paper so the whole setup looks intentionally styled instead of “I made this at midnight.” It’s my favorite trick when the drawer is visible often, like a vanity or entry catch-all.
Possibly helpful picks:
- Sturdy Corrugated Cardboard Sheets: Create a strong foundation for custom dividers by cutting these durable sheets to fit your specific drawer dimensions.
- Self-Adhesive Contact Paper: Elevate plain cardboard quickly by wrapping it in this textured adhesive paper for a seamless, high-end finish.
- Precision Craft Knife Set: Ensure clean, straight cuts on your dividers with this sharp tool, making assembly simple and professional-looking.


Folded Paper Dividers for Quick Fixes
On days I needed a fast solution, I folded thick paper into sturdy channels and used them as temporary drawer dividers. I’ve used this in my “miscellaneous” drawer during moves, and it kept things separated without committing to a full build.
Some handy options:
- Heavyweight Cardstock Paper: Create sturdy, folded channels quickly with thick cardstock that holds its shape and organizes your miscellaneous items.
- Decorative Contact Paper: Reinforce your paper dividers and add a stylish finish that protects the construction from wear and tear.
- Double-Sided Craft Tape: Secure your folded paper structures firmly in place to ensure your custom layout stays neat and organized.
Long Channels for Utensil Drawers
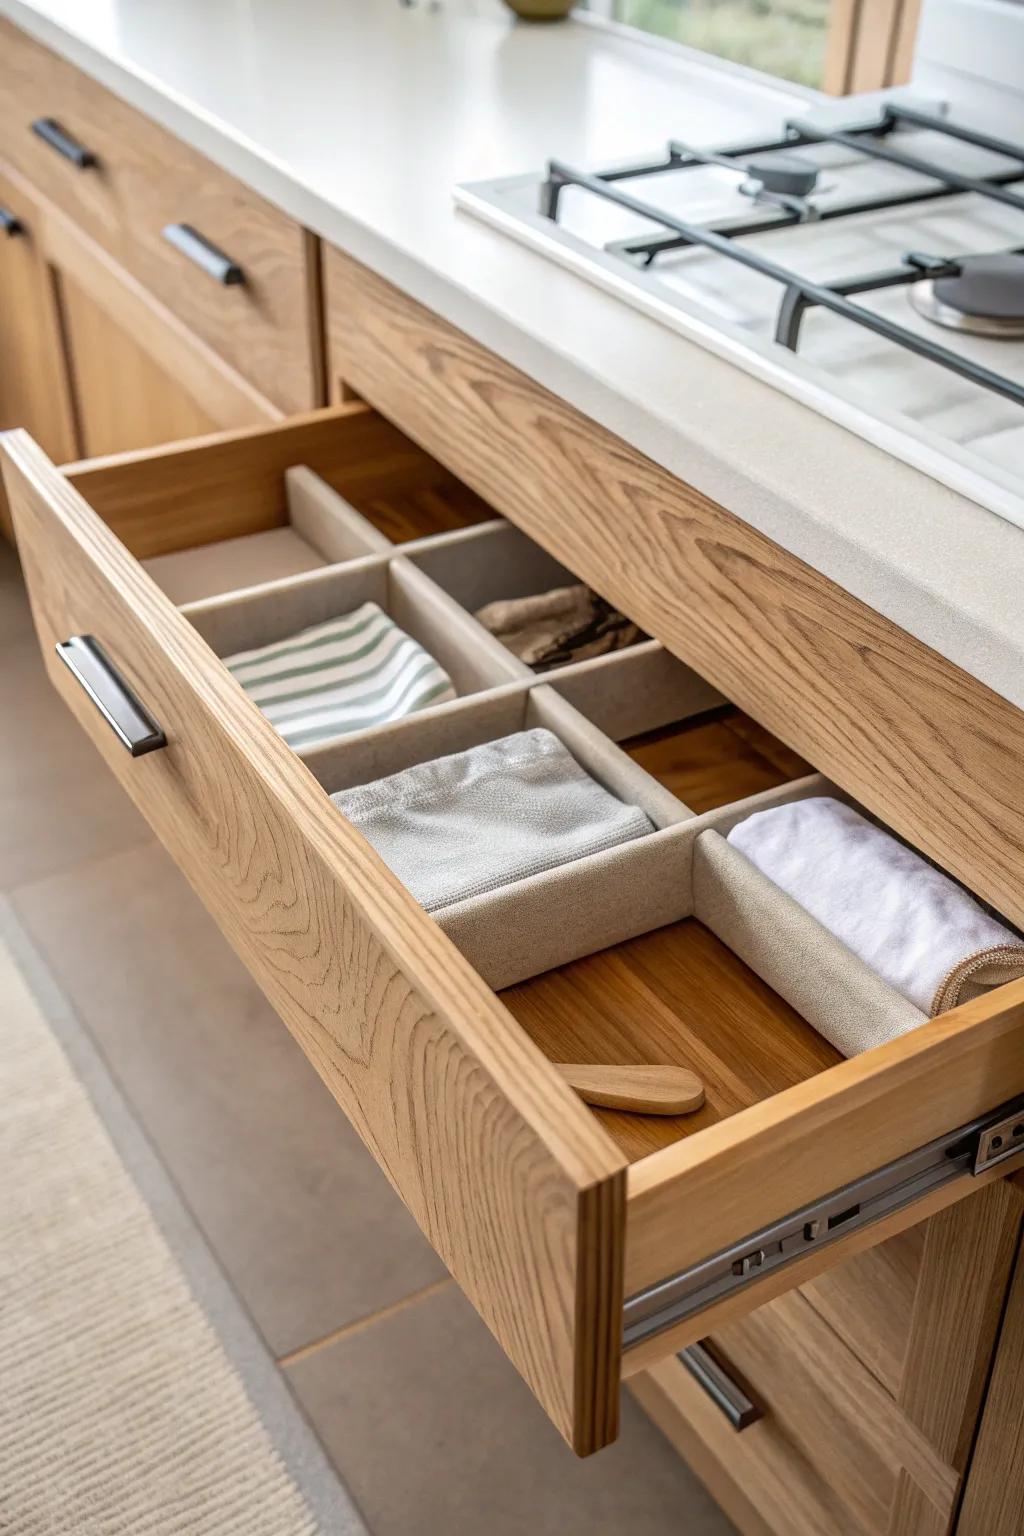
For spatulas and whisks, I make long drawer divider channels by folding sturdy board into shallow U-shapes. I used this in a narrow kitchen drawer, and it kept long utensils from tangling like spaghetti.
These products might help:
- Adhesive Felt Sheets: Line your DIY dividers with soft felt to protect utensils and replicate the elegant look shown here.
- Adjustable Bamboo Drawer Dividers: Instantly create sturdy long channels for spatulas without crafting, matching natural wood finishes perfectly.
- Thick Cardstock or Corrugated Plastic: Use this sturdy, pliable material as the perfect core for folding your own custom-sized drawer inserts.
Magnetic Divider Strip for Tiny Metal Bits

I added a thin magnetic sheet to one divider wall so bobby pins, clips, and tiny metal tools “stick” instead of scattering across the drawer. I tested this in my bathroom with DIY drawer dividers, and it was that rare hack that actually stayed working long-term.
Maybe worth checking out:
- Adhesive Magnetic Strip Roll: Simply cut this self-adhesive tape to size and attach it to your wooden dividers to catch small metal pins.
- DIY Wood Drawer Organizer Kit: Build your own custom dividers using these adjustable separators, creating the perfect base for your magnetic organization system.
- Sheet of Adhesive Magnetic Paper: Cut this magnetic sheet to cover larger divider sections, ensuring lighter metal clips and grooming tools stay secure.


